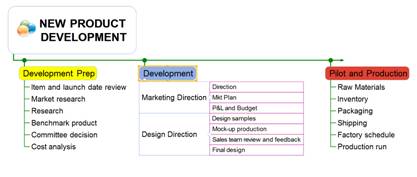
MM 17 User Guide Contents
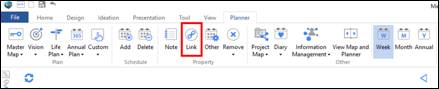
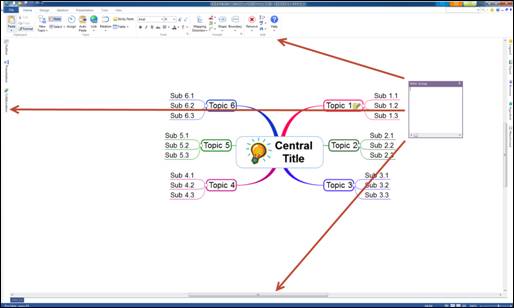
MindMapper is comprised of three main screens.
1. Mapping screen for mind mapping.
2. Planner screen for schedule management.
3. Dashboard screen for bird’s eye view and quick access to project maps and schedule.
![]()
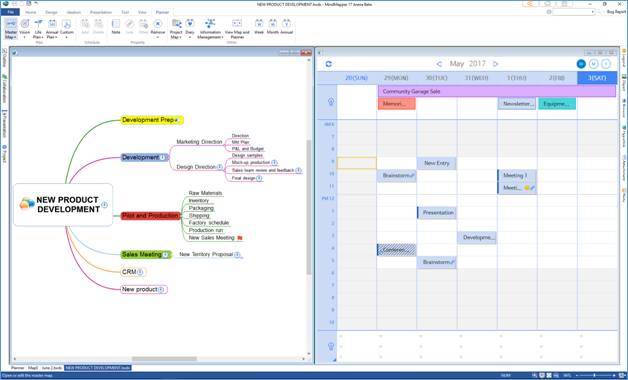
Note: You can split the screen to view your map and planner together.
Mapping screen is used to visualize thoughts rising from your mind. It’s not writing down your thoughts word for word, but using the keywords to visually layout your thoughts. From the mapping screen, you can brainstorm, plan projects, manage information for work and school, write dissertations and reports, solve problems, declutter your brain, and much more.
Planner screen comprises of a weekly and monthly calendar. And from the weekly calendar screen, you can edit and manage a schedule. Per each day, you can write down all day events, appointments, and memos. We’ll omit here the fundamental concept of a planner and its features.

Through this screen, you can efficiently access project maps, shortcuts, and calendar.

v Map and Planner Split Screen

í What is Mind Processing
Change is inevitable and it the only constant that has shaped the world. Once dominant type writers are nowhere to be found, VHS videos tapes are a long forgotten history, and real-estate hogging CRT monitors and TVs are but a distant memory in the past. In this fast changing information age, you can no longer follow established ways of doing things which cannot keep pace with the speed of change. In order to gain global competitive advantage, you must be the first one to try and implement change.
Let’s think of a typical sales strategy meeting. The organizer of the meeting will most likely do the following:
· Planning
· Research and collection of data
· Meeting announcement
· Moderate meeting
· Meeting minutes
· Meeting report and sharing
During this process, meeting organizer will create and receive numerous documents while members will try to read information related to the meeting and think about them before they meet, which is a very difficult to accomplish. While meeting is in session there isn’t a readily available tool to input and share information with the team besides writing down notes individually. It is almost impossible to jot down and organize creative ideas that come up in a flash with Word or PowerPoint in real-time while meeting is running. After the meeting, it is given that someone writes up a meeting minutes and send it to team member. Meetings are inevitable part of daily work routine but having a productive meeting varies drastically depending on the organization.
We can see that there is a problem with running a typical meeting. Not only in meetings, but typically most people will document important information using a software only after ideas that have been stored in the head or written down as memos become ripened. In other words, ideation and documentation are happening as two distinctly different processes. All of us are well aware that creative thinking is one of the most important skill to have in the current knowledge and information age. Unfortunately, we are still trenched in thought that creative thinking and expressing that thinking using a tool are distinctly separate processes and requires different skill set for each. On top of that, we confuse mastering these tools as development of core competency.
Established rule of thinking and documenting separately in sequential manner poses loss in productivity and creativity in many areas such as meetings, planning, researching, problem solving and so on.
If visual mapping can be used to reflect creative thinking and documentation simultaneously, then it will get rid of the unnecessary and illogical workflow while focusing on individual and organizational capabilities toward creative thinking. This is the driving force behind lightning fast advancement of work.
Mind processing is a new way of performing work that maximizes thinking and implementation skills with the mindset that every activity is a project that has a goal and schedule. In short it is a new approach to accomplishing work with one tool that simultaneously and multi-dimensionally enables you to do the following:
· Creative thinking and documentation
· Visual thinking and communication
· Implementation thinking and schedule management

If you apply mind processing to all projects that have goals and schedules, then you will see great results in the following areas.
· Improve creative skill by stimulating the right-brain with visual thinking
· Develop habit and skill to see things with bird’s-eye view
· Apply creative ideas to work immediately
· Decrease cost and maximize value by getting rid of unnecessary procedures and focusing on goals
· Look at work from integrated aspect of creative problem solving process as opposed to independent aspect of procedures and tools.
· Realize creative thinking and communication skills are key to competitive edge
· Confidence grows and work becomes enjoyable.
· Transform individuals and organizations into goal oriented
· Individual competitive advantage converges to organization’s competitive advantage
The efficacy of mind processing can be summarized as enhancing project quotient (PQ) in this age of global competition. Individual member of an organization starts to display common traits of good workers. And in turn individual competitiveness translates into corporate culture where corporate goal converges and realized.
í Mind Processor
MindMapper is different from the software that lets you simply express your brewed thoughts during meetings, planning, presentation, projects, and daily tasks.
Major difference is that it is able to express your new ideas into visual format and those creative thoughts can be naturally reflected in the sum of results derived from your various tasks. MindMapper is a thinking tool that can help your ideas come alive in full force. The more you use MindMapper, the more ideas are generated and implementing these ideas no longer become stressful, but an opportunity to show your hidden potentials.
As a result, it allows anyone to discover the dormant creative thinking ability, and it fosters growth of this new found capability, and it equips you with 3 characteristics of smart worker: the ability to see the whole picture, creative thinking and visual thinking skills.
Let’s take a look at some of the key features of this unique tool.
n Visual Thinking and Documenting
Foremost, it fosters and maximizes visual thinking. MindMapper is not a left brain- centric writing tool that jots down prepared thoughts or words in a linear format, but it is a visual thinking tool that lets you express thoughts as if you were drawing them. In the process of developing your thoughts, you can easily organize them as you look at your ideas and correlations, at the same time looking at the entire picture.
n Creative Thinking and Documenting
⒋ MindMapper supports right-brain centric random and multi-dimensional radiant thinking.
⒋ It also supports left-brain centric serial and logical convergent thinking.
⒋ It is very easy to apply a variety of creative thinking methodologies to everyday work routines.
⒋ It provides brain friendly user interface to maximize creative processes. Thus it is easy to learn and use, yet still offers many features.
n Compatibility
⒋ Mind processed contents can be converted into familiar linear document format.
⒋ It is compatible with a variety of systems and document formats that has been used before to carry out tasks.
n Mind processor is needed during the process of organizing your thoughts.
n The most critical and important survivor skills in today’s information age is the ability to logically organize information gathered from many different sources.
n It is inherently ineffective when trying to effectively organize a lot of information by reading from right-to-left and then writing in linear format.
n Our brain receives information through different senses in 3 dimensional forms, which is nearly impossible to express in linear writing format.
n Our brain is divided into left and right brain, and it is uniquely designed to process random and multi-dimensional information.
n Our brain is amazing, wonderful, and very powerful. The whole brain is able to gather, register, and process information that has no patterns and order.
n Our brain has the innate ability to effectively process visual information.
n The two brains react very sensitively to images and colors. Thus, if information is visualized in a map format, our two brains will work very effectively to understand and analyze the relationships among the topics.
MindMapper Basic Principles
Before any MindMapper maps are created, we can define the basic fundamentals as outlined below.
1. Write down thoughts that naturally arise from your mind on a piece of paper without any regards to logical flow or hierarchy.
2. Have a main topic that diverges to form subtopics (branch).
3. If logical flow is necessary, then use the straight map direction instead of radial direction.
4. Insert image to visualize the meaning of topics, and add notes for detailed information.
5. If the map is about project management, then add schedule to topics.
6. It is imperative that an important map must be saved and backed-up. The process of adding ideas will repeat itself every time you open the map. And even if it is the same new idea, it is almost impossible to replicate it on the map once the file is lost. Thus, it is important to think about saving maps often and make backups.
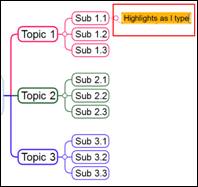
This is an explanation of many elements that are used to create a mind processor map. Using variety and different elements creates mind processor map. And these elements make up hierarchy (topic and subtopic) and flow.
Each element of the map can either easily be added or removed. In order to express effective mind processor map, you can use legend icons, images, notes, schedule, colors, and so forth.
í What is a Mind Map
Mind mapping is a technique of visually arranging ideas associated with a particular topic as you write down keywords on paper as your thoughts come to you multi-dimensionally.
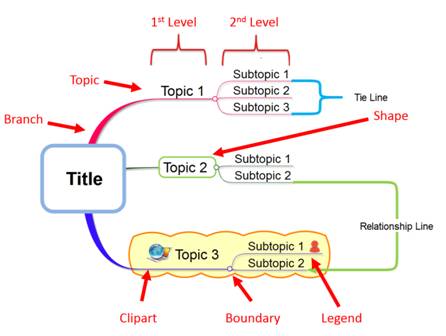
n Hierarchy (Level)
⒋ Some topics are related to other topics. Particularly there are topics that can be divided into a number of specific topics.
⒋ Hierarchy is established when a topic forms a relationship with above and below topics.
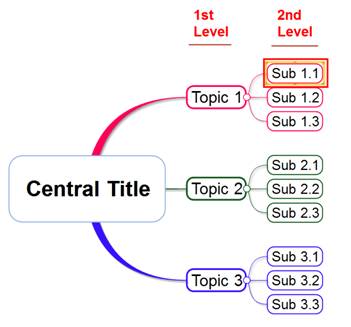
⒋ In hierarchy, the topic that is on the top is represented as the map’s central topic or title.
⒋ From the central topic come 1st level topics that are related to the central topic, and from 1st level topics come 2nd level topics that are related to the 1st level.
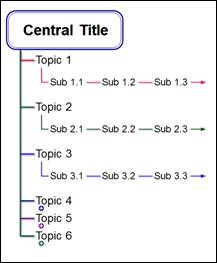
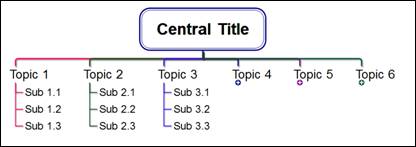
n Direction
⒋ Direction represents way of expressing your thoughts logically in directional flow.
⒋ Some maps are radial, expressing thoughts in all directions, and some maps are straight, expressing thoughts in progression as start to finish.
⒋ It is especially important what type of direction is selected when working on a project-planning map that needs to express progression from start to finish.
⒋ MindMapper is developed to easily create maps while providing powerful mapping environment and features.
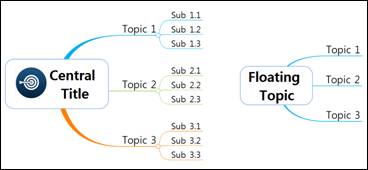
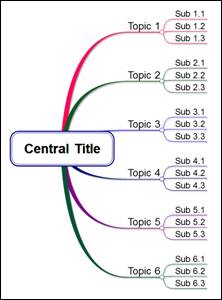
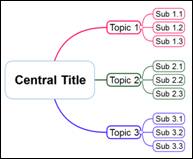
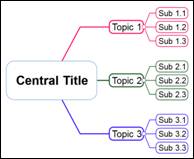
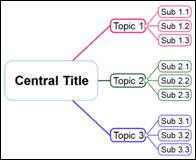
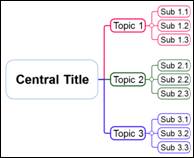
n Title
⒋ The map title is the main topic of the central idea that you want to create as a map. It is the central point, and everything else branches from it.
n Topic
⒋ A Topic is the basic unit of a Mind Map. When you add a topic, you create a new branch that leads out a level to a new subtopic.
n Branch
⒋ Though branch may be a very small component of a map, it still carries an important function. Branch connects two closely related topics. And the number of branches that can be created in each level is unlimited.
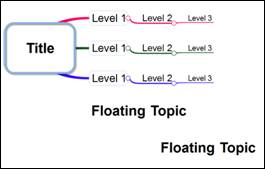
n Level
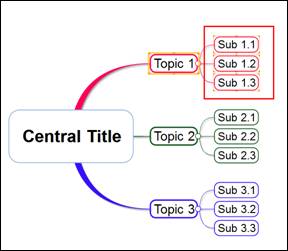
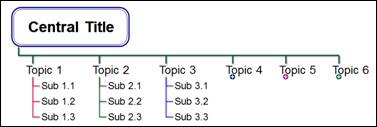
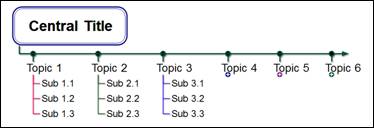
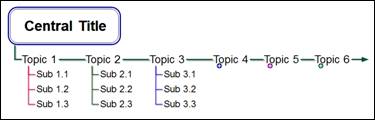
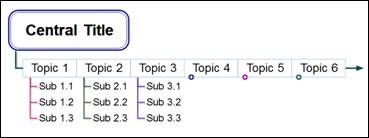
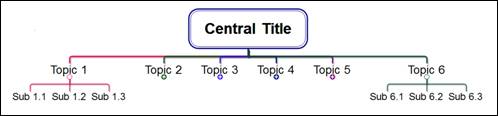
⒋ Level represents hierarchy of branches formed around the central topic. You can think of it as tree rings or ripples on water to get a better understanding. The commonality of this is that they spread out from the center.
⒋ Likewise, this pattern can be applied on a map in organizing information as thoughts radiates from a central topic.
⒋ Number of branches created can be limited by the physical memory of the computer you are using, however, theoretically speaking it is limitless.
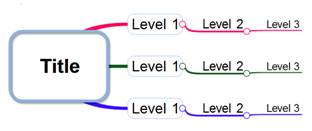
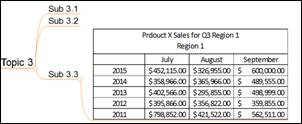
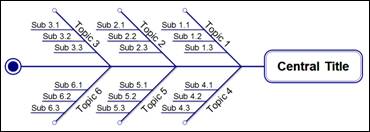
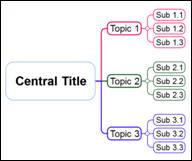
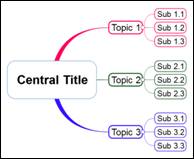
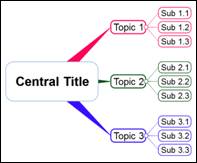
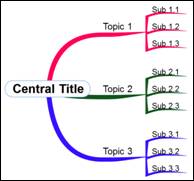
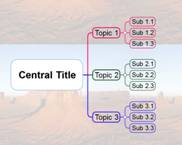
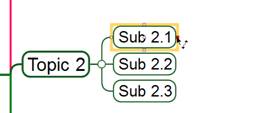
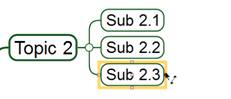
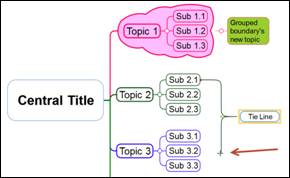
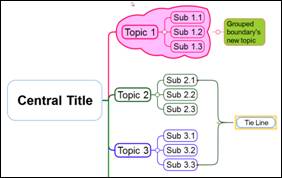
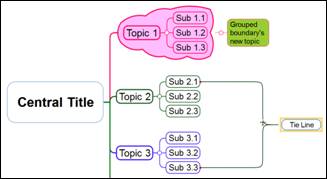
⒋ Looking at the example map above, 1st level branches consist of 3 branches. Of these 3 branches, the 1st or the top branch consists also of 3 branches and these are 2nd level branches.
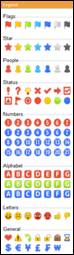
n Legend (Icons)
⒋ Legends are small representative icons that are inserted into topics. They are used to help easily perceive the topics composed in the map.
n Clipart
⒋ Clipart or any images can easily be added to the map. The most important function of clipart or image is that it helps to read the map much easily. Clipart or images facilitate understanding of the map.
n Note
⒋ Note is used to add tremendous amount of text on a selected topic.
n Schedule
⒋ Detailed scheduling contents can be added in order to manage projects.
Use the screens menu to easily switch back and forth from map, dashboard, and planner.
![]()
Dashboard offers easy access to both project maps and planner. You can view project maps on the left and planner on the right. Center of the dashboard is your profile.
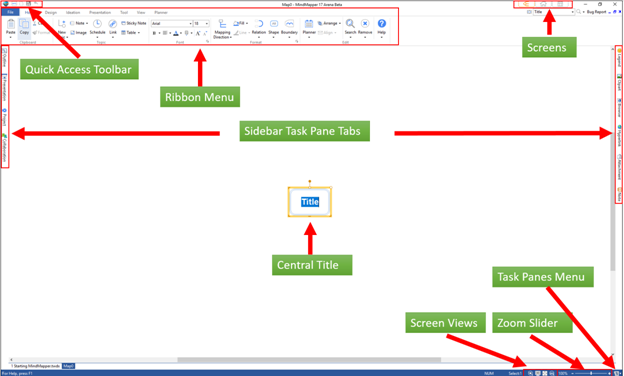
Quick Access Toolbar contains collection of command buttons that is used most frequently in order to shorten the access time. It can also be customized to place more command buttons.
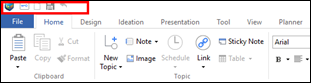
í How to Add More Command to QAT
1. Bring mouse cursor over the menu that you want to add to QAT and then right-click the mouse.
2. Select Add to Quick Access Toolbar.
3. The menu will have been added to the Quick Access Toolbar.
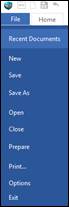
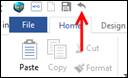
File tab contains features to create, open, save and print files.
Contains the most essential mapping features and commands.

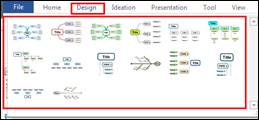
Provides convenient way to design map with variety of pre-defined themes and styles.

Designed to easily apply different ideation techniques and introduces the method of using and applying them.

Presentation can be made within MindMapper.

Additional features such as adding and deleting objects, screen capture, and extracting data.

This tab provides different ways of viewing a map.

Map out your life by creating master, vision, life plan, annual plan maps. Spit screen map and planner to easily manage and track events and schedule. Planner syncs to Google Calendar.

Task panes consist of Outline, Presentation, Project, and Collaboration on the left side of the screen; and Legends, Clipart, Browser, Hyperlink, Attachment, and Note on the right side of the screen; and finally Gantt chart window on top of the background when Gantt chart command is called. Left side task panes affect the entire map and provides useful features when presenting, managing or collaborating. Right side task panes are a collection features that can be used conveniently and quickly to create visual maps.
í Collaboration Pane
Collaboration pane provides cloud-based collaboration service for sharing and co-editing maps from PC and mobile devices.
í Outline Pane
Contents of map is displayed in tree format. Select a topic from the outline pane and the same topic will be selected on the map. Also, run Outline Presentation mode to view selected topic appear center of the screen for more effective presentation.
í Presentation Pane
Present your map instantly. You can customize order of slides and even select the order of slides.
í Project Pane
Access, add, delete, and create project maps from this pane. Note that project maps are maps that are linked to planner.
í Gantt Chart
Gantt chart appears on the upper part of the workspace (background) and it is mainly for managing schedules for projects. Schedule is typically managed from the planner but any scheduling from the planner can easily be created onto Gantt chart. Since Gantt chart can display resources and completion rate besides scheduling, it is ideal fit for managing projects.

v Closer Look at the Right Panes
í Legend Pane
Legend can be added to topics to indicate task status, priorities, or user defined meanings to help users visually manage task progress, priorities, tasks, and so on.
í Clipart Pane
Add built-in clipart to topics or browse your computer or the internet to find am image you like to add.
í Browser Pane
Browser task pane is intended to conveniently access information through the internet while mapping. Having a built-in browser add convenience of not opening a separate browser.
í Hyperlink Pane
Use hyperlink to access files (image, video, map, document), folders, and internet addresses from the map.
í Attachment Pane
Use attachment to embed files into the map as attachment. The file you have attached gets embedded into your map or becomes a part of the map.
í Note Pane
Note is for writing down detailed information about the keyword written in the topic. You can enter text, table, and image into the note pane.
í Screen Button Overview
Use the title button to navigate between managing projects and schedule.
n Dashboard
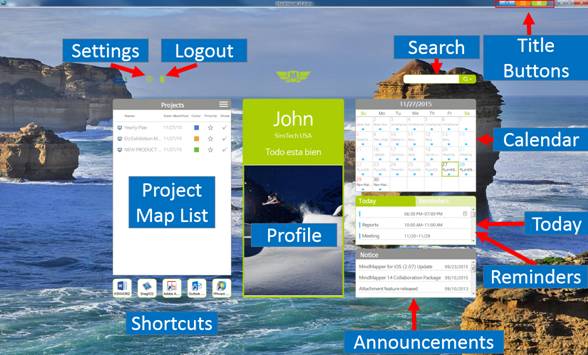
⒋ Project Map List: Add/delete projects.
⒋ Shortcuts: User selected shortcuts to programs, web pages, and other.
⒋ Profile Pane: Displays user profile.
⒋ Settings: Set options for dashboard and planner.
⒋ Logout: Logout to exit dashboard and planner.
⒋ Search: Search schedule from the planner or the web.
⒋ Monthly Calendar: Displays calendar in monthly format.
⒋ Today: View today’s schedule.
⒋ Reminder: View minders for today.
⒋ Announcements: MindMapper announcements are displayed.
⒋ Title buttons: Dashboard, Mapper, and Planner.
n Planner
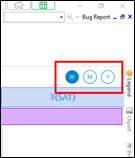
⒋ Schedule can be divided further by item types.
All Day: Enter activities or events that will happen all day long or over a period of time
Appointments: Enter activities or events for a particular day with start and end time
Memo: Enter memos for a particular day
⒋ Calendar View: Select Week, Month, and Year calendar view
⒋ Planner Menu: Provides maps that will help you design your life and achieve your dreams. You can easily split the screen and view map and planner together so that you can see and execute your plans with more clarity and progress.
n Map
í Profile Settings
n How to set profile
1. Click on the name.

2. Planner options window will appear.
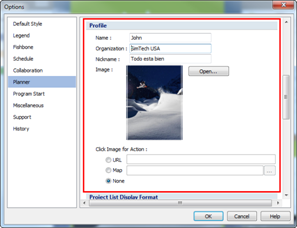
3. Edit profile
⒋ Name: Enter name.
⒋ Organization: Enter organization name or the name of the company.
⒋ Nickname: Enter nickname or your personal objective.
⒋ Image: Add image to profile. This picture should be an image of your success, goal, or achievement that will make you strive to accomplish it.
⒋ Click on image for action: Set options when you click on the image so that it will go to a URL or open a map or just do nothing
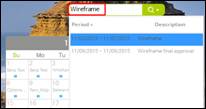
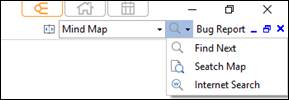
í Dashboard – Search Schedule
n How to search schedule
1. Type search entry in the search box at the top-right.
2. Press Enter key or click on the search icon.
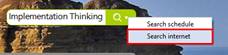
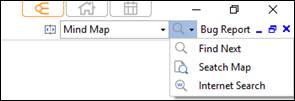
í Dashboard –Search Internet
n How to search internet
1. Type search entry in the search box at the top-right.
![]()
2. Click on the downward arrow and select Search Internet.
v Dashboard – Manage Project List
í Create a new project through a new map
Create a new map and add project to it
n Create a new project – Local File
1.
Click on the menu button ![]() .
.
2. Select Create New Project.
3. Select Local File.
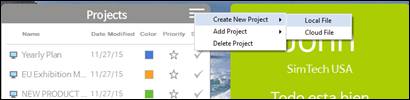
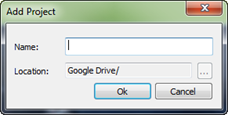
4. Name the project and click OK to open the new project map.
5. Newly created project map appears in the Project List pane.
6. Local documents from the Project List is denoted by an image of a PC screen.
![]()
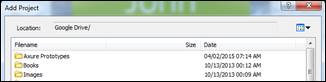
n Create a new project – Cloud Document (Google Drive)
MindMapper uses Google Drive to store files in the cloud. You must have Google Drive account to use this feature.
1.
Click on the menu button ![]() .
.
2. Select Create New Project.
3. Select Could File.
4. Name the project and click OK to open the new project map.
5. Newly created project map appears in the Project List pane.
6. Cloud documents from the Project List is denoted by an image of a cloud.
![]()
í Add to Project with Existing Maps
You can add to project list your existing maps or collaboration maps
n Add to Project – Local Documents
1.
Click on the menu button ![]() .
.
2. Select Add Project then Local File.
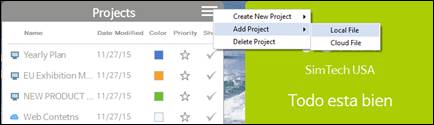
3. Browse and select the map through Add to Project List window.
4. Click Open.
5. Your local map will appear in the Project List pane.
6. Local documents from the Project List is denoted by an image of a PC screen.
![]()
NOTE
You can also right click on the currently open map’s document tab and select Register as Project Map to add to the Project List.
n Add to Project – Cloud (Google Drive)
MindMapper uses Google Drive to store and retrieve files in the cloud. You must have Google Drive account to use this feature.
1.
Click on the menu button ![]() .
.
2. Select Add Project then Cloud File.
3. Select the map from Add Project window and click OK.
4. Your cloud map will appear in the Project List pane.
5. Cloud files from the Project List is denoted by an image of a cloud.
![]()
í Delete Project
n How to delete a project
1.
Click on the menu button ![]() .
.
2. Select Delete Project.

3. Check projects to be deleted from the Project List.
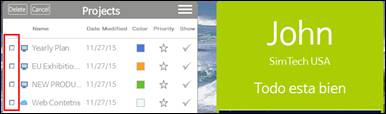
4. Click Delete.
í Setting Project Priority
You can display the importance of a project relative to others in the list.
n How to set degree of importance for each project?
1. Click on Priority.
2. Priority icon has 3 different display options: filled, half-filled, empty.
3. Priority display changes every time you click the icon.

í Setting Project Color
n How to set Project Color
1. Click on the color icon (square box).
2. Select a color that will be displayed in the planner.
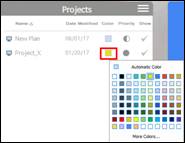
3. The selected color will show on schedules connected to this project.
í Sort Project
You can sort project list by name, modified date, and priority.
n How to sort project list
1. Click on the categories to sort: name, modified date, priority.
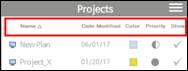
2. List will sort by category selected.
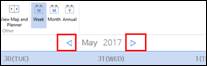
í Navigating Calendar Views
n Move through weeks
1. Open calendar by clicking Planner screen button.
2. Click forward or back button to move through weeks.
n Switch Calendar Views (Week, Month, Year)
1. Click Week, Month, or Year button to switch calendar view.
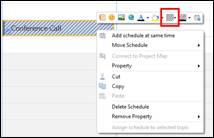
í Calendar – Adding Schedule
n Add schedule from calendar
1. Click on the desired slot to add schedule.
⒋ All Day: Enter activities or events that will happen all day long or over a period of time
⒋ Appointments: Enter activities or events for a particular day with start and end time
⒋ Memo: Enter memos for a particular day
2. Type schedule entry and press Enter when finished.

n Add schedule from map
1. Select a topic you want to add schedule to.
2. Click Schedule menu from Home tab.
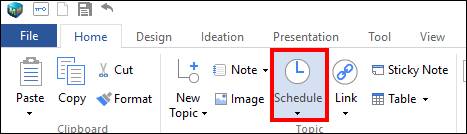
3. Or right click mouse and select Schedule.
4. Enter schedule information and click OK.
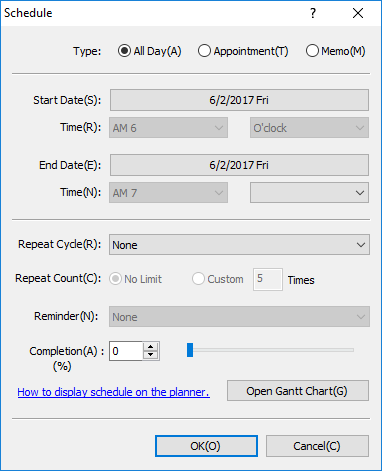
⒋ Type: Select a schedule type from All Day, Appointment, Memo.
⒋ Start Date/Time: Set start date and time. This only applies to Appointment.
⒋ End Date/Time: Set end date and time. This only applies to Appointment.
⒋ Repeat Cycle (Interval): Set recurrence interval.
⒋ Repeat Count: Set number of occurrences for the recurring interval.
⒋ Reminder: Set schedule reminder alerts.
⒋ Completion: Display schedule completion rate. The more completed, the more schedule icon becomes filled with red color.
5.
Schedule icon![]() will appear in the
topic.
will appear in the
topic.
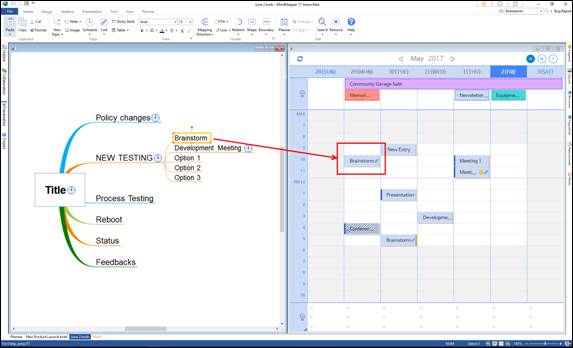
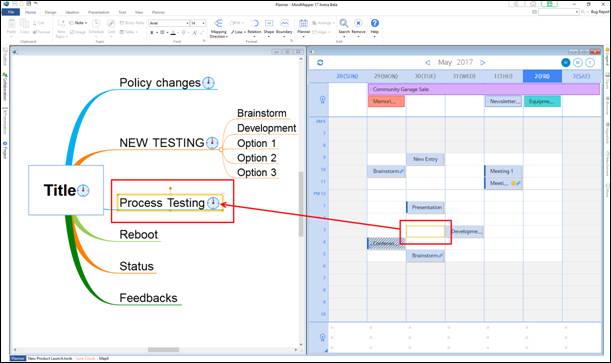
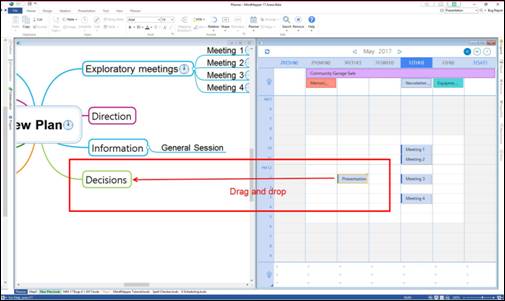
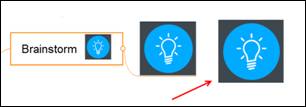
n How to add schedule using map and planner together
1. Click View Map and Planner menu to split screen map and planner.

2. Select a topic from the map and drag it to the planner.
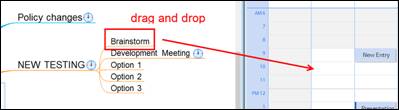
3. You will see a new entry Brainstorm appear in the planner with a link icon. If you click the link icon, it will open the linked map with focus on the topic Brainstorm.
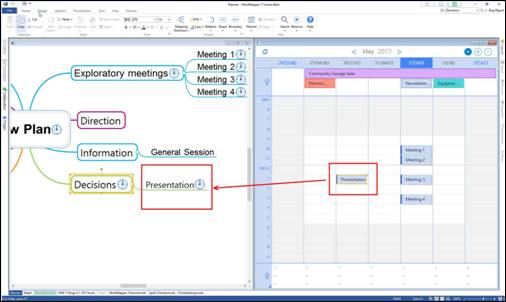
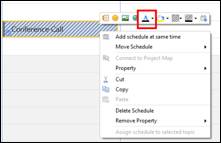
4. From planner to map, you must select the topic in the map first. Then select a schedule from the map.
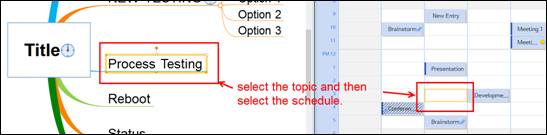
5. Right-click and select Assign schedule to selected topic.
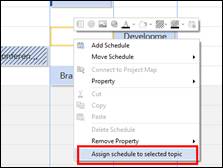
6. You will see schedule icon appear in the topic.
n How to copy schedule
1. Right-click over the schedule slot and select Copy.
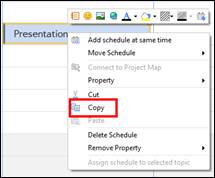
2. Or use Ctrl + c to copy.
3. Select a desired slot and right click mouse.
4. Select Paste.
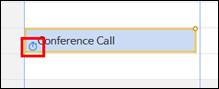
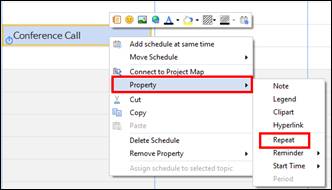
n How to set reminders
1. Select the schedule slot.
2. Right-click > Property> Reminder> Select a time.
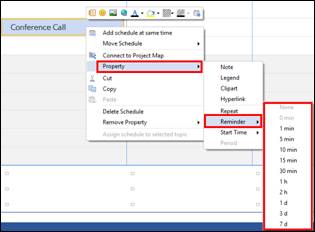
3. Reminder icon will appear in the schedule slot.
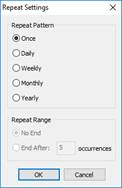
n How to set recurring schedule
1. Select a schedule slot
2. Right-click > Property> Repeat> Select repeat pattern and range
í Edit Schedule
n How to edit schedule
1. Select schedule slot and press Enter or double click to change information.
n How to move schedule
1. Drag and drop schedule to desired slot. Also, drag handle up or down to either increase or decrease schedule time.
í Delete Schedule
n How to delete schedule
1. Select a schedule to delete.
2. Click Delete from menu.

3. Or press Delete key from keyboard.
v Planner – Connect to a Project Map
í Connect Schedule to a Project Map
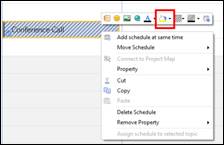
n How to connect a schedule to a project map (right-click menu)
Calendar entry will automatically be added as a new topic in the project map once schedule from Calendar is connected to a project map.
1. Right-click the selected schedule and click Connect to Project Map.
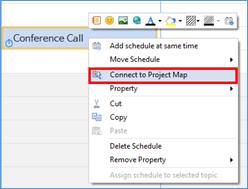
2. Select a project map you want to connect schedule to and click Connect.

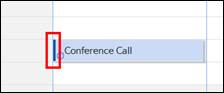
3. When connected, calendar slot’s front end gets a filled vertical bar. Click on the filled vertical bar to open the project map.
n How to connect a schedule to a project map (drag-and-drop)
1. Click View Map and Planner menu to split screen map and planner.
.
2. Select a schedule.
3. Drag the schedule to a topic in the project map and you will see the schedule appear in the map.
NOTE: The map that is open here should be a project map. If it is not a project map, then this action will add schedule to the map but it will not be linked.
n How to view and manage project maps
1. Planner> Project Map> Manager
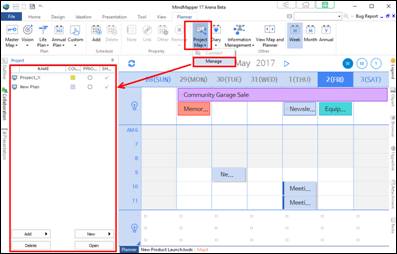
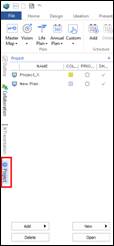
2. Or click Project task pane.
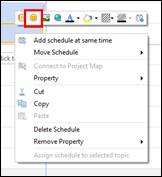
v Using Other Schedule Features
í Designing Schedule
Insert colors and line patterns to personalize calendar.
n Add line pattern
1. Select a calendar slot.
2. Right-click and select the line pattern icon.
3. Select pattern.
n Change schedule font color
1. Select a calendar slot
2. Right-click and select the font color icon.
3. Select color
n Change schedule fill color
1. Select a calendar slot
2. Right-click and select the fill color icon.
3. Select fill color
n Change schedule pattern color
1. Select a calendar slot with a pattern
2. Right-click and select pattern color icon
3. Select pattern color
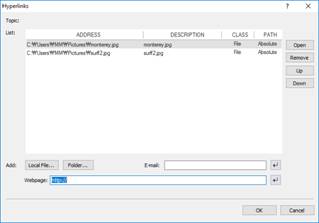
í Add Properties to Schedule
n Schedule – Open Hyperlink
1. Select a calendar slot.
2. Click Link
3. Or right-click and select Property > Hyperlink
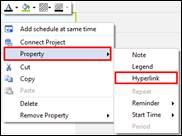
4. Select hyperlink type (file, folder, email address, webpage) and click OK.
n Schedule – Add Legend
1. Select a calendar slot.
2. Right-click and select legend icon.
3. Select a legend and close the legend pane by clicking the pin or anywhere outside.
n Schedule – Add Note
1. Select a calendar slot.
2. Right-click and select note icon.
3. Or click Note from the menu.
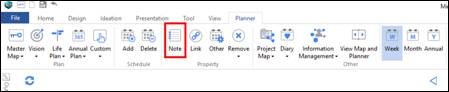
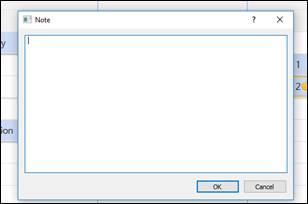
4. Write detailed information about the schedule and click anywhere outside the note pane to close.
5. Note icon will appear in the slot.
6. You will notice that Note command does not open the note task pane but a note window. Note task pane cannot be used while in the planner screen.

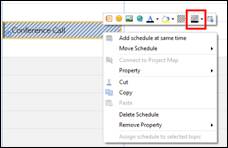
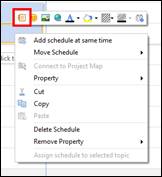
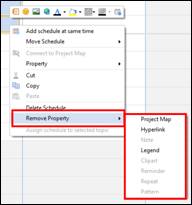
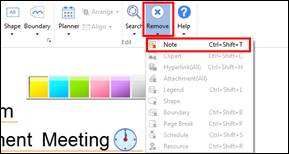
n Schedule – Deleting Properties
1. You must select a schedule with properties in order to delete properties.
2. Right-click mouse, select Remove Property, and select property to delete from the schedule.
Use Open menu to open existing MindMapper maps.
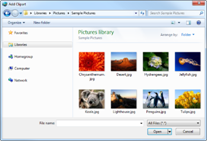
í Opening an Existing Map
n How to open a map
1. File > Open
2. Search for the file
3. Select the file type
4. Select the file and click Open
n Supported file types
Program can open below file formats.
1. MindMapper file (*.twdx)
2. MindMapper 3.0 - 12 Professional file (*.twd)
3. MindMapper Linked Map Compressed File (*.twds)
4. MindMaper for Jr. file (*.jtw)
5. MindMap 1.1 - 2.5 file (*.map)
6. Text file (*.txt)
7. MS Word file (*.doc)
8. MS PowerPoint file (*.ppt)
9. MS Project (*.twm)
10. Extensible Markup Language file (*.xml)
11. MindManager file (*.mmp, *.mmap)
12. Freemind file (*.mm)
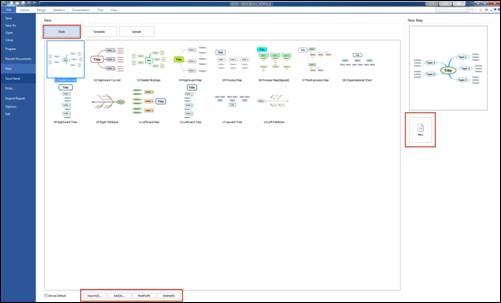
There are two ways to create a new map in MindMapper. One is to use a predefined map and the other is to use a blank map.
í Create a New Map
n Create a new map using predefined style
1. Select a style to apply to your new map.
⒋ Import: You can choose to import another map’s style to be used in your new map.
⒋ Add: You can add a frequently used map style to Style list.
⒋ Modify: You can select a style from the Style list and edit it.
⒋ Delete: You can delete the style map from the Style list.
2. New: Click New to create a map with selected style.
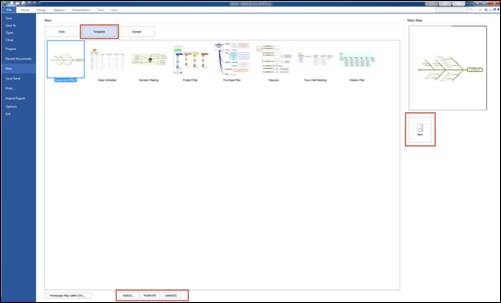
n Create a new map using template
1. You can select a map template and just fill in the contents.
⒋ Add: You can add a frequently used map to Template list.
⒋ Modify: You can select a template map from the Template list and edit it.
⒋ Delete: You can delete a template map from the Template list.
2. New: Click New to create a map with selected template.
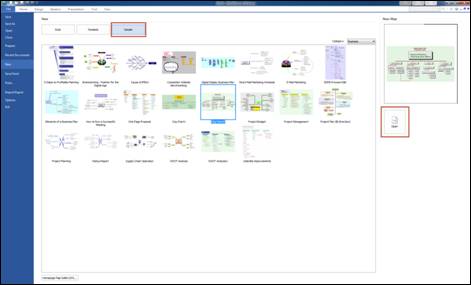
n Create a new map using sample map
1. You can choose to work with a sample map. More sample maps are available from our website’s map gallery.
n Create New Map Using Blank Map
1. Click the New Document icon from the Quick Access Toolbar.
2. Or Ctrl + n from the keyboard.
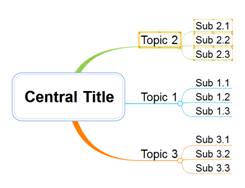
3. Enter Central Title. This is your main idea of your map.
4. A central title appears in the center of the screen whenever a new map starts. Text is highlighted and all you need to do is enter your title for the map. If it is not highlighted, you can double click the topic, enter text, and then press Enter key to finish.
![]()
5. Or you can select the central title by clicking it (orange outline should appear when a topic is selected) and press Enter in order to highlight the text to edit. When done, press Enter key again to finish editing.
![]()
![]()
![]()
![]()
í Create a Topic
You must select a topic first in order to add a subtopic. Whatever the topic you have selected, a new topic will be created as a subtopic.
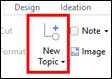
n How to add a new topic
1. Click a topic.
2. Press Spacebar.
3. Or click New Topic from the ribbon menu.
4. Type text when cursor blinks.
5. Press Enter to finish.
NOTE
There is another way to create topic. Select a topic -> Type text -> Press Enter finish.
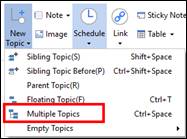
í Creating Multiple Topics
This feature is used when you want to add multiple topics at once. Each line in the multiple topics dialog box represents 1st level topics. If you wish you include 2nd level, you can indent with a space to denote 2nd level, or 2 spaces for 3rd level and so on.
n How to add multiple topics
1. Select a topic.
2. Press Ctrl + Spacebar.
3. Or Click New Topic downward arrow ″ and select Multiple Topics.
Home tab > Topic group > New Topic ″> Multiple Topics.
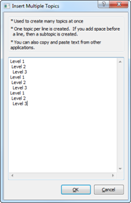
4. You'll see Insert Multiple Topics window. Just type in multiple items and press Enter after each item.
5. You can use the Insert Multiple Topics dialog box to add topics of different levels by indenting each line with a space or multiple spaces.
6. Click OK to finish.
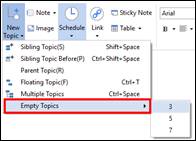
í Creating Empty Topics
This feature inserts multiple topics without text.
n How to add empty topics
1. Select a topic.
2. Hold down Shift key and press a number of topics (from 1-9) you want to create.
3. Or Home tab > Topic group > New Topic ″> Multiple Empty Topics> Select from 3, 5, or 7
í Creating Sibling Topics
Add topics at the same level. New sibling topic will be positioned beneath the selected topic.
n How to add sibling topic
1. Select the topic that you want to place below your sibling topic.
2. Hold down Shift key and press Spacebar.
3. Or Home tab > Topic group > New Topic ″> Sibling Topic

4. Type in the text, and press Enter to finish
n Adding Sibling Topics Before
You can add sibling topic either above or in front of the selected topic depending on the direction of the map.
1. Select a topic.
2. Ctrl + Shift + Spacebar.
3. Or Home tab> Topic group > New Topic ″> Sibling Topic Before.
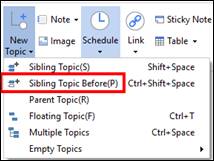
4. Type in the text, and press Enter to finish.
í Creating Parent Topics
Insert parent topic to tie together sibling topics.
n How to add parent topic
1. Select a topic.
2. Ctrl + Shift + Alt + Spacebar.
3. Or Home tab> Topic group > New Topic ″> Parent Topic.
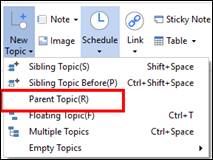
4. Type in the text, and press Enter to finish.
í Inserting Floating Topic
You can insert a floating topic anywhere in the map background.
n How to insert a floating topic
1. Click on a location where you want to insert the floating topic
2. Or Home tab> Topic group > New Topic > Floating Topic and click on a location where you want to insert the floating topic.
3. Type in the text, and press Enter to finish
n Creating subtopics to a floating topic
You can add subtopics to a floating topic and thereby creation another map. This feature allows creation of multi maps within one map file.
1. Select a floating topic.
2. Press Spacebar.
3. Type text and press Enter to finish.
NOTE:
When multiple maps are created, it is very important to insert visual elements to the original central topic by inserting shape, color, or image to distinguish it as the central topic.
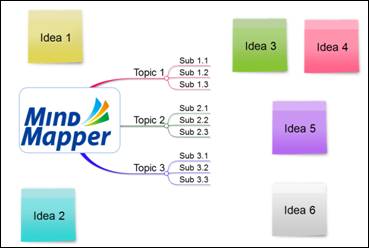
You can add notes to anywhere in the background like Post-it notes. This is to simulate common brainstorming sessions where Post-it notes are widely used.
í How to Add Stick Note
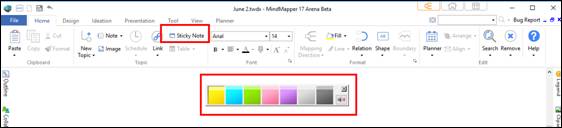
1. Home tab> Topic group> Sticky Note.
2. Sticky note color palette will appear for you to select.
3. Or press and hold Shift key and click background to create a memo.
4. Type text and press Enter to finish.
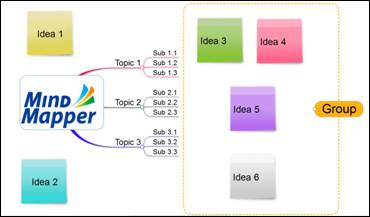
NOTE:
You can select multiple sticky notes and group them by holding down Shift key and clicking the background. You learn more about this feature in the Brainstorming section.
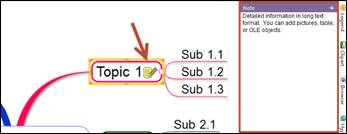
Concept of Mind Mapping is to just enter few key words to help you remember and recall the associated information. However, not everyone has a photographic memory, and there will be a need to record more than just a few key words. Using the Note window, you can add sentences, paragraphs, pictures, tables, and even OLE objects to help you organize your thoughts.
í How to Add Note
1. Home tab > Topic group > Note
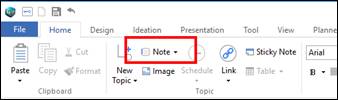
2. Or click Note on the right sidebar.
3. Enter detailed information.
4. When finished, click background.
5. Your topic will show a note icon.
NOTE:
You can insert not only text but image file, metafile, table, and OLE object.
Viewing Note
⒋ Click on the note icon to view or to edit
⒋ Or select a topic with note icon and press F3
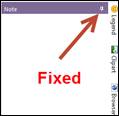
1. Home tab> Topic group> Note
2. Click on the push pin icon to either Auto Hide (Pin leftward) or Fixed (Pin downward).

í Changing Note Pane Position
1. Click Note and click to make the push pin fixed.
2. Click on the bar where Note is written.
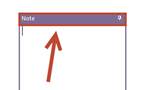
3. Drag the mouse to the top, left, or bottom to snap note pane into place or have it just floating.
í Deleting Note
1. Select a topic with note. Right-click and select to Remove Property. Select Note.
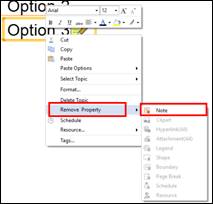
2. Or Home tab > Edit > Remove
3. Select Note
Object Linking and Embedding (OLE) allows objects or contents created in one application to be available in another application. For example, you can create a chart in Excel and insert it into MindMapper
í Inserting Excel Sheet
You can insert MS Excel sheet as OLE object. However, you must have MS Excel installed to use this feature
n How to insert Excel Sheet
1. Select a topic.
2. Tools> Object group > Excel Sheet
3. Add contents to Excel sheet when Excel opens.
4. When done, close the program.
5. Excel sheet is added as object in your map.
6. Double click the Excel object to edit.
í Inserting Excel Chart
You can insert MS Excel chart as OLE object. However, you must have MS Excel installed to use this feature
n How to insert Excel chart
1. Select a topic.
2. Tools> Object group> Excel Chart
3. Edit contents of Excel chart and close the program.
4. Excel chart is added to the map.
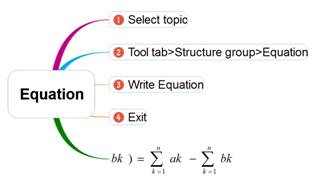
í Inserting Equations
Clicking Equation button will invoke Microsoft Equation Editor. Enter your equation. You must have MS Office to use this feature.
n How to insert equation
1. Select a topic.
2. Tools > Object group > Equation
3. Write equation.
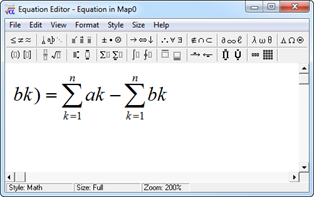
4. Exit the equation editor and the equation will appear in the map
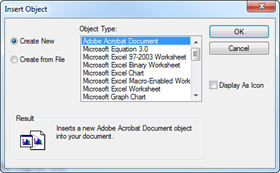
í Inserting Other Objects
You can also insert other objects besides Excel sheet, chart, and equation
n How to insert other objects
1. Tool tab > Object group > Etc
2. Select either Create new or Create from file.
n How to “Create New”
1. Select Create New.
2. Select the object type from the list box and press OK.
3. Program will start, and you and write down contents.
4. When done, close the program and your topic will show an icon that has been just added.
n How to “Create from file”
1. Select Create from file.
2. Click browse to select a file.
3. Click OK to finish.
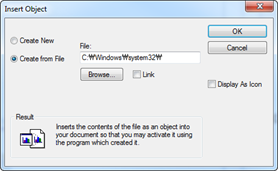
NOTE
If “Display as icon” is checked, icon of the program to open the OLE object will be shown instead of the OLE object.
Table is used in MindMapper to maximize options for visual formatting in the map.
í How to Convert a Map into a Table
1. Select a topic.
2. Home tab > Table

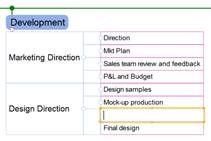
í Editing Table
You can add and move topics in a table just like you would in a map.
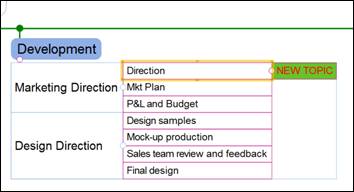
n Adding topics in a table
1. Select a topic.
2. To add subtopic: press Spacebar> enter topic text > press Enter key to finish.
3. Example below adds sup-topic to the last level topic: press spacebar> enter topic text > press Enter key to finish.

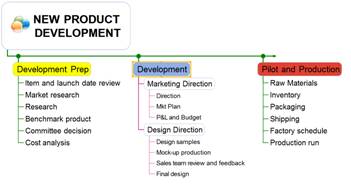
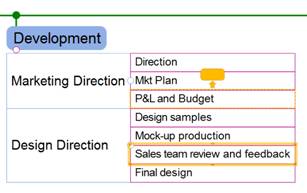
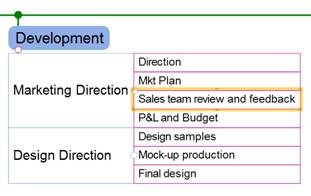
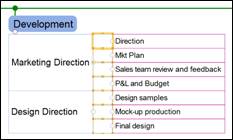
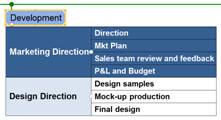
n Moving topics in a table
Moving a topic in a table is the same as moving a topic in a map
1. Select the topic you want to move.
2. Drag the topic until you see an arrow sign to position and then drop the mouse to finish.
In below example, “Sales team review and feedback” topic will be placed above “P&L and Budget’ topic.
![]()
í Inserting Columns
You can add a column to the left of the selected topic
n How to insert columns
1. Select a topic where you want to insert a column to the left.
2. Home tab> Table down arrow > Insert Column
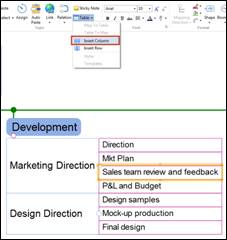
3. Column to the left of the selected topic will show.
í Inserting Rows
You can add a row to above the selected topic.
n How to insert rows
1. Select a topic where you want to insert a row above.
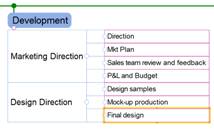
2. Home tab> Topic group > Table down arrow > Insert Row
í Applying Style to a Table
Choose one of the built-in table styles.
1. You must select the parent topic of your table.

2. Home tab> Table downward arrow> Style
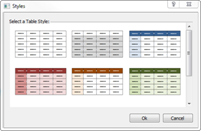
3. Select a style and click OK.
í Using Map Templates
Choose one of the built-in table templates.
n How to use map templates
1. Home tab> Table down arrow > Templates
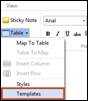
2. Select a template you want to use and click OK.
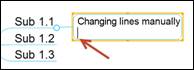
í How to Manually Change Line
1. Select a topic.
2. Double click or press Enter to edit and place the cursor where you want to break the line.
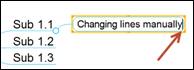
3. Press Ctrl + Enter to create a new line.
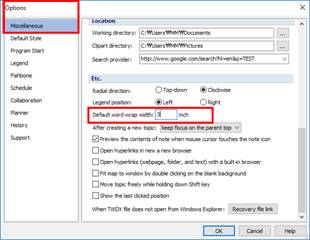
í How to Adjust Auto Word-Wrap
Adjust width: File > Options > Miscellaneous > Default word-wrap width
í How to Adjust Word-Wrap Manually
1. Select a topic.
2. Hover cursor over the edge until cursor turns into sizing handle.
3. Move the sizing handle toward the top, bottom, left, or right to adjust.
![]()
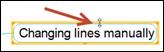
í How to Cancel Auto Word-Wrap
Press and hold down either Shift or Ctrl key and double click sizing handle in the corner edge of the topic.
1. Select a topic with auto word-wrap.
2. Doulbe click width sizing handle to cancel horizontal auto word-wrap.
![]()
3. Double clicl height sizing handle to cancel vertical auto word-wrap.
![]()
4. Double click on sizing handle on the corder to cancel both width and height auto word-wrap.
![]()
NOTE:
You can hold down on Ctrl key and adjust the topic size while retaining
the position of text.
One of the benefits of using mind map is that your current thoughts can be easily poured out into a map and can be rearranged and reordered just as easily.
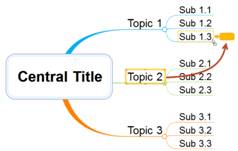
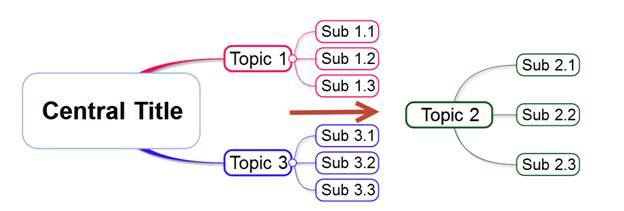
í How to Move a Topic
1. Select a topic to move.
2. Drag the topic to the location you want.
3. When this moving topic touches another topic, you will see placement marker with arrow appear for positioning.

4. Let go of the left mouse button to complete the move. Topic 2 has moved above Topic 1.
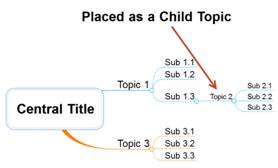
NOTE
1. Ctrl+ Z or press the Undo button to cancel the move.
2. When the placement marker arrow points to the right or to the left, it usually will place the moving topic as a child topic, but depending on the mapping direction it could be placed as a sibling topic.
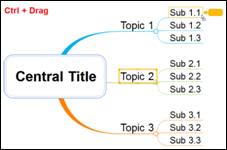
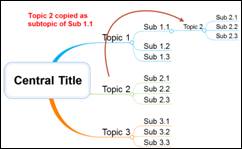
í Copying Topic
You can copy a topic and place it anywhere in the map.
1. Select a topic you want to copy
2. Hold down Ctrl key and drag the topic to location you want to copy to
3. Release the mouse button to complete
There are a number of ways to view your map within MindMapper from the bottom status bar.
![]()
í Local Centering
Local Centering is used to hide all other topics except for the one you want to view. This is especially helpful if you want to concentrate working on one topic of your complex map.
í View Full Screen
If you wish to maximize your monitor's real estate space, pressing View Full Screen will maximize the
MindMapper window and hide all menus and toolbars.
í Fit to Window
You can zoom to fit your entire map inside the MindMapper screen. Keyboard shortcut is Ctrl+F5 or you can double click on a blank space.
í Viewing Map at 100%
Map is displayed at its actual size.
í Zoom In/Zoom Out
Use the slider to zoom in and out.
You must first select a topic by clicking it in order to change or delete the topic. If there are a lot of information that will need editing, then you can press Shift + Enter keys to invoke the text editor to make changes.
í How to Edit Topic
1. Double click on a topic you want to edit.
2. Or select the topic you want to edit and press Enter.
3. Make changes and press Enter to finish.
v Setting Radial Map’s Order of Topic Creation
You can select either clockwise or top-down direction for topic creation
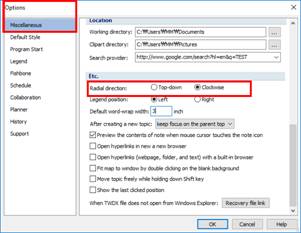
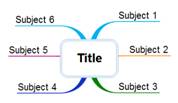
Topics will be created in a clock wise direction.
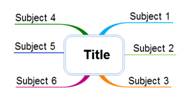
í Top-down direction
Topics will be created in top-down direction.
Text within a topic can be aligned to left, center, and right.
1. Select a topic.
2. Home tab> Alignment down arrow
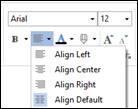
3. Select alignment.
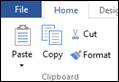
Cut or copy images, topics, or objects and paste them within the map and other MS Office applications.
1. Select a topic or an object
2. Click Copy.
3. Or Ctrl + C.
4. Or right click and select Copy.
5. Select a topic, background, even other map or document.
6. Click Paste or Ctrl + V or right click and select Paste.
1. Select a topic or an object.
2. Click Cut or Ctrl + X or right click and select Cut.
3. Select a topic, background, even other map or document.
4. Click Paste or Ctrl + V or right click and select Paste.
You can use Paste Special to establish a link between different applications. Copy the source object and paste it into a target application. When the link is established, whenever the source is updated, then the object in the target will also be updated.
1. Open a source program where you are going to copy object from (ex. Excel).
2. Copy the object from the source Excel sheet.
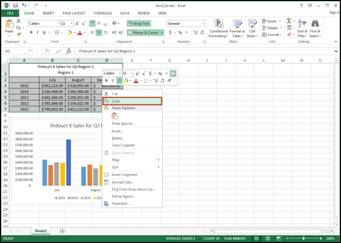
3. From MindMapper, select a topic to paste the Excel object.
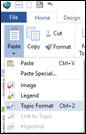
4. Select Paste Special: Home tab> Paste downward arrow> Paste Special
5. Or right click mouse and select Paste Special.
6. Make sure to check Paste Link and click OK.
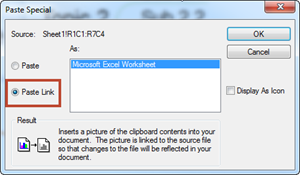
7. You will see the copied Excel object appear in the map. When source is updated, it will also update in the map.
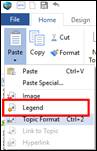
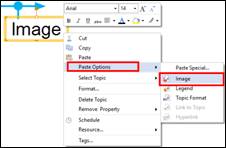
Copied image can be inserted into topics or added as subtopic or even used as image for the background. Below instruction lists 3 methods in pasting image, copied from a web browser, into a working map.
1. Right click on the image file and select copy (images from local computer or internet will be fine)
2. Select a topic to insert image.
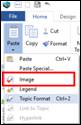
3. Click Paste ″ downward arrow and select Image.
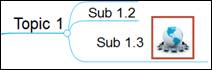
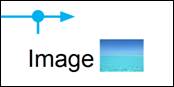
4. You will see the copied image appear in the topic.
NOTE:
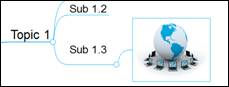
Select a topic and click Paste or Ctrl + V to insert image as subtopic. You can also resize this image and attach to a different topic.
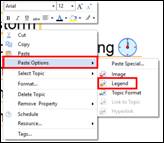
Copy legend and paste it into another topic without having to go through the legend pane.
1. Select a topic with legend
2. Right click and select Copy or press Ctrl + C
3. Home tab > Paste dropdown menu> Legend
4. Or right click mouse > Paste Special> Legend
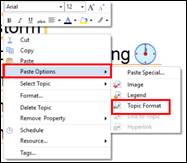
n How to copy the topic style and paste it to a selected topic.
1. Select the topic with style.
2. Right click mouse and select Copy or Ctrl + C
3. Select a topic you want paste style to.
4. Home tab> Paste dropdown menu> Topic Format
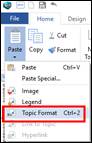
5. Or right click mouse > Paste Special> Topic Format
NOTE:
You can set what to copy from MindMapper options> Miscellaneous > Paste > Topic Style (font, icon, branch).
Copy hyperlink from a topic and paste it into another topic.
1. Select the topic with a hyperlink.
2. Right click and select Copy.
3. Select a target topic.
4. Go to Home tab> Paste downward arrow> Hyperlink.
5. Or right click mouse and select Paste Options > Hyperlink.
6. You will see a hyperlink icon appear in the topic.
v Freely Move and Place Topics
í Freely move topics
You can move topics anywhere you’d like by dragging the topic.
NOTE:
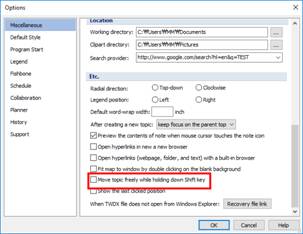
If dragging the mouse does not move your topic, then make sure to uncheck “Move topic freely while holding down Shift key” from File>Options> Miscellaneous
When manually placing topics, you have an option to control the line patterns of topic branches.
n How to change the line pattern of a branch
1. Select the branch line you want to change.
2. Change line shape by moving the yellow dots.
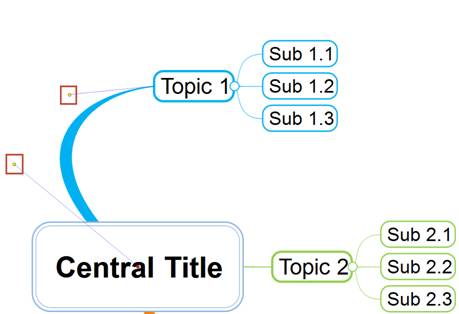
í Changing the starting point of 1st level branch
When you click on the branch line, you will notice a red dot in the middle of the central title. You can move this red dot to change the starting point of the branch line.
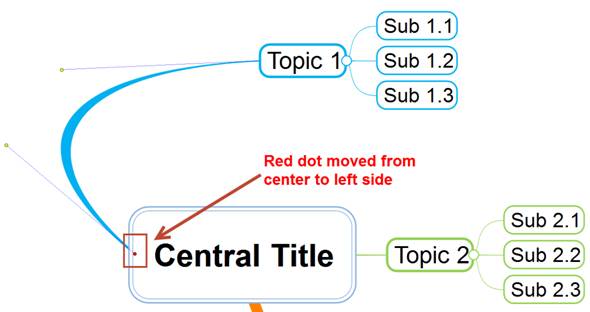
n How to change the starting point of a 1st level branch line
1. Select the 1st level branch line.
2. Move the red dot and you will see the branch starting point change as you move.
Detach a topic from the main map in order make it a floating topic or another map.
í How to Detach Topic
1. Select the topic to detach.
2. Press and hold Alt key and drag the topic to desired location.
3. Let go of the mouse to complete detachment.
NOTE:
Detached topic can always be reattached to the main map by moving the topic to the main map.
Topics can be deleted and you can specify which levels to delete.
í Deleting the last level topic
1. Select the topic.
2. Press Delete.
3. Or right click and select Delete Topic.
í Deleting the Midlevel Topic
Midlevel topics have options to keep or delete their children topics.
1. Select a midlevel topic.
2. Right click and select Delete Topic.
3. Select an option.
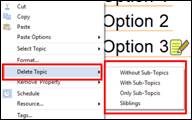
Without subtopics: only the selected topic will be deleted while leaving the subtopics intact.
With subtopics: selected topic along with its subtopics will be deleted.
Only subtopics: only the subtopics will be deleted.
Siblings: selected topic along with sibling topics will be deleted.
NOTE:
Delete key will perform the same function as With Subtopics option.
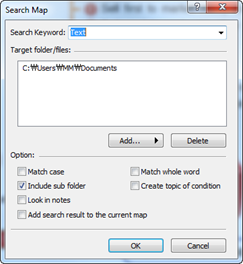
You can search and find text within the currently open map. Text from topics, floating topics, and contents notes can be searched.
1. Home tab> Edit group> Search
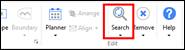
2. Or Ctrl + F.
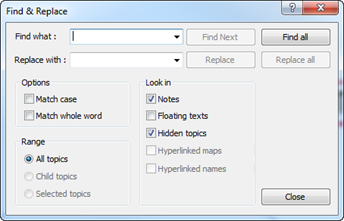
3. Type in the search text.

4. Fill out options, range, and where to look in.
5. Click either Find Next or Find all.
⒋ Find Next: To find each instance of a search text.
⒋ Find All: To find all instances of a search text.
n Search Options
⒋ Match case: Searches the map matching exact word and case of search word or phrase.
⒋ Match whole word: Searches the map matching exact word or phrase.
n Search Range
⒋ All topics: Search range includes the entire map.
⒋ Child topics: Search range includes only the selected parent topic and its children topics.
⒋ Selected topics: Search range includes only the selected range
n Search Look In
⒋ Notes: Search in the notes.
⒋ Floating texts: Search floating topic texts.
⒋ Hidden topics: Search hidden topics.
⒋ Hyperlinked maps: Search hyperlinked map. You can specify how many levels you want to search.
1. Home > Search > Find and Replace

2. Or Ctrl + F.
3. Enter search text in Find what field.
4. Enter replacement text in the Replace with field.
5. Select options, range, and where to look.
6. Click Find Next and Replace to change word one at a time.
7. Or click Find All and Replace All to change found words at one time.
⒋ Find Next: To find each instance of a search text.
⒋ Find All: To find all instances of a search text.
⒋ Match case: Searches the map matching exact word and case of search word or phrase.
⒋ Match whole word: Searches the map matching exact word or phrase.
n Replace Range
⒋ All topics: Search range includes the entire map.
⒋ Child topics: Search range includes only the selected parent topic and its children topics.
⒋ Selected topics: Search range includes only the selected range
n Replace Look In
⒋ Notes: Search in the notes.
⒋ Floating texts: Search floating topic texts.
⒋ Hidden topics: Search hidden topics.
⒋ Hyperlinked maps: Search hyperlinked map. You can specify how many levels you want to search.
You can search specific texts from currently open map to multiple maps using the search field.
í How to search for specific text
1. Home> Search> Search Map or type in the search word into the search field.
2. Click search icon to apply search conditions.
3. Click OK to start search.
Search from the web.
í How to Search the Web
1. Type the search word into the search field.
2. Select Internet Search.
í Selecting multiple topics
You can select a number of topics at a time. Such feature allows for faster and efficient mapping. You can also select the entire topics, or selected topic’s children topics or sibling topics.
n How to select multiple topics
1. Select topics by holding down the Shift key and clicking on each topic if the topics are spread throughout the map.
2. You can also drag your mouse to select multiple topic if the topics are not spread.
NOTE
⒋ Text or line of a topic that is just inside the selection box when mouse is dragged from right to left will be selected.
⒋ Text or line of a topic that is just inside the selection box when mouse is dragged from left to right downward will be selected.
⒋ Text or line of a topic that is just inside the selection box when mouse is dragged from bottom to top will be selected.
í Selecting Subtopics
n How to select subtopics
1. Select the topic with subtopics.
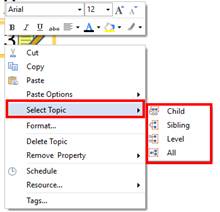
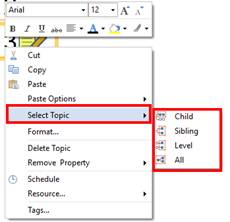
2. Right-click > Select Topic > Child
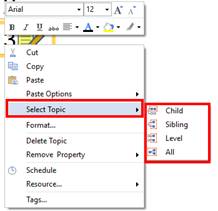
3. Or Shift + down arrow key.
4. All of the child topics are selected.
í Selecting Sibling Topics
Selected topic’s sibling topics can be added to selection.
n How to select sibling topics
1. Select the topic.
2. Right-click mouse > Select Topic > Sibling
3. Or Shift + right or left arrow key
4. All of the sibling topic are selected
í Selecting Same Level Topics
You can select a topic from a map and select all of the same level topics.
n How to select same level topics
1. Select the topic.
2. Right-click> Select Topic> Level
3. All the same level topics are selected.
í Selecting All Topics
All topics from the currently open map will be selected.
n How to select all topics
1. Select the topic.
2. Right-click> Select Topic > All
3. Or Ctrl + A.
4. All topics in the map are selected.
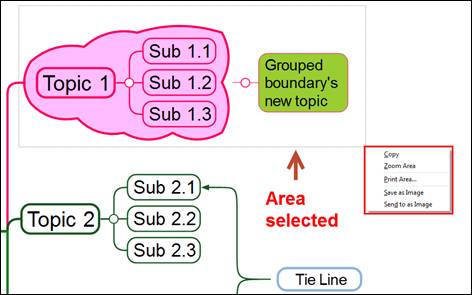
You can select certain area of the map to copy, zoom, print, save as image, and send as image.
í How to Select an Area.
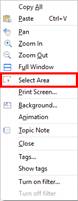
1. Right-click background.
2. Choose Select Area.
3. When mouse cursor changes to +, drag the mouse to select an area.
4. Selected area will be outlined in rectangle and you can select options.
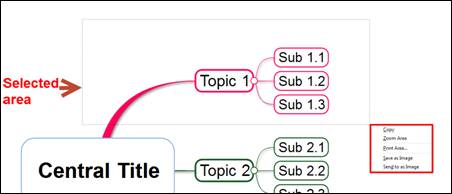
Options:
⒋ Copy: Selected area will be copied as an image where you can paste it to a map or other programs.
⒋ Zoom Area: Selected are will be zoomed in.
⒋ Print Area: Selected are will be sent to print.
⒋ Save as Image: Selected area will be saved as image file (JPG, BMP, GIF, PNG).
⒋ Send to as Image: Selected area will saved as PNG image file and automatically attached to default mail program ether Outlook or Outlook Express.
Undo button is found on the Quick Access Toolbar. You can undo any mistakes, so don't be shy experimenting with any features.
Click undo button from Quick Access Toolbar.
Extract or filter topics based on conditions and create a map of the results.
í How to Extract Topics
1. Tool > Extract Topics
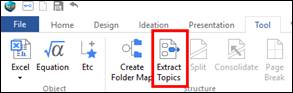
2. Enter text to search.
3. Check conditions to apply.
4. Select options.
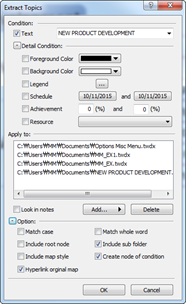
5. Click OK and you will see a new extraction result topic created within the current map.
You can change mapping directions to fit your visual mapping preferences.
í How to Change Mapping Direction.
1. Select the central topic to change the entire map or select a particular topic for changing that topic direction.
2. Home tab> Mapping Direction> Select a direction
3. Mapping direction will change accordingly.
4. If map gets all tangled up after changing direction, then simply undo the changes and use a different direction: Ctrl + Z or undo button.
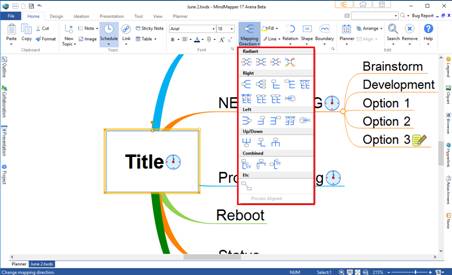
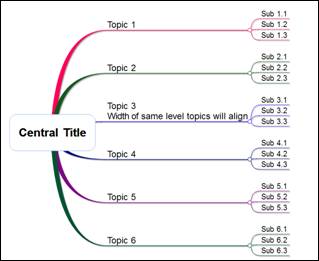
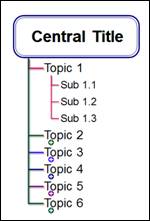
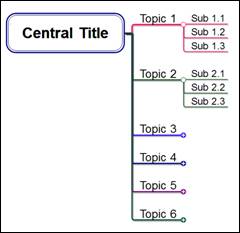
í Mapping Directions
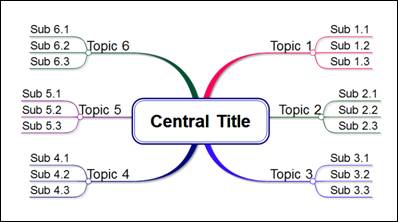
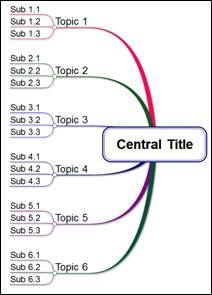
n Radial
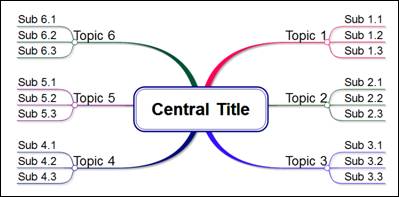
n Radial – Aligned
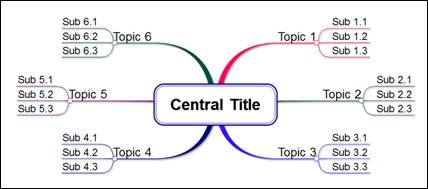
n Radial – Rounded
n Hand drawn

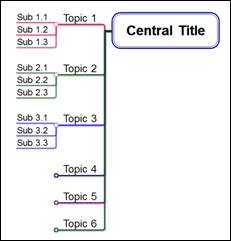
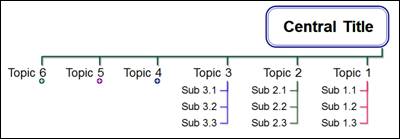
n Rightward
n Rightward Aligned (Width of same level topics will align to its widest topic length.)
n Rightward Tree
n Rightward Hierarchy
n Rightward Process Tree Type A
n Rightward Process Tree Type B
n Rightward Process Tree Type C
n Rightward Process Tree Type D
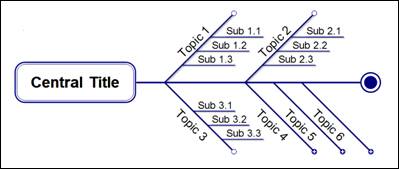
n Rightward Fishbone
n Leftward Tree
n Leftward Tree
n Leftward Hierarchy
n Leftward Process Tree
n Leftward Fishbone
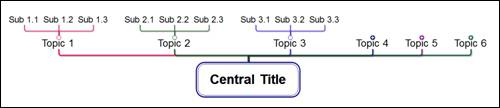
n Upward Tree
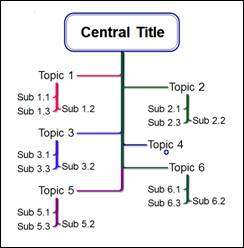
n Bidirectional Hierarchy
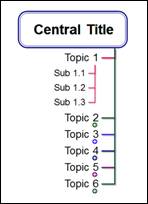
n Downward
n Combo Type 1
n Combo Type 2
n Combo Type 3

n Inherited
Used on the child topic to inherit the mapping direction of the parent topic.
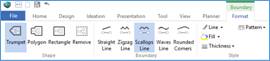
You can select a variety of branch line patterns.
í How to change branch line pattern
1. Select the central topic (to apply all) or a particular topic (to apply topic only)
2. Home tab> Format group > Branch icon
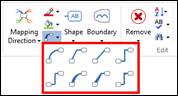
í Branch Line shapes
n Curved
n Angled
n Straight
n Rectangle
n Rounded
n Trumpet
n Merged
n Sharp
í Fonts
You can use font formatting menu to change text formatting for the selected topics or objects.
n How to set font formatting of a topic
1. Select the topic.
2. Home tab> Font group
3. Or right click and select Format
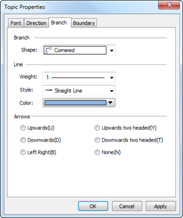
í Branch Line
Set branch line properties and colors.
n How to change line properties and colors.
1. Select the topic.
2. Home>Line> select property
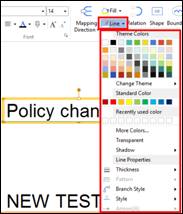
3. Or right-click and select Formatˇ> Branch
í Fill
Fill color is used inside the topic or to highlight the topic. You can change colors and set gradation, transparency and shadow.

n How to use fill command
1. Select the topic.
2. Home tab> Fill icon downward arrow
3. Select color and set properties.
This feature highlights topic text as you type.
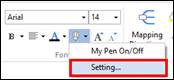
í My Pen On/Off
1. Home tab > My Pen downward arrow
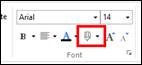
2. Click My Pen On/Off to turn on the feature.
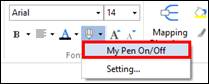
3. Create a new topic and type text. Text will be highlighted as you type.
4. Click My Pen On/Off to turn off this feature.
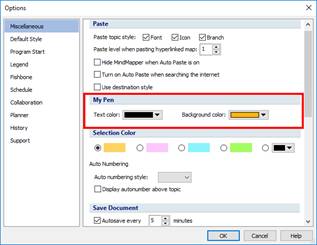
í My Pen settings
You can set the fill color and text by selecting Settingˇ
Add clipart or any images to the map. The most important function of clipart or image is to emphasize or to stand out. A picture is a worth 1000 words. Clipart or images facilitate understanding of the information much easier. You can use images to emphasize a main point or make the map more readable and standout. Also, you can convey a different message by using images while increasing the visual effects of the map. You can either use clipart that comes with the program or images stored in your computer.
í Insert Clipart to a Topic
You can insert built-in clipart collection or images from your computer or the web.
1. Select the topic.
2. Click Clipart sidebar tab.
3. Clipart pane will open.
4. Select a clipart.
í Insert Image from Your Computer
You can insert image to your topic or as a subtopic from your local computer or online storage. You can even insert the image to the background and attach it to any topics later on.
1. Select the topic.
2. Home>Image>select an option
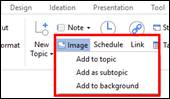
· Add to topic: image will be inside the topic.
· Add as subtopic: image will be added as a subtopic.

· Add to background: image will be added in the background.
3. Browse and select an image file and click Open.
4. Image is added.
í Insert Image from the Web
Search the web for an image and then add it to your topic. Google and Bing offer image search.
1. Search the web from Google or Bing.
2. Select an image> right-click > Copy image
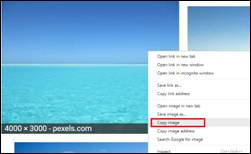
3. Select the topic. Right-click>Paste Options> Image
4. Image is added to the topic.
í Add Image to the Clipart Pane
Image files from your computer can be added to the clipart pane.
1. Select a folder form the clipart pane (ex. Favorites).
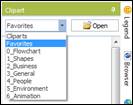
2. Navigate toward the bottom of the clipart pane and click Image > Add to clipart pane.
3. Select an image and click Open.

í Change Image and Text Positions
1. Select a topic with image.
2. Click Clipart.
3. Or open Clipart pane on the right sidebar.
4. Select image position you want.
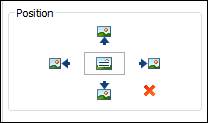
í Removing an Image Inserted into Topic
1. Select the topic with image or clipart.
2. Click down arrow button of Remove and select Clipart.
[Home tab> Remove]
3. Or right click > Remove Property > Clipart
4. Or go to the Position box in the Clipart Pane and click X.
White is default background color MindMapper map. You can change the color or insert image to the background.
í Set a Picture as the Background Image.
1. Right click any place in the background and then select Background.
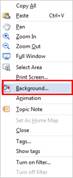
2. Choose "Select..." and browse for the picture you want to use.

3. Select the image file and click Open. You will see that image will be placed in the Background dialog box.
4. Transparency: You can set transparency of the picture. The higher the number or if the bar is more to the right, the more transparent the image will be.
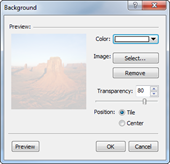
5. Position
⒋ Tile: Many tiles of the same image.
⒋ Center: Image placed in the center.
6. Click Preview to see the image as background.
7. Click OK to apply the changes.
NOTE:
It seems ideal to have transparency set to at least 80 so that the image won’t get in the way of viewing the actual map.
í How to Apply Design Theme to the Map
1. Open a new blank map or an existing one.
2. Select a design to apply.
í How to Change Color Theme of the Map
1. Design tab> Theme downward arrow
2. Select a color theme

Use Map Style menu to change mapping style of the current map. This setting is similar to default styles menu from the File>Options>Default Styles, however default styles menu applies to all new maps and not the currently open map.
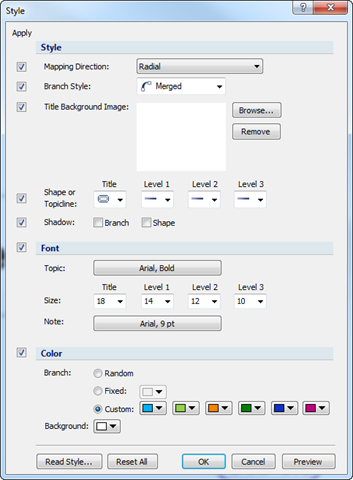
n Apply
Applies the setting to current map and not the newly created map.
n Map Style
Set default style to current map.
⒋ Mapping Direction: Select mapping direction to be used in the map.
⒋ Branch Style: Select branch style to be used in the map.
⒋ Background: Browse to select image to be used in the title background.
⒋ Shape: Select shape for the Title, Level 1, Level 2, Level 3, and From Level 4 and up.
n Font
Set default font to current map.
⒋ Topic: Select a default font.
⒋ Size: Select font size for Title, Level 1, Level 2, Level 3.
⒋ Note: Select a font size for note.
n Color
Set branch color and background.
⒋ Random: branch color is generated randomly by the program.
⒋ Fixed: a single branch color for the entire map.
⒋ Custom: 6 different colors can be selected for the branch.
⒋ Background: choose a color for the background of the map.
n Read Style
Import and apply the style of already existing map.
⒋ Click on Read Style button and select a style from MindMapper styles list.
⒋ Or browse to select a map file that you have created.
1. Click Read Style.
2. Select a map to import style from.
3. Click OK.
n Reset All
Resets style to default.
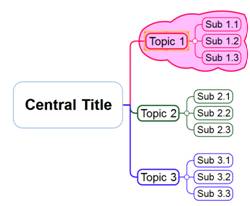
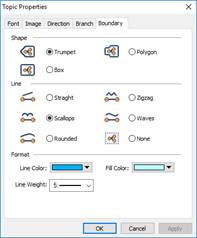
There are times when you want to put special emphasis to certain parts of the map. It’s at times like this that you can use the Boundary feature to put a boundary around the selected area. This boundary can have different line patterns, boundary shapes, and colors. The Boundary feature is located in the Home tab > Format group > Boundary, or you can simply open the Component pane on the right sidebar.
1. Select the topic.
2. Click Boundary down arrow.
[Home tab > Boundary down arrow]
3. Select the boundary shape.
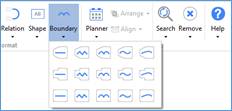
4. Boundary will appear in the map.
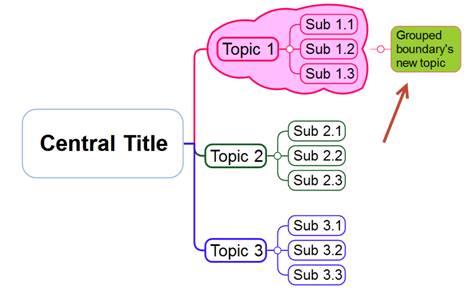
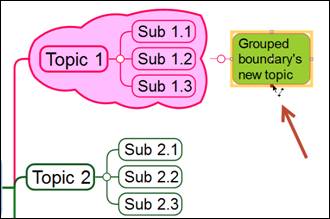
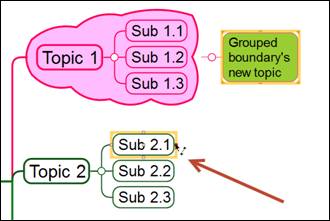
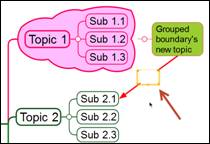
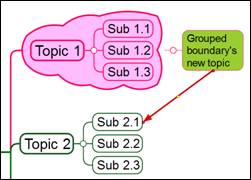
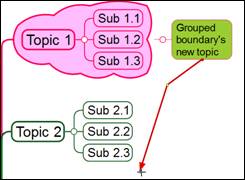
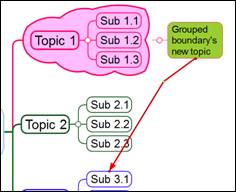
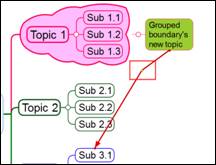
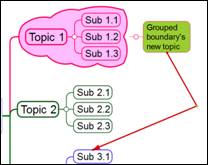
í Add Topic to Boundary
Boundary can now be recognized as a standalone topic. So you can consider the boundary as a central topic and branch off subtopics from it.
1. Select the boundary.
2. Press Spacebar to add a topic.
3. Type text and press Enter.
í Change Boundary
1. Select the boundary line or boundary area.
2. Or right-click and select Format.
3. Format Boundary menu will appear. Change shape, line, color, and pattern.
í Delete Boundary
1. Select the boundary line or boundary area.
2. Click Remove from the Shape group.

You can insert shapes to topics. By adding shape to topics, you do not have to use an image to make topics stand out.
1. Select the topic.
2. Click Shape menu down arrow.
[Home > Format group > Shape]
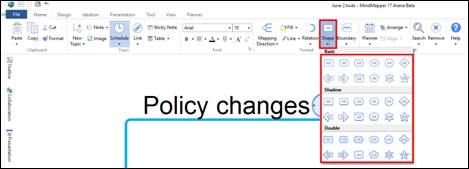
3. Choose a shape.
NOTE:
You can select multiple topics and add shape to them.
í How to Format Shape
1. Select the topic with a shape.
2. You can select different line and fill from the format group.
[Home > Format group > Line or Fill]
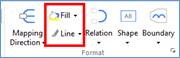
NOTE:
You can choose to apply the change to shape, branch or both.
í How to Delete Shape
1. Select the topic with shape.
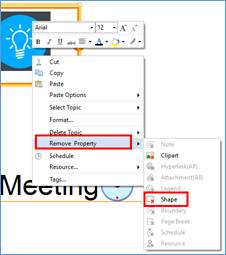
2. Go to Remove and click down arrow.
[Home tab > Edit group > Remove]
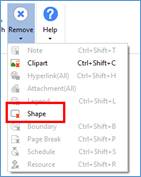
3. Or right click mouse > Remove Property > Shape
Use legends to denote current status, importance, assigned person, priority, and etc.
í How to Insert Legend to Topic
1. Select the topic.
2. Click Legend pane on the right sidebar.
3. Select a legend.
NOTE:
You can add more than 2 legends in the topic. However, if it is more than 2 legends, the sequence preset by the program will be followed.
í How to Remove Legend from Topic
1. Select the topic with legend.
2. Click Remove button and select Legend.
[Home tab > Edit group > Remove down arrow > Legend]
3. Or click Legend pane on the right sidebar and click on the legend you want to remove.
4. Or right click > Remove Property > Legend
NOTE:
It is much more effective to use the Remove Property command when you want to remove a lot of legends.
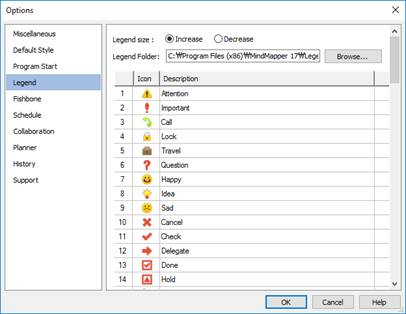
í How to Increase or Decrease Legend Size
1. File > Options> Legend> Increase or Decrease
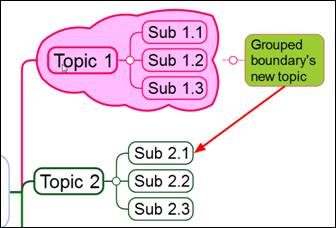
Connect two topics with relation line to express the relationship between the two.
í How to Connect Topics with Relation Line
1. Click Relation down arrow.
[Home tab > Relation down arrow]
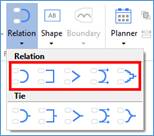
2. Select a relation line type.
3. Your cursor will change.

4. Select the first topic and pick a red dot as the starting point of the relation line.
5. Select the second topic and pick a red dot as the ending point of the relation line.
6. Once completed, you will see a line drawn between the first and the second topic. You will also see a blinking cursor in the middle where you can enter text. If you do not want enter text, click any blank space.
NOTE:
If you want to enter or edit text, you can double click the relation line.
í How to Change Relation Line
1. Select the relation line.
2. Click the red dot on either end of the relation line and drag it to other location.
3. Relation line moved to a different topic.
4. Click the yellow dot and drag it to move the relation line.
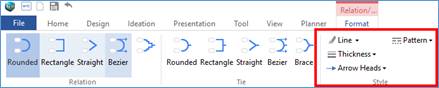
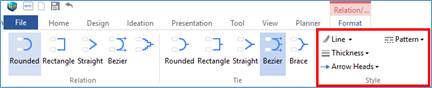
í How to Change Relation Line Format
1. Select the relation line.
2. Format Relation > Style group> Change color, thickness, arrow, and pattern.
í How to Delete Relation Line
Select the relation line and click Delete key.
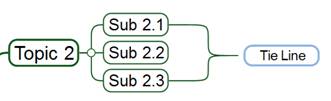
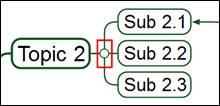
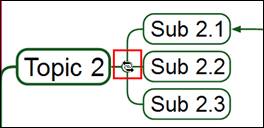
Use tie line to make two topics grouped as one.
í How to Connect Two Topics Using the Tie Line.
1. Click Relation down arrow.
[Home tab > Topic group > Connect down arrow]
2. Select a tie line type.
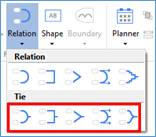
3. Your mouse pointer will change.
![]()
4. Select the first topic and pick a red dot as the starting point of the tie line.
5. Select the second topic and pick a red dot as the ending point of the tie line.
6. Once completed, you will see a line drawn between the first and the second topic. You will also see a blinking cursor at the end of the tie line were you can enter text. If you do not want enter text, click any blank space.
í How to Change a Tie Line
1. Select the tie line.
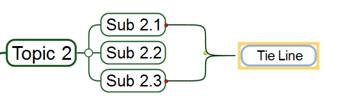
2. Click the red dot on either end of the tie line and drag it to other location.
3. Tie line moved to different topic.
4. Click the yellow dot and drag it to move the tie line.
í How to Change Tie Line Format
1. Select the line.
2. Format Relation > Change color, thickness, arrow and pattern.
í How to Delete a Tie Line.
1. Select the tie line and click Delete key.
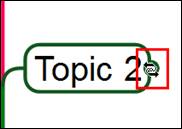
í Entering Text on the Tie Line
Once the tie line has been completed, you will see a blinking cursor at the end of the tie line where you can enter text.
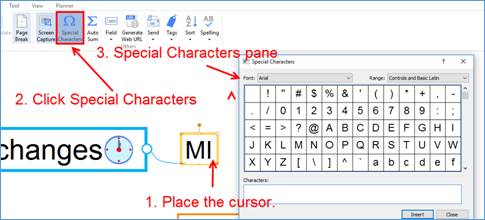
Clicking Special Characters command will open Microsoft Character Map program. Select the font, and the desired character, then press Select to add the character to the edit box. You can add multiple characters. Once you done, click Copy, then go back to your MindMapper program. Select a topic and click Paste (or Ctrl+v) to paste the special characters.
í How to Insert Special Characters
1. Select the topic and place the cursor where you want to insert special character.
2. Tools > Special Characters
3. Select a character and click OK.
Map and its contents can be viewed in numerous ways.

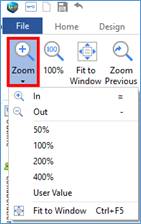
í Zoom In/Out
1. View> > Zoom dropdown menu> In or Out
2. Click View> Zoom to increase or decrease zoom level. [+] magnifying glass indicates zooming in and [-] indicates zooming out.
3. You can also select 50% to 400% zoom level or put in your own zoom level.
NOTE:
⒋ You can use your mouse and keyboard to zoom in and out.
⒋ With your Mouse: Hold Ctrl, then use the Scroll Wheel to zoom in and out With your keyboard: "=" to zoom in, "-" to zoom out
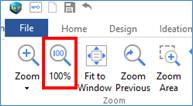
Map is displayed at its actual size.
1. View > Zoom group> 100%
í Fit to Window
You can zoom to see your entire map.
Keyboard shortcut is Ctrl+F5 or double click on a blank space.
1. View tab> Fit to Window
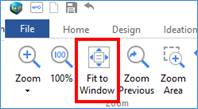
2. Or double click on any blank space in the background.
3. Or click Fit to Window icon in the status bar.
![]()
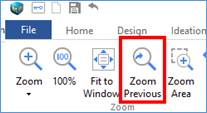
í Zoom Previous
Zoom Previous command is used when you have made a change in zoom setting and want to revert back to previous zoom setting.
1. View tab> Zoom Previous
í Zoom Area
Click Zoom Area, and then select an area on the screen using your mouse. Program will zoom into the rectangular area selected with your mouse.
1. View tab> Area
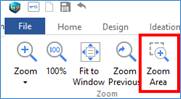
2. Mouse pointer will change to [+]
3. Drag mouse to select an area you want to zoom.
You can move your map around so that you can see other parts of the map.
í How to Pan
1. Click Pan and use your left mouse button to drag when cursor changes to hand
[View tab> Pan]
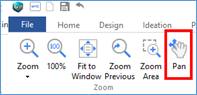
2. Or right click mouse on the map and drag. As you drag you will see mouse cursor change to a hand.
![]()
You can select certain area of the map to copy, zoom, print, save as image, and send as image.
n How to select an area
1. Right click background and choose Select Area.
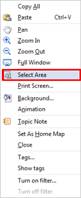
2. When mouse cursor changes to +, drag the mouse to select an area.
3. Selected area will be outlined in rectangle and you can select options.
⒋ Copy: Selected area will be copied as an image where you can paste it to a map or other programs.
⒋ Zoom: Selected are will be zoomed in.
⒋ Print Area: Selected are will be sent to print.
⒋ Save as Image: Selected area will be saved as image file (JPG, BMP, GIF, PNG).
⒋ Send to as Image: Selected area will saved as PNG image file and automatically attached to default mail program Outlook or Outlook Express.
As you add more topics to your map, it's inevitable that some maps will become quite complex with many topics and many levels of branches. You can use Roll Up / Down commands to make your map look simpler. And you can use these commands to work on one area of the map at a time.
Roll Up / Down commands are located in the Scope group of the View tab.
í Roll Up
1. Select the topic.
2. View tab> Roll Up

3. Last topic level is rolled up.
4. Each time you click Roll Up, last level topic will be hidden.
NOTE:
A small circle joins higher and lower level topics together. However, if this circle shows [+] sign, then it means that lower level topics are hidden from the branch.

If you bring your mouse over this circle, you will see mouse pointer change. If you click it, then topics will roll down or roll up depending on the position.

í Full Roll Up
Full Roll Up command rolls up all your topics and sub topics with one command.
If you choose the Title text and choose Full Roll Up, all child branches will be hidden and you’ll only be left with the Title text.
1. Select the central title or the topic.
2. View tab> Roll Up downward arrow >Full Roll Up
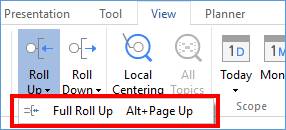
3. All of the child topics will roll up.
í Roll Down
1. Select the rolled up topic. Topics with small [+] circle at the end.
2. View tab > Roll Down

3. Each time you click Roll Down, one hidden level is rolled down and displayed.
í Full Roll Down
1. Select the rolled up the topic.
2. View tab> Roll Down downward arrow> Full Roll Down
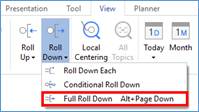
3. All child topics will roll down and displayed.
í Conditional Roll Down
Conditional roll down is the same as full roll down. However, topics that have been rolled up manually by mouse will not roll down when this feature in invoked.
n How to use conditional roll down
1. Select the rolled up topics.
2. View tab > Roll Down downward arrow> Conditional Roll Down
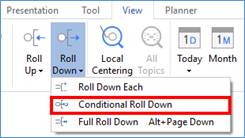
3. Only the topics that have not been rolled up manually by mouse will be rolled down.
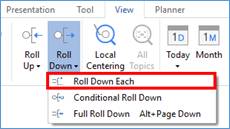
í Roll Down Each
Use this command when you want to roll down sibling topics one at a time.
1. Select the rolled up topic.
2. View tab > Range group > Roll Down downward arrow> Roll Down Each
í Using mouse to roll up/down
1. Click the connecting circle between the parent and child topics. Child topics will roll up.
2. Click on the same connecting circle to roll down.
í Preview Rolled Up Branch
Hover your mouse over the rolled up branch connecting circle [+] and you can preview the rolled up branches without clicking it to unroll.
1. Hover your mouse over a connecting circle and the rolled up branches will show without clicking it.
í Roll Effect
You can have animated roll up and down effects when using this command.
1. Click Roll Effects to turn it on or click it again to turn if off.

í Focus on Topic Using Local Centering
Local centering is used to hide all other topics except for the one you want to view. This is especially helpful if you want to concentrate working on one topic of your complex map.
n How to focus on a topic using local centering
1. Select a topic you want to focus on.
2. View tab> Local Centering

3. Only the selected topic with its subtopics are shown and the rest of the topics are hidden.
Note:
If you click All Topics, all hidden topics will be shown.
If you print with Local Centering in place, only the topics shown in the local centering will print. This is a great way to print certain topics only.
n View All Topics
All hidden topics will reappear. Using Local Centering command will hide all topics except for the selected topic. Click All Topics to unhide all topics or view all topics.
1. View tab> Scope group> All Topics
Note:
Please note that hidden topics are not deleted. They are simply hidden from the computer screen.
í Centrally Focusing on a Topic
You can bring a topic to center of your work space
1. Select the topic.
2. Press F5.
3. Topic is now in the center of your work space.
v Viewing Topics by Modified Date
Highlight topics changed during the given period of time. For example, selecting 3 days will highlight all topics created or changed in the last 3 days.
n How to select time period
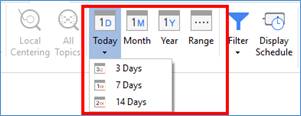
⒋ Today: Topics either created or changed today will be selected.
⒋ 3 Days: Topics either created or changed in the last 3 days.
⒋ 7 Days: Topics either created or changed in the last 7 days.
⒋ 14 Days: Topics either created or changed in the last 2 weeks.
⒋ 1 month: Topics either created or changed in the last month.
⒋ 1 year: Topics either created or changed in the last year.
⒋ Range: Select your own time period.
Fields allow you to show some sample text, and when the user clicks the text, the text disappears and you can enter real data. You can easily make a template map using fields.
1. Select the topic.
2. Tool > Field> Set Field
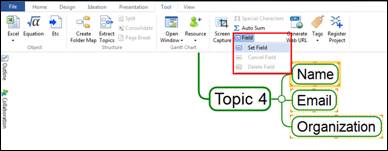
3. The text will become light gray color. You can change the color and shape of the topic.
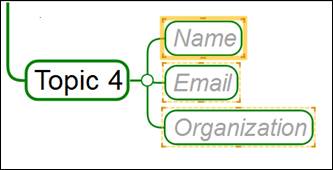
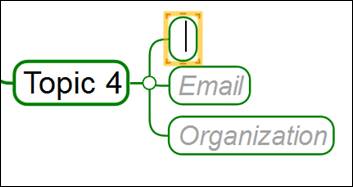
4. Now when you double-click this topic, the sample text will disappear, allowing you to enter your data.
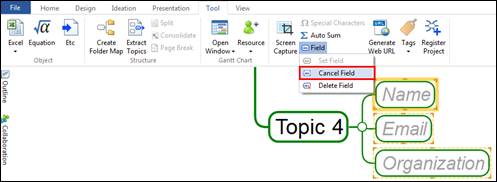
í How to Cancel Field
Convert the field back to normal text topics.
1. Select the topics that have been converted to field.
2. Tool> Field > Cancel Field
í How to Delete Field
Remove all field topics.
1. Select a topic with field.
2. Tools > Field> Delete Field

If you wish to maximize your monitor's real estate space, pressing Full Screen will maximize the
MindMapper window and also hide all menus and toolbars so you have the most optimal space to work
on your maps.
1. View tab> Full Screen > Full Screen

2. Or press F11.
3. Or click Full Screen icon in the status bar.
![]()
4. Press Esc to return to normal view.
í View Full Window
This feature displays full view of your map in MindMapper application window.
1. View> Full Screen> Full Window

2. Or right click mouse > Full Window
3. Press Esc key to return to normal view.

n Tile Horizontally
1. View tab> Tile Horizontally
2. All of opened map windows will be aligned horizontally and not overlapping each other.
n Tile Vertically
1. View tab> Tile Vertically
2. All of opened map windows will be aligned vertically and not overlapping each other.
n Cascade
1. View tab> Cascade
2. All opened map windows will overlap with each other.
í Switch Windows
Use this command to switch to different map that is currently open.
1. View tab> Switch Windows
2. Select a map you want to view.
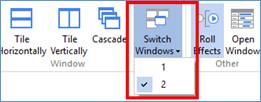
í Open the Folder of the Currently Open Map
1. Right-click on the name of the map file from the bottom.
2. Select Folderˇ
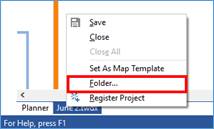
Use alignment to align topics or justify topic sizes. It’s also used to align topics and object such as floating topics and flow charts.
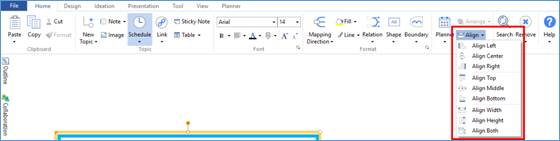
n Align Left
Select more than 2 topics or objects and then click Align Left. All selected topics or objects will align to the left.
n Align Center
Select more than 2 topics or objects and then click Align Center. All selected topics or objects will align to the center.
n Align Right
Select more than 2 topics or objects and then click Align Right. All selected topics or objects will align to the right.
n Align Top
Select more than 2 topics or objects and then click Align Top. All selected topics or objects will align to the top.
n Align Middle
Select more than 2 topics or objects and then click Align Middle. All selected topics or objects will align to the middle.
n Align Bottom
Select more than 2 topics or objects and then click Align Bottom. All selected topics or objects will align to the bottom.
n Align Width
Select more than 2 topics or objects and then click Align Width. All selected topics will have the same width of the longest topic, or objects will have same width.
n Align Height
Select more than 2 topics or objects and then click Align Height. All selected topics will have the same height of the highest topic, or objects will have same height.
n Align Both
Select more than 2 topics or object and then click Align Both. All selected topics will have the same width and height of the widest and highest object.
The Arrange menu will only work on texts or objects that have been added to the background.
1. Select text or objects to arrange.
2. Click Arrange drop down menu.
[Home tab>Arrange]
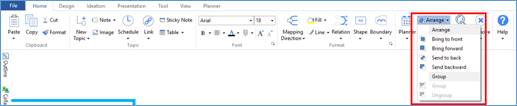
3. Select arrange options.
Selected object will be brought all the way to the front.
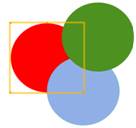
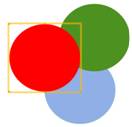
n Bring Forward
Selected object will be brought one level forward.

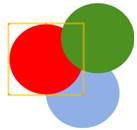
n Send to Back
Selected object will be sent all the way to the back.

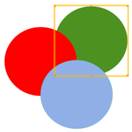
n Send to Backward
Selected object will be sent to one level backward.
You can form many objects into one group so that it is easier to move them about in a map. It is also convenient to change multiple objects in a group setting.
n How to select objects to be grouped.
1. Click Group
[Home> Arrange > Group]
2. Selected topics will be grouped.
n How to ungroup
1. Select grouped object and click Ungroup.
[Home> Arrange> Ungroup]
You can control spacing between parent topics and child topics or between higher levels and lower levels.
í How to Adjusting Spacing Between Topics
1. Click the topic with highest hierarchy in the area you are editing.
2. Click Spacing down arrow button for dropdown menu.
[Design tab > Spacing down arrow button]
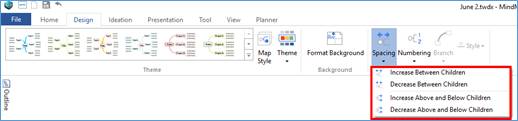
3. Select an option.
4. After the selection has been made, you can click on the Spacing button if you want to repeat the same spacing option. If not, you would have to select another spacing option.
í Spacing Dropdown Menu
n Increase between children
Increase space between selected topics and their children topics.
n Decrease between children
Decrease space between selected topics and their children topics.
n Increase above and below children
Increase space between children topics.
n Decrease above and below children
Decrease space between children topics.
NOTE:
Spacing only applies to selected parent topics and their children topics.
If you have a lot of hierarchies or many levels for which you want to modify spacing, then you would have to select all relevant topics and apply the spacing command.
MindMapper map consists of hierarchies and structures. Use auto numbering to bring out the hierarchical structures more visually and logically.
í How to Start Auto Numbering?
1. Design tab> Format group> Numbering.
2. Select auto numbering format.
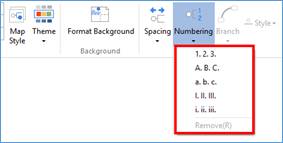
3. Entire topics in the map will have auto generated numbers.
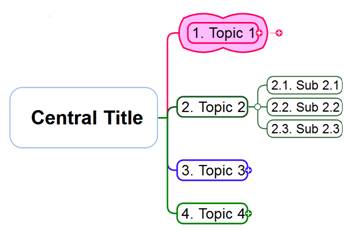
You can topics in different ways such as sorting by alphabetically, legends, colors and schedule.
í How to Sort
1. Select highest hierarchical order parent topic of the subtopics you want to sort. If the root (main title) is selected, then the entire map is sorted.
2. Tool tab > Sort
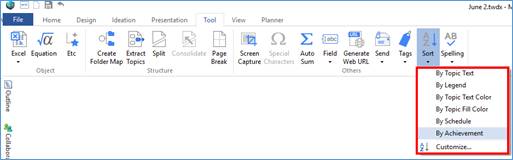
3. Select a condition. Topics will be sorted according to selected condition.
í Sort Conditions:
n Topic Text: Alphabetically sorted from A to Z.
n Legend: Sorted by legend icons in the same order as shown in the legend pane.
n Text Color: Sorted by text color.
n Fill Color: Sorted by filled color.
n Schedule: Sorted by starting date.
n Achievement Rate: Sorted by highest achievement rate.
n Customize: Using the Customize option, you can make even more powerful sorting conditions.
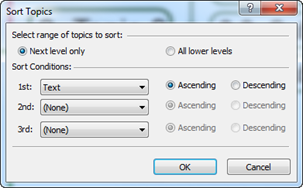

1. Select the topic.
⒋ If you select a parent topic that has child topics, spell check will check the parent and its child topics.
⒋ Select the central topic if you want to check the entire map.
2. Tool> Spelling
3. Click Change or Ignore to either accept or reject the suggested word.
It’s easy to find and open a map file since it saves the file name and the location of the folder. It is best to save your file often when working on a map. You can password protect your map so that others can’t access your map.
1. File > Save
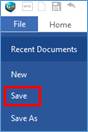
2. Or Ctrl + S
3. Select the folder, name the file, and click Save. Note that central title of the map is the default save name.
v Save in Different File Format
Save MindMapper file in different format.
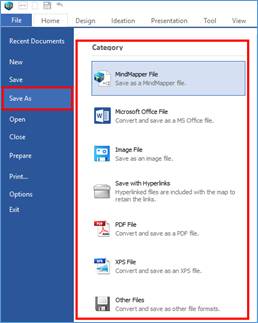
Supported Files
1. MindMapper file (*.twdx): Latest MindMapper file format (supports XML)
2. MindMapper 12 Pro file (*.twd): MindMapper 12 and 2009 file format
3. MindMapper 2008 file (*.twd): MindMapper 2008 file format
4. MindMapper 5 file (*.twd): MindMapper 5 file format
5. MindMapper 3.0 - 4.5 file (*.twd): MindMapper 3.0 to 4.5 file format
6. Text file (*.txt): Text file without formats
7. Rich Text Format file (*.rtf): Text file with formats
8. Extensible Markup Language file (*.xml): File with web compatibility
9. MindMapper Mobile file (*.twm): Mobile file which does not support XML
10. Enhance Metafile (*.emf): Vector-based image file
11. Windows Bitmap file (*.bmp): Default Windows image file
12. JPEG file (*.jpeg, *.jpg): JPG image file
13. GIF file (*.gif): GIF image file
14. Portable Network Graphics (*.png): Compressed graphic image file
í How to Save MindMapper File in Older Format
n Save as MindMapper 3.0 - 2008 Map
If you have colleagues are using our legacy versions and you wish to share your maps with them, you need to save your file as one of the previous versions for compatibility.
1. File > Save As> MindMapper File> Local or Google Drive
2. Choose the file type and save.
· MindMapper file (*.twdx): Latest MindMapper file format (supports XML)
· MindMapper 12 Pro file (*.twd): MindMapper 12 and 2009 file format
· MindMapper 2008 file (*.twd): MindMapper 2008 file format
· MindMapper 5 file (*.twd): MindMapper 5 file format
· MindMapper 3.0 - 4.5 file (*.twd): MindMapper 3.0 to 4.5 file format
í Save Map as a Different Image File
n Save as an Image
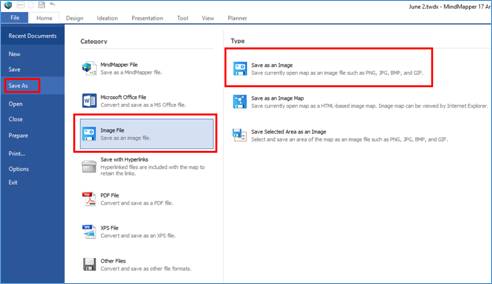
1. File>Save As>Image File>Save as an Image
2. Select a folder and create a file name.
3. Select a file type:
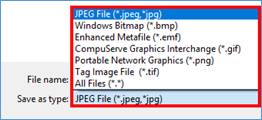
NOTE:
Here is a list of image files you can convert to: JPG, BMP, EMF, GIF, TIF, and PNG formats.
TIP: If you want to save the map to print with high definition, increase the zoom to above 300% and save the image. If it is a large print, save it at 400%.
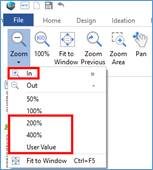
n Save as Image Map
Save your current map as a webpage(HTML document) while preserving the graphical design of your mind map. This is especially helpful when you wish to emphasize the graphical relationship or flow of your mind map.
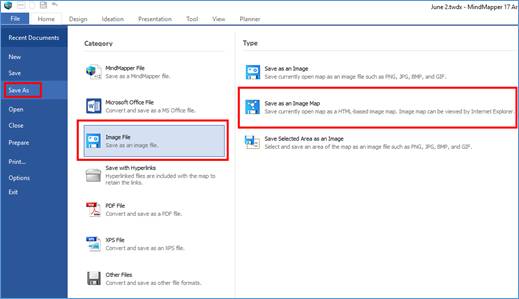
1. File>Save As> Image File> Save as an Image Map
2. Browse to select a map file you want to convert.
3. Select the folder path and name the HTML file.
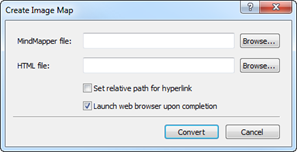
4. Check Relative path for hyperlink and Launch web browser when completed.
5. Click Convert.
NOTE:
If you need to move this image map file, you would need to move HTM and PNG files together.
n Save Selected Area as an Image
Select an area of your current map, then save the selected area as an image file.
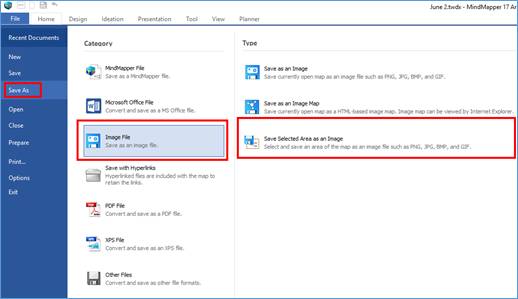
1. File > Save As> Image File> Save Selected Area as an Image File
2. Drag you mouse to select an area to save when cursor changes to [+]
3. Select folder and name the file.
í Save as PDF
Save your mind map as a PDF document. PDF is the global standard document format. You can save your mind maps as PDF file and most everyone will be able to view your mind map.
1. File > Save As> PDF File> PDF
2. Select a folder and name the file.
í Save as XPS
1. File > Save As> XPS File> XPS
2. Select a folder and name the file.
í Save as Other File Formats
1. File > Other Files> Other Formats
2. Select a folder and name the file.
⒋ Text Save your map as text file, preserving only your topic text.
⒋ RTF Save your map as Rich Text Format file.
⒋ XML Save your map as Extensible Markup Language file.
í Save as Microsoft Office Files
This is covered in the Document Creation Tool section’s Export and Import subsections.
Map’s hyperlinked files can be compressed and saved to a folder along with the map.
í How to Save a Map File Including the Hyperlinks
1. File > Save As> Save with Hyperlinks> Save as Pack
2. Saved pack file has TWDS extension.
Hyperlinked files are lost when you open the map in different computer or location. To prevent broken links, this feature compresses the linked files into a folder and decompresses them when opening the file in a different location so that hyperlinks are preserved. Simply put, it zips the map and linked files into one zipped file.
í How to Open a Packed File or the TWDS File
1. Click on the TWDS file.
2. You will be asked to unpack the file.
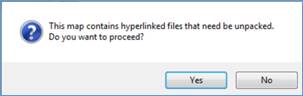
3. Select a folder location where the packed file will be unpacked and click OK.
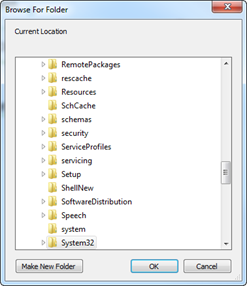
4. Unpacked MidMapper file along with hyperlinked files will appear in the folder.
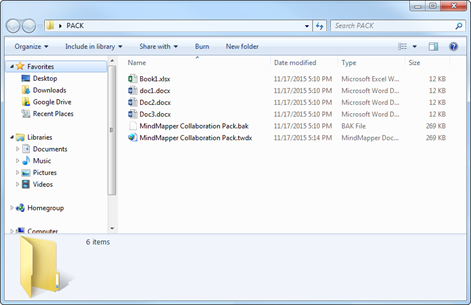
From MindMapper print menu, you can print the map, schedule, resources, presentation slides, and selected area of the map.
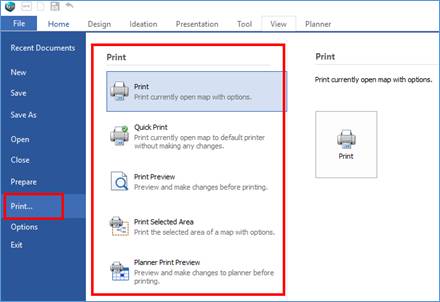
Print: Print with options.
Quick Print: Print to default printer without going through print dialog box.
Print Preview: Preview and make changes to page before printing.
Print Selected Area: Print selected area of a map.
Planner Print Preview: Preview and make changes to planner before printing.
í Print
Select print settings and print.
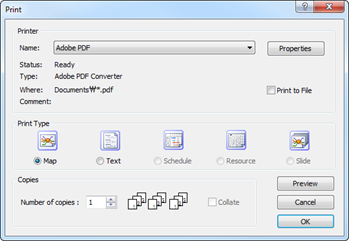
⒋ Name: Select the printer to print.
⒋ Properties: Change printer settings.
⒋ Map: Map printout.
⒋ Text: Text printout.
⒋ Schedule: Schedule printout.
⒋ Resource: Resource printout.
⒋ Slide: Slide printout.
⒋ Copies: Number of copies to print.
⒋ Preview: Preview and make changes to page before printing.
Print to default printer without going through print dialog box.
1. File>Printˇ>Quick Print>Quick Print
í Print Preview
Preview and make changes to the map before printing.
1. File>Printˇ>Print Preview>select options:
⒋ Map
⒋ Text
⒋ Schedule
⒋ Resource
⒋ Slide
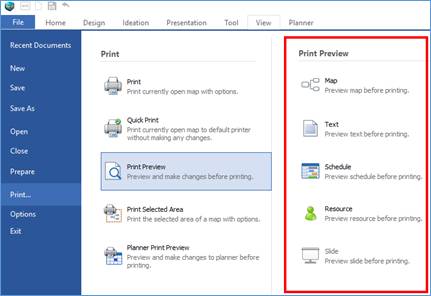
2. Selected option’s preview screen will appear.
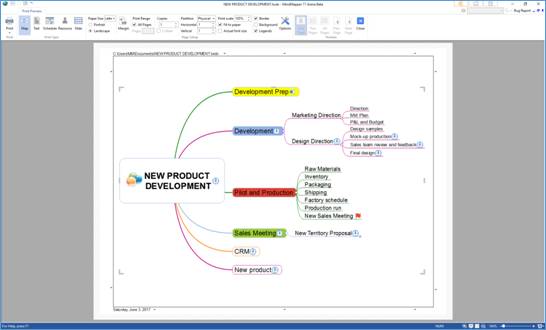
n Print preview screen
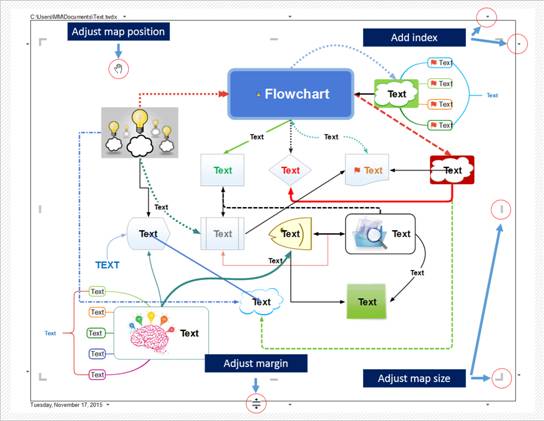
1. Map position control: You can left click mouse and drag map to move.
2. Margin control: Click on the border to change margin.
3. Map size control: Click on the black tab-like guide to resize map.
4. Add index: Click on (″) and add items you want to add to index.
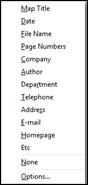
n Print preview menus
⒋ Print size: Default is letter size and other sizes are dependent upon your printer.
⒋ Portrait/Landscape: Choose portrait or landscape mode. And you can see the changes reflected in real-time.
⒋ Print Range: Choose which pages to print. This is enabled only with multiple page printing via physical or logical printing.
⒋ Copies: Choose number of printout copies.
⒋ Physical Partition: If you have a large map that will not fit into one page, then you can print your map divided by number of pages. For instance, if you choose Horizontal 2, and Vertical 2, your map will print out in 4 sheets of paper, 2 across and 2 down. You'll need to tape or glue the printout together to view the entire map.
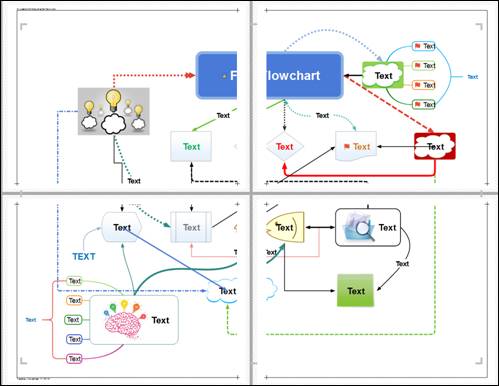
NOTE:
a. Maximum page limit is 10x10.
b. When a map is printed at 100%, there might be a chance that it will exceed the paper size. When this happens, you can click on the arrow toward the area where the map has exceeded the paper size. Once clicked, additional paper will be added and print partition set to physical.
⒋ Horizontal and Vertical values: Specify the number of pages to print for physically partitioned map.
⒋ Logical Partition: Choose logical partitioning to print to multiple pages with each topic logically divided. Logical Partition breaks your map into logical pieces. Each logical piece is one 1st level topic with its subtopics. This one topic will be printed on one sheet of paper. However, the very first page consists of central topic with all 1st level topics.
⒋ Print Scale: Scale your map to different paper size. If you select 50% with 20 point font, then it will print with 10 point font size.
⒋ Fit to Paper: Print will enclose entire map in a single paper.
⒋ Actual Font Size: Print will use same font size as screen font size at 100% regardless of page per size.
⒋ Border: Decide if you want to print border.
⒋ Background: Decide if you want to print background color.
⒋ Legends: Decide if you want to print legends.
n Adjust margin
You can click on the margin line in the preview screen to increase or decrease margin.
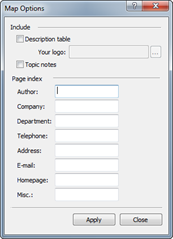
n Description table
Insert description table when printing such as title of the map, author, date, file name, and company.
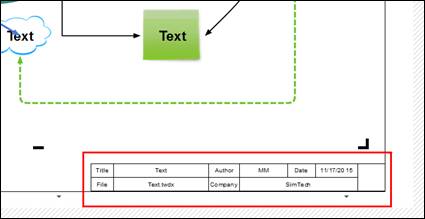
n Topic notes
Note contents from topics will be printed.
n Page index
You can insert index information.
v Split a Map into Another Map
í How to Split a Map
To split a large map into 2 or more maps, click the topic that you wish to break off, then click Split button.
1. Select the topic that you wish to split from the main map.
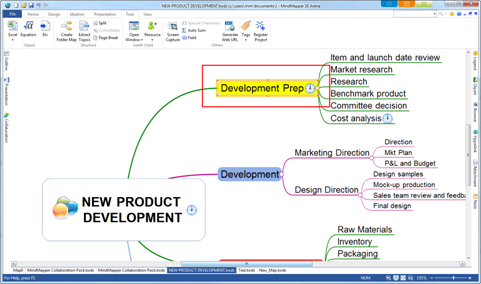
2. Tool tab> Split

3. Split command will generate a new map with the selected topic as the central title. You must save the newly created map for this feature to work.
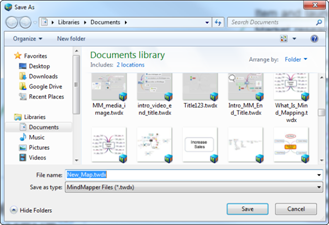
4. Once saved, the split topic from main map will show a link to the split map and split map will have a link back to the main map.
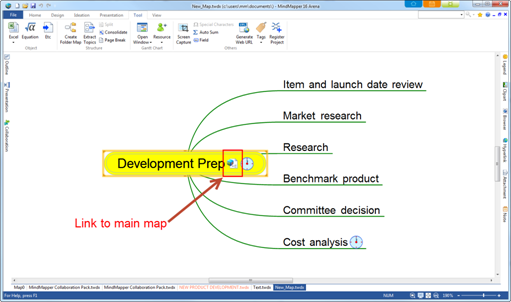
Main map will have name of the topic with hyperlink to the split map.
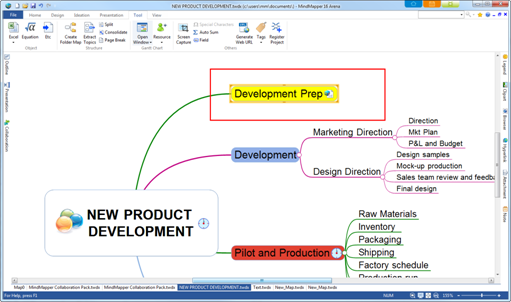
í How to Consolidate a Split Map
Consolidate is the direct opposite of split. Consolidate will take split files or hyperlinks files and combine them into a single file.
1. Select a topic from the main map that has been split off.
2. Tool tab > Consolidate
3. Split map will be added under the selected topic.
Clicking Screen Capture will hide your MindMapper program and show you screen. Select an area of the screen using your mouse, and the selected area will automatically paste into your MindMapper program as an image under the selected topic.
í How to Capture Screen
1. Open an application or internet webpage to capture.
2. Go to the current map and select the topic.
3. Tool tab> Screen Capture

4. MindMapper program will hide, and your screen will show with mouse cursor changed to [+].
![]()
5. Drag to capture screen.
![]()
6. When done, the captured screen will be added to your map.
Numbers entered in the children topics will be automatically added up in the parent topic.
í How to Use Auto Sum
1. Select the topic.
2. Tool tab> Auto Sum

3. You will see [0] appear on the parent topic and all the children topics.
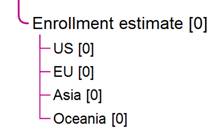
4. As you enter numberical values in the child topic, automatic sum is calucated in the partent topic.

Set options for the program. File> Options.
í Default Style
Select default style settings.
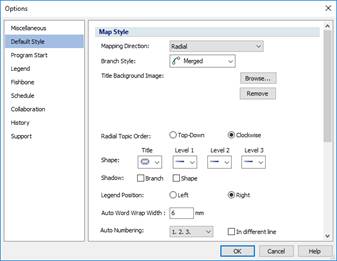
⒋ Mapping Direction: Select mapping direction to be used in the map.
⒋ Branch Style: Select branch style to be used in the map.
⒋ Background: Browse to select image to be used in the title background.
⒋ Shape: Select shape for the title, level 1, level 2, level 3, and from level 4 and up, level 3 shape will be inherited.
⒋ Shadow: Apply shadow to topic or shape.
n Font
Set default font to a new map.
⒋ Topic: Select a default font.
⒋ Size: Select font size for title, level 1, level 2, level 3.
Note: Select a font size for note.
n Color
Set branch color and background.
⒋ Random: branch color is generated randomly by the program.
⒋ Fixed: a single branch color for the entire map.
⒋ Custom: 6 different colors can be selected for the branch.
⒋ Background: choose a color for the background of the map.
n Read Style
Import and apply the style of already existing map. Click on Read Style button and select a style from MindMapper styles list. Or browse to select a map file that you have created.
1. Click Read Style.
2. Select a map to import style from.
3. Click OK.
n Reset All
Resetting to program default style.
Note:
Changes made to default style will apply to newly created file.
Legends are small icons that can be inserted into a topic. They visually enhance the topic meaning and message. Each ch legend has its own meaning, but that can be changed to your needs.
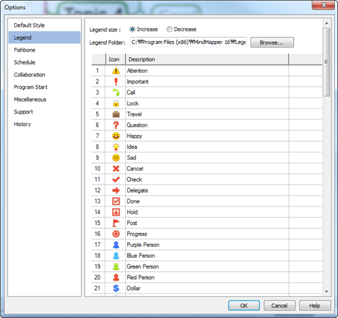
n How to change the meaning of each legend icon.
1. Select Legend
2. Click on the Description box next to a legend icon.
3. Insert a new description.
4. Click OK button to apply the changes.
í Fishbone
Image and backbone line can be chosen when selecting fishbone mapping direction.
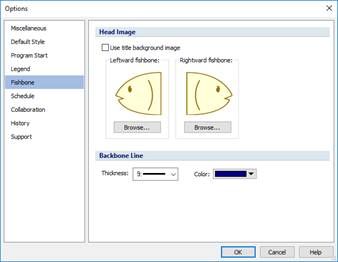
1. Use image shown in the box.
2. Decide if you want to use title background image as the one selected here.
3. Browse and select images for the left and right images for fishbone head.
n Backbone line
Choose color and thickness of the fishbone lines.
í Schedule
Set options for schedule.
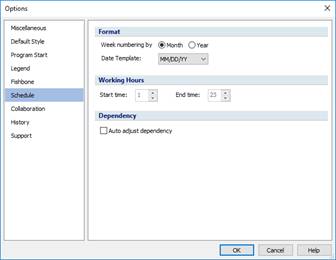
n Format
⒋ Set week numbering option: Monthly (M) starts with week 1 and ends with week 5. Yearly (Y) starts with week 1 and ends with week 52.
⒋ Set date option: MM/DD/YY, DD/MM/YY, YY/MM/DD
n Working Hours
⒋ Set work hours.
n Dependency
⒋ Set schedule dependency. Checked “Auto Adjust Dependency” will automatically set dependency.
n Calendar
⒋ Set first day of week for the schedule.
í Collaboration Options
Options for setting collaboration.
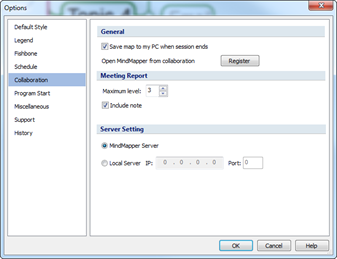
n General
Check box if you want to save the collaboration map to your PC when session ends.
n Meeting Report
Maximum: set maximum map level to be converted to report.
Include note: add note to report
n Server Setting
Most users are set to MindMapper Server for collaboration. If you have on-premises collaboration server, input the IP and port number. However, the on-premises client version cannot access the MindMapper server even if it is set to MindMapper Server. It will only try to access the internal organization’s IP address.
í Program Start
Set options when starting the program.
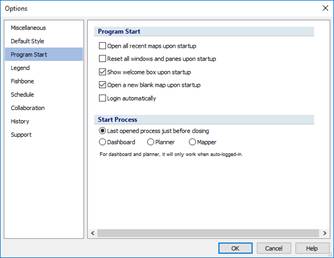
⒋ Open all recent files upon startup: Option to open all recently opened files when startup.
⒋ Reset all windows and panes upon startup: Resets position of program windows and panes. If checked, the program must restart.
⒋ Show welcome box upon startup: It opens up the welcome box that has map style, map templates, map samples, recent files, and product news.
Open a new blank map upon startup: This is asking if you want to open a new map automatically when staring MindMapper.
⒋ Login automatically: This will automatically login you into the planner and dashboard.
⒋ Start Process: You have the option to set which screen to appear when you startup MindMapper. Dashboard and planner screen will only work when you are auto logged in.
í Miscellaneous
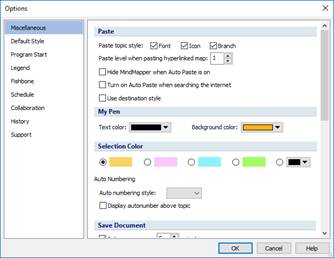
n Paste
Paste topic style: Copying a select topic and pasting unto another branch with source style intact. It copies only the format, so you can quickly format uniformly. You have the option to choose Font, Icon, and Branch.
⒋ Paste level when pasting hyperlinked map.
⒋ Hide MindMapper when Auto Paste is on.
⒋ Turn on Auto Paste when searching the internet.
⒋ You can have Auto Paste feature turned on automatically when searing the internet.
n My Pen
My Pen is a feature that is used to distinguish topics or phrases from the rest of the map. You have the option to pick text and background color.
n Selection Color
When you select a topic, an orange colored box appears encapsulating the topic contents. You can have this color changed.
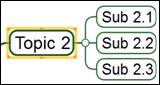
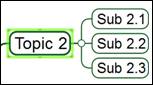
n Auto Numbering
⒋ When Auto Numbering feature is used, the numbering type can be set here
⒋ When “Display auto number above topic” is checked, then auto numbering will appear on top of the each topic text.
n Save Document
⒋ Auto Save: Determine when the program auto saves the open map.
⒋ Make a backup copy: When a map is being saved, a backup copy is automatically generated. Backup map has the last saved information. When your map becomes damaged, you can open up the backup copy. Backup copies have extension .bak and have the same file name in the same directory.
⒋ Auto save file including attachments: Map file along with all of embedded attachments are automatically saved.
n Location
⒋ Working Directory: Default directory to save and open map files from. You will saving maps to and opening them from this directory.
⒋ Clipart Directory: Default directory to look for images to be inserted into the map.
⒋ Search Provider: You can specify default internet search page when browser is initiated to search the internet.
n Etc
⒋ Radial direction: Set the level 1 topic direction to clockwise or top-down when radial mapping direction is selected.
· Top-down: Start from top right to bottom and then goes to top left to bottom.
· Clockwise: Start from top right to bottom and then goes to bottom left to top.
⒋ Legend position: Legend can be positioned before the text in the topic or after the text in the topic
⒋ Default word-wrap: You can set the length of text fields so that when text is full, it will automatically change lines. However, you can always change the length and height of the topic box manually.
⒋ After creating a new topic, keep focus on the parent topic: New subtopic created from the parent topic is automatically selected and waits for your next input
⒋ After creating a new topic, move focus to the new topic: New subtopic created from the parent topic is automatically selected and waits for your next input
⒋ Preview contents of note when mouse touches note icon: The entire contents in the note can be viewed when a mouse touches the note icon. However, preview will only show texts.
⒋ Open hyperlinks in a new browser: If checked, hyperlinked internet address will open in a new browser.
⒋ Open hyperlinks (webpage, folder, and text) with the built-in-browser: Built-in-browser from the browser pane will open hyperlinked webpage, folder, and text.
⒋ Fit map to window by double clicking on the blank background: Map will zoom to fit in the window.
⒋ Move topic freely while holding down Shift key: You can move topics anywhere by dragging the topic while holding down Shift key. Uncheck if you want to move topics freely by dragging the mouse.
⒋ Show the last clicked position: This will show you the last position where your mouse was clicked. However, it will only show in the blank space.
⒋ When TWDX fixe does not open from Windows – Recovery file link: Click Recovery file link when you cannot open TWDX file form Windows Explorer.
í Support
You can get updates, look at contact information, go to homepage, and check the release version.
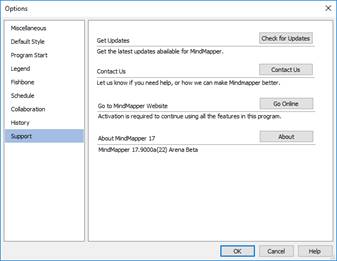
n Check for updates
You can click Check for Updates to see if there are new updates available.
n Contact Us
Lists contact information if you have any questions.
n Go Online
Directs you to MindMapper website.
n About
Information about installed version of MindMapper can be found here.
í History
You can view or restore version of map you have saved.
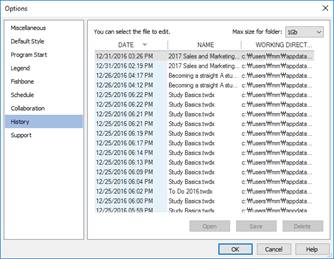
Fully utilizing MindMapper for Work
MindMapper is very effective tool for delivering systemic and logical information to intended audience.
MindMapper provides built-in presentation capabilities. Main advantages of using MindMapper presentation feature are convenience and effectiveness. You can work on a map and present it when you need to and because information is in graphical format, it is easier to convey the message.
í Brief with Outline
Present with outline window open.
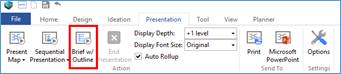
1. Open the map you want to present.
2. Click Presentation tab to start presentation mode.
3. Select Brief with Outline.
You will see an outline of the map in the left window.
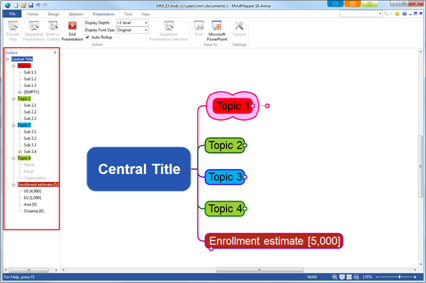
4. The topic you click in the outline window will be highlighted in the main window, and all other topics will dim. If you click a topic that contains subtopics in the outline window, then the whole sub topics will become highlighted.
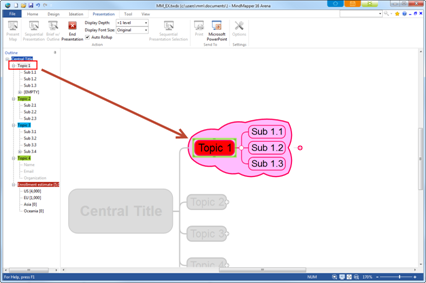
5. Click End Presentation to terminate presentation.
í Present Map
You can present your map just like PowerPoint slideshow.
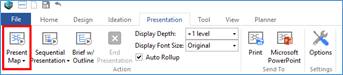
n How to present map as a slideshow.
1. Open the map you want to present.
2. Click Presentation tab to start presentation mode.
3. Select Present Map. Left window will show slides and outline. Right top corner will show slide controls. You can click on the slides to show the slides one by one, or click on the outline to highlight and dim. If you want to present full screen, unpin the left window and use slide control to move forward and back or use the left and right arrow key.
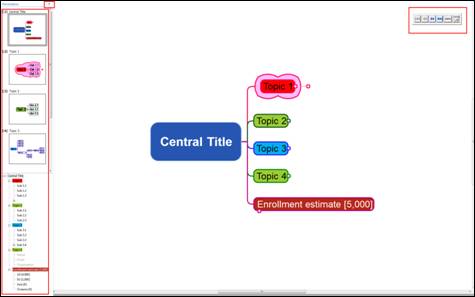
Note:
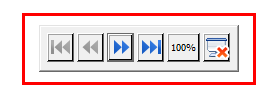
Use the slide control to move forward and back or move to the first and last slide. Also, set the zoom for the presentation from 33% to 400%. You can right click to control slides as well. Just clicking your mouse will move forward a slide. And use the left and right arrow to move forward and backward. Use ESC key to end slide.
í Sequential Presentation
Select the topics to be presented. The selected topics will be presented in mind map hierarchical order.
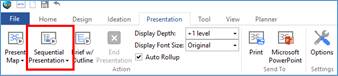
n How to select topics for sequential presentation
1. Press Sequential Selection.
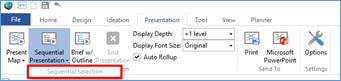
2. Select the topics to be presented in the order that you select. You can pick multiple topics.
3. Selected topics will show sequential presentation icon.
4. Select the topic again to delete sequential presentation selection.
n How to present in sequential presentation mode
1. Press Sequential Presentation.

2. Slides will show in mind map hierarchical order. In radial map, the highest is the top-right and works its way down to clockwise direction.
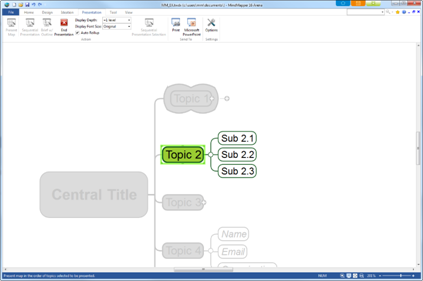
3. Press End Presentation to terminate.
í Presentation Pane Display Options
Note:
By default, presentation will display central title along with its 1st level topics. Subsequent slides will include 1st level topics with their subtopics.
n How to change display options.
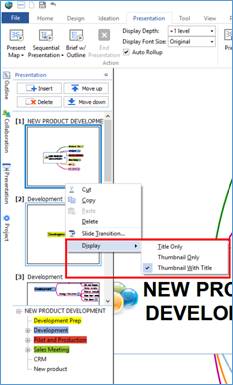
1. Right click on any slides or empty space within the presentation pane.
2. Select the display option.
⒋ Title Only
⒋ Thumbnail Only
⒋ Thumbnail with Title
í Change the Order of Slides
You can change the order of slides to better fit your presentation.
n How to change the slide order
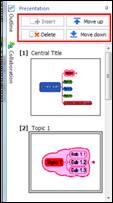
1. Select slide thumbnail and move it up or down.
2. Use the delete button to remove a slide.
Note:
⒋ Insert: Click the topic in the main map and click insert and select a slide in the presentation pane to insert the topic.
⒋ Hyperlink: Select the topic with hyperlink. Right click and select Add To Presentation.
í Presentation Options
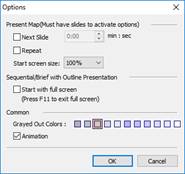
⒋ Grayed Out Colors
Non-selected items are grayed out during the presentation. And you can set colors you here.Next Slide
⒋ Nest slide: You can set specific time till next slide.
⒋ Repeat
1. Presentation is set to repeat.
2. Press Esc key to cancel.
⒋ Animation: Shows animated effect when turning to the next page.
⒋ Start screen size: You can set zoom to start off your presentation.
⒋ Star with full screen: This option will present the map in full screen.
v Print Map or Send It in Different Format
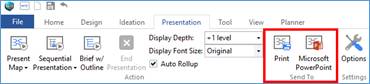
í Print
1. Presentation > Print
2. Set print options and print.
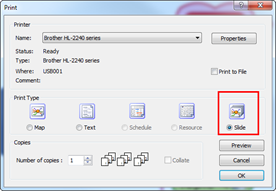
í Send to PowerPoint
1. Presentation > Microsoft PowerPoint
2. Click OK to export using default template using auto generated file name, which is usually the map name.
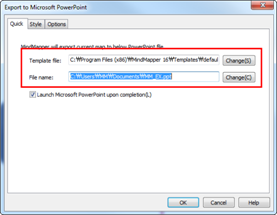
v Export to MS Office Documents (found in Save As menu)
MindMapper is the first mind mapping program ever to develop map’s bidirectional conversion to and from MS Office documents. The current version has export to Office documents included in the Save As menu.
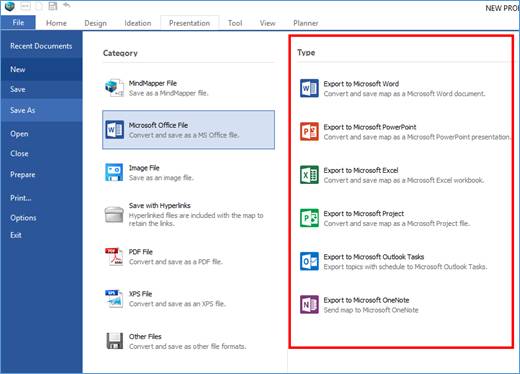
í How to Export Map to Word Document.
1. Open the map that you want to export.
2. File > Save As> Microsoft Office File> Export to Microsoft Word
3. Export to Microsoft Word dialog box will appear.
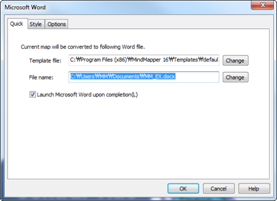
4. Template file: Convert map to Word document with predefined template.
5. File name: Choose your folder and filename for the Word document.
6. Check if you want to launch Microsoft Word upon completion
7. Style tab: Predefined template styles can be viewed and selected.
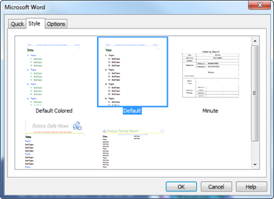
8. Options tab
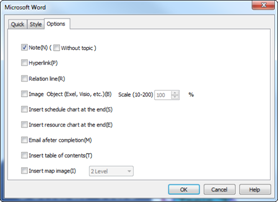
⒋ Note: Include contents of note.
⒋ Hyperlink: Include contents of hyperlinked documents.
⒋ Relations line: Include relation lines.
⒋ Image and object: Include images and objects linked by Excel.
⒋ Insert schedule chart at the end: Include schedule chart at the end of the document.
⒋ Insert resource chart at the end: Include resource table at the end of the document.
⒋ Email after completion: After conversion, automatically attach Word document in the email.
⒋ Insert table of contents: Table of contents will be created.
⒋ Insert map: Image of your map will be included in the document.
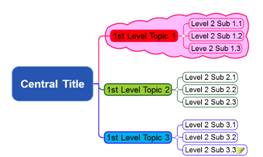 9. Click OK to convert
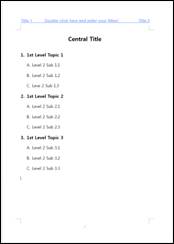
í How to Eexport Map to PowerPoint Slides
1. Open the map that you want to export.
2. File > Save As> Microsoft Office File> Export to Microsoft PowerPoint
3. Template file: Select the PPT template file (*.pot) if you wish to use your own. Otherwise, you can use our preinstalled PPT template.
4. File name: Choose the folder and filename for converted PPT file. Default folder is the folder where your map is currently stored.
5. Check if you want to launch Microsoft PowerPoint upon completion.
6. Style tab: Predefined template styles can be viewed.
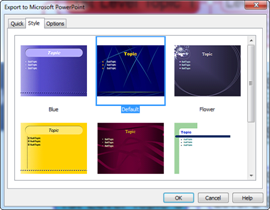
7. Options tab: Select options.
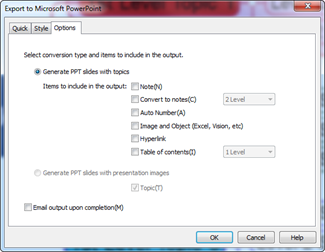
a. Generate PPT slides with topics: Topics are converted into PPT slides.
b. Generate PPT slides with presentation images: 1st level topics are made into images and attached to PPT slides.
c. E-Mail output upon completion: After conversion, automatically attach PowerPoint file in the email.
8. Click OK to convert.
í How to Export Map to Microsoft Excel Spreadsheet
1. Open the map that you want to export.
2. File > Save As> Microsoft Office File> > Export to Microsoft Excel
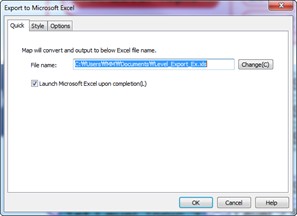
3. Click Change to choose the folder and filename of your output Excel file.
Default folder is the folder where your map is currently stored.
4. Style tab: Select topic arrangement
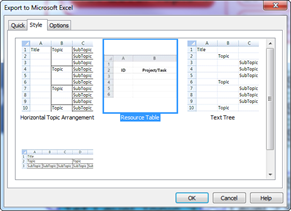
⒋ Horizontal topic arrangement: Topics are arranged from left to right (title, level 1, level 2, level 3).
⒋ Vertical topic arrangement: Topics are arranged from top to bottom (title, level 1, level 2, level 3).
⒋ Text Tree: Topic are arranged in tree format.
⒋ Resource table: Check box if you want to include resource table to output.
5. Options: Items to be included in output result.
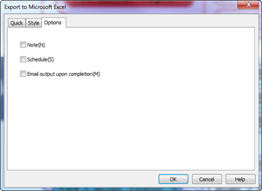
NOTE:
Memo is created for each topic converted into Excel.
⒋ Schedule: Memo is created for each topic converted into Excel so that schedule contents can be displayed.
⒋ Check "Email output upon completion” if you want to send the converted file as an email attachment.
6. Click OK to convert
NOTE:
⒋ Vertical Topic Arrangement

⒋ Horizontal Topic Arrangement
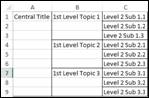
⒋ Text Tree
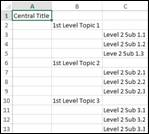
í How to Eexport Map to Microsoft Project
Please keep in mind that MindMapper is a mind mapping tool with some Project Management features. We do not compete with other professional Project Management software on the market. Therefore, if you feel some Project Management features you require are lacking in MindMapper, we recommend that you export your Mind Map to Microsoft Project. Then you can continue to manage your project using a professional Project Management package.
1. Open the map that you want to export
3. File > Save As> Microsoft Office File > Export to Microsoft Project
4. Export Wizard will appear
5. Choose your destination folder and filename for the output Project file.
6. Click Next.
7. Choose which items to include or exclude from your Project file.
8. Click Next.
9. Choose to launch Project after conversion. By checking Export E-mail, you can start your e-mail program and attach the converted Project file automatically.
10. Click Finish to convert.
í How to Export Topics with Schedule to Microsoft Outlook Tasks
1. Open the map that you want to export.
2. File > Save As> Microsoft Office File> Export to Microsoft Outlook Tasks
3. Open Outlook if it’s not already opened and go to Tasks.
4. You will see all the topics with schedule have been exported to Tasks in Outlook.
í How to Export Map to Microsoft OneNote
1. Open a map that you want to export.
2. File > Save As> Microsoft Office File> Export to Microsoft OneNote
4. OneNote will open and your map will be inserted into OneNote.
v Import from MS Office Documents (found in Open menu)
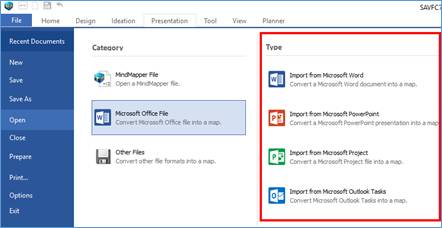
í How to Import a Word Document
1. File > Open > Microsoft Office File> Import from Microsoft Word
2. Select the Word document you want to import.
3. Next dialog is the Import Microsoft Word dialog box. This is the critical step of the Import Process. You must match the styles used in your Word document to each level of your mind map.
4. The right column shows all the styles used in your Word document. Click the text box next to Main Title, and then choose the title from the right column. When you find the corresponding style, double-click it, or just press the Arrow button in the middle of the dialog box. Usually Title will do.

5. Now click the text box next to Heading 1 Topic, and then locate the styles in use for Heading 1 topic in the right column. Most likely it will be Heading 1 or Level 1. Double click it or press the Arrow in the middle of the dialog.
6. You must repeat the above steps for all the styles you wish to import into MindMapper. If you're sure your Word document only goes 3 Headings deep (i.e. Heading 3), then you can stop after assigning Heading 3 to Heading 3 Topic box.
7. Click OK to import.
8. Save the newly created map.
NOTE:
The Word document you are converting must be using Word Styles. Best Word documents to import are documents in outline form using styles such as Heading1, Heading2, Heading3, etc.
í How to Import PowerPoint File
1. File > Save As > Microsoft Office File > Import from Microsoft PowerPoint
2. Before you complete the import process, you can choose to View the PowerPoint file by pressing the View button.
3. Click OK to import.
Note:
Your PowerPoint slides must be using the design styles feature in PowerPoint.
í How to Import Project File
1. File > Save As > Microsoft Office File> Import from Microsoft Project
2. Select a file you want to import and click Open.
3. Then click OK to confirm importing or you can click View to preview before you import.
í How to Import Microsoft Outlook Tasks to your map
1. File > Save As > Microsoft Office File> Import from Microsoft Outlook Tasks
2. Select range and group.
4. Click OK to import.
v Send Map as an Email Attachment
í Send as Map Attachment
This feature automatically starts your default email program and attaches your currently working MindMapper file for sending. Your colleague would require either the MindMapper program or a MindMapper Viewer to see the file.
1. Open the map.
2. Tool> Send> As Map Attachment

3. Default email program such as Outlook or Outlook Express will open with the map file attached.
4. Input email address, subject, a short message and send.
NOTE:
If you want to add more attachments, you can simply click on Attach File command from Outlook Message tab.
í Send as Image Attachment
Automatically starts your default email program and automatically attaches your current working MindMapper file as an image attachment. Your colleagues just need any picture viewer to see your mind map file.
1. Open the map.
2. Tool> Send> As Image Attachment
3. Default email program such as Outlook or Outlook Express will open with an image file attached.
4. Input email address, subject, and a short message and send.
í Send as Image Attachment (Selected Area)
Automatically starts your default email program and attaches your selected image of the map as an image attachment.
1. Open the map.
2. Tool> Send> As Image Attachment (Selected Area)
3. Drag your mouse to select an area you want to send as an attachment
4. Default email program such as Outlook or Outlook Express will open with the image file attached.
í Send as PDF Attachment
Start you’re your default Email program and automatically sends map file as PDF attachment.
1. Open the map.
2. Tool> Send> Send a PDF Attachment
3. Map will convert to PDF and automatically attached to a default email program such as Outlook or Outlook Express.
4. Input email address, subject, and a short message and send.
v Insert Map to Other Programs
You can insert MindMapper map to other programs in your computer. You copy and paste the map to other program or copy and paste other’s program’s object to your map.
í How to Insert Map to MS Word
1. Open the map.
2. Right-click on any blank space in the background.
3. Select Copy All.
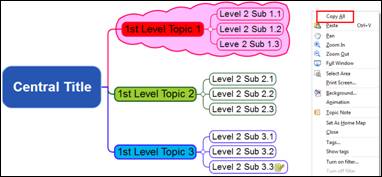
4. Go to MS Word document.
5. Home tab > Clipboard group> Paste dropdown menu> Paste Special

6. Select MindMapper Document Object.
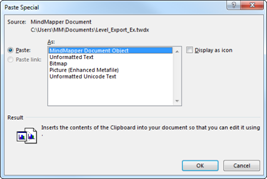
7. Click OK.
8. Map is inserted into Word document.
9. Repeat the same procedure for PowerPoint and Excel and other programs.
í Insert Map as Text
1. Repeat step 1 to 5 from above.
2. Select Unformatted Text.
3. Text of the map is inserted into Word document.
4. Repeat the same procedure for PowerPoint, Excel and other programs.
v Linking Information (Hyperlink)
Hyperlink is a wonderful feature. It makes your document come to life with links to exciting web pages, multimedia contents, pictures, spreadsheet and documents. With hyperlinking, your map is not confined to the present data set.
There are no limits to how many links can be created within a topic. However, you can only view up to 20 links from the map screen.
í Link to a File
n Hyperlink – How to link a file
1. Select the topic.
2. Home tab> Link> Hyperlink
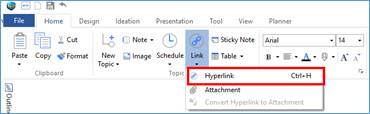
3. Or click Hyperlink on the right sidebar and click File.
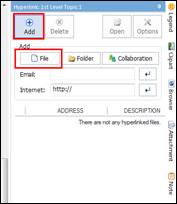
4. Browse and select the file to link and click Open.
5. Hyperlinked file will be shown on the list.

6. Hyperlinked topic will show this icon.
![]()
7. You can add multiple hyperlinks to the same topic.
í Link to a Folder
n Hyperlink – How to link a folder
1. Select the topic.
2. Home tab> Link > Hyperlink.
3. Or click Hyperlink on the right sidebar and click Folder.

4. Select a folder you want to link and click OK.
5. Linked folder will appear in the hyperlink pane with folder address and description.
í Link to Collaboration Meeting
n Hyperlink – How to hyperlink a collaboration meeting
1. Select the topic.
2. Home tab> Link > Hyperlink
3. Or click Hyperlink on the right sidebar and click Collaboration.
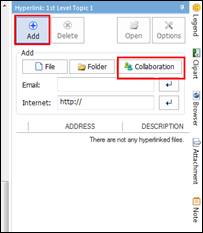
4. Login window will open to access collaboration files.
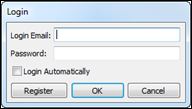
5. Select the file you want to link.
í Link to Website
n Hyperlink – How to link a webpage
1. Select the topic.
2. Home tab> Link > Hyperlink
3. Or click Hyperlink on right sidebar
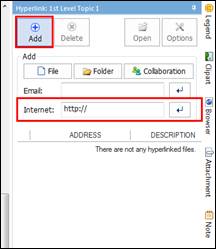
4. Enter or paste webpage address in the internet field.
5. Click the input arrow button to register the address or press Enter key.
í Link to Email Address
n Hyperlink – How to link an email address
1. Select the topic.
2. Home tab> Link > Hyperlink
3. Or click Hyperlink on right sidebar.
4. Enter email address.
5. Click the input arrow button to register the address or press Enter key.
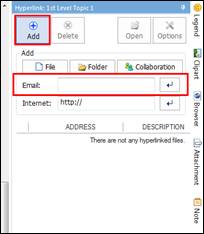
í Link Multiple Files
n How to drag and drop multiple files to hyperlink
1. Open Windows Explorer alongside MindMapper.
2. Select all the files you want to hyperlink from Windows Explorer.
3. Drag selected files from Windows Explorer to MindMapper topic.
4. You will see a hyperlink icon appear once hyperlink has been created.
n Hyperlinks Dialog Box
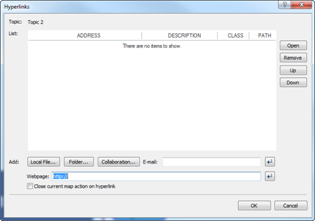
⒋ List: Lists the items you have selected to hyperlink.
⒋ Add: You can add more than one hyperlink item to a topic.
⒋ Close current map when opening hyperlink: This feature will open hyperlink file while closing the current map.
⒋ Open: Open hyperlinked file.
⒋ Remove: Removes hyperlink to file.
⒋ Up: Move up the hyperlink file from the list.
⒋ Down: Move down the hyperlink file from the list.
í Delete Hyperlink
n How to delete a hyperlink.
1. Select the topic with hyperlink.
2. Home tab> Edit group> Remove > Hyperlink
3. Or right click mouse > Remove Property> Hyperlink
4. All of the hyperlinks associated with the topic will be removed.
Note:
If you want to remove specific hyperlinks, then you have to use the hyperlink dialog box or the hyperlink pane and then select the link from the list and click Delete.
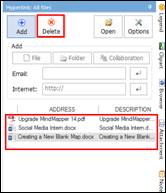
í Repairing Broken Hyperlinks
You can check the integrity of your hyperlinks by pressing Repair Broken Hyperlinks.
1. Home tab> Topic group> Link > Repair Hyperlink
2. If an error occurs, you'll see a dialog box where you can either remove the link or fix the path to restore the link.
3. If there are 2 or more broken links, Next button will become active so that you can click Next button till it becomes inactive.
4. Click OK button when done.
You can embed any documents, including video clips, to any topics in the map.
í Attachment
n Attach a file or files to a topic.
1. Select the topic.
2. Home > Link > Attachment
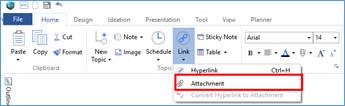
3. Or click Attachment tab on the right sidebar
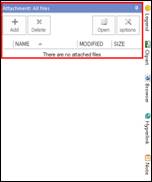
4. Browse and select files you want to attach.
5. Click Open to attach files

6. Topic with attachment will display clip icon.
![]()
í Deleting Attachment
1. Select the topic.
2. Click Attachment on the right sidebar.
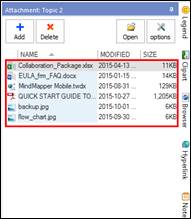
3. Or right-click mouse > Remove Property> Attachment
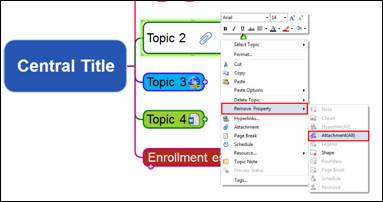
n What is the difference between hyperlink and attachment?
⒋ Attachment is attaching the file or embedding the file to the map file. So if the attachment file is big, then the map size will be big also.
⒋ Hyperlink uses the file’s location information so the size of the map file does not get big as the attachments.
⒋ Drawback of attachment is the size, but it is very useful when sending the map or opening the attached files without worrying where the files are located.
⒋ Hyperlink advantage over attachment is that the size will not get any bigger. However, if the location address of the files are altered or files moved/removed, then the link will be broken and you will have to reestablish them.
⒋ Collaboration will only allow hyperlink and not attachment since all files are uploaded to the server and links are made.
í Attachment Right Click Menu
Right click on the attachment file for menu options.
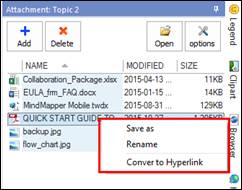
⒋ Save as: Save the attachment in different location.
⒋ Rename: Give a different file name.
⒋ Convert to Hyperlink: Convert attachment to hyperlink.
This feature allows you to capture a graphical representation of your folder structure in a specified folder or drive. Each file in the map is automatically hyperlinked to the actual file.
You can elect to increase the text font size if the folder size gets larger, or if the number of files in the folder is large. If the selected folder structure is too complex and it takes too long to create the map, you can press ESC to cancel the operation.
n How to create folder map
1. Tools >Structure group > Folder Map

2. Create Folder Structure dialog box will appear.
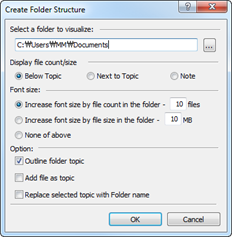
3. Select a folder to map in your computer.
4. Click OK to begin.
n Folder Map Menus
Display File Count/Size - Number of files and size of the files are displayed.
⒋ Below Topic – Displays count/size information below folder name.
⒋ Next to Topic – Displays count/size information next to folder name.
⒋ Note – Displays count/size information in note.
Font Size
⒋ Increase font size by file count in the folder – You can decide to increase font size depending upon number of files in the folder.
Options
⒋ Outline folder topic - Selected folder structures will be mapped out with hyperlinked files in each folder.
⒋ Add file as topic – Files in the folder will be added as subtopic under folder name.
⒋ Replaced selected topic with Folder name - When you create a folder map, the folder you have selected from your computer will be placed under a selected topic in the map. However, you can replace the selected topic with the name of the folder from your computer.
Note:
If you do not check “Add file as topic” then folder structure will be mapped out as subtopic of selected topic in the map. However, if you check “Add file as topic” then selected topic name will change to folder name while all of the files will be added as subtopics.
Generate a URL for your map so that others can immediately view your map on the web.

í How to Generate a Map URL.
1. Select the map.
2. Tool>Generate Web URL.
3. A window will appear confirming the generation of the URL. Click OK.
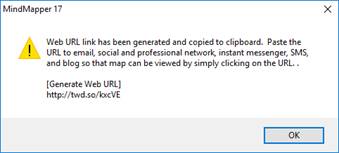
4. The URL address has been copied to clipboard.
5. Use Ctrl + v to paste the link and send it out to anyone who wants to view the map. Map is only available for 10 days, after which it will be deleted.
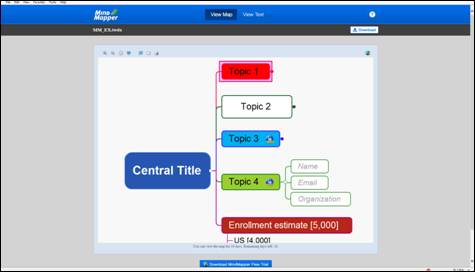
Use tags to categorize topics within your map.
í Define Tags
n How to define tags
1. Tool> Tags

2. Click Add
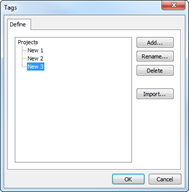
3. Enter category and tag name.
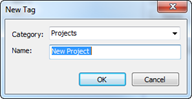
n How to make changes to tag
1. Tool> Tags
2. Select the tag you want to change.
3. Click Rename and enter new tag name.
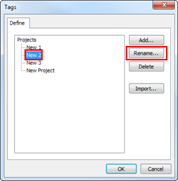
n How to delete tag
1. Tool> Tag
2. Select the tag to be deleted.
3. Click Delete.
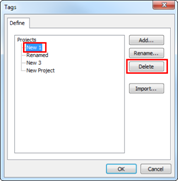
n Import tags from another map.
1. Tool> Tags
2. Click Import.
3. Browse, select the map, and click Open.
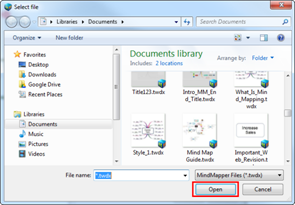
n How to Assign Tags
1. Select the topic.
2. Tool>Tag
3. Or right click on topic and select Tags
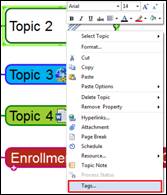
4. Select tag. You can select multiple tags also.
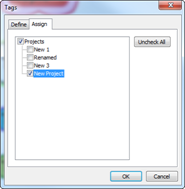
5. Topic will display with the new tag.
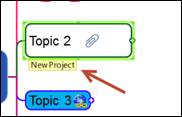
n Display tags
You can either show or hide tags from your map.
1. Tool>Tags downward arrow.
2. Click to check to display or uncheck to hide.

Extracting topics command extracts condition met topics to a new branch. However, filter command will display only the condition met topics while hiding the rest. So there is no structural change to the map with this command.
í How to Apply Filter
1. View> Filter

2. Set filter conditions.
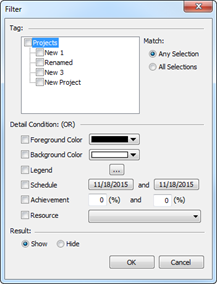
3. Click OK when done setting filter conditions. Filtered results will display on the map.

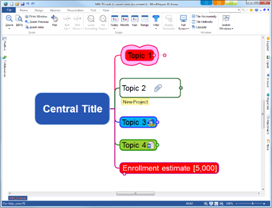
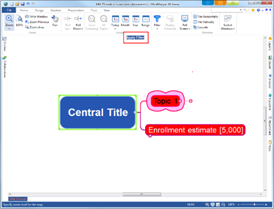
í How to Turn Off Filter
1. View> Filter downward arrow ″
2. Click Filter Off.
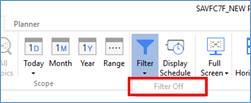
í Open Gantt Chart Window.
n How to open Gantt chart window.
1. View> Gantt Chart

2. Or press Ctrl+d on the keyboard and select Open Gantt Chart
í Add Schedule to Gantt Chart
n How to add schedule to Gantt chart
1. Select the topic or topics to insert schedule.
2. Right click mouse then select Schedule.
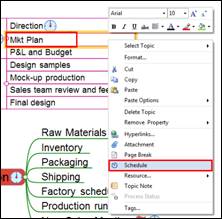
3. Schedule window will open. Set the start and end date. Start date will default to today’s date.
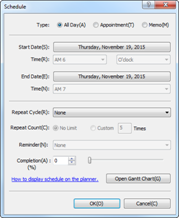
4. You can also point the cursor at the end of the schedule bar and drag it to change ending date.
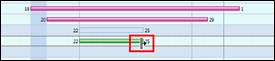
5. Point the cursor the schedule bar to move it.
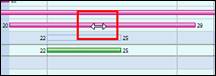
6. Schedule icon will appear on the topic.
![]()
í Changing the Topic From the Gantt Chart
Changes that have been made on the Gantt chart will be reflected on the map.
1. Double click the topic.
2. Make changes to topic.
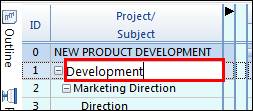
3. You will see that changes have been applied to the map.
í Split and Combine Schedule.
n Split Schedule
You can split the schedule or add additional schedules when the same event is repeating two or more times.
1. Place the mouse cursor on the schedule bar where you want to make the cut.
![]()
2. Right click mouse and select Split Task.
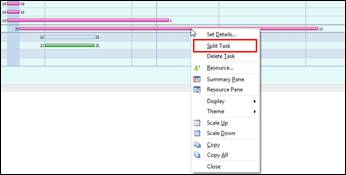
3. If you want to add another schedule bar, click on either the front or end of each bar and drag.
![]()
![]()
n Consolidating Schedule
You can consolidate multiple split schedule bars to just one schedule bar.
1. Select schedule bar and drag it to each other to consolidate
í Timescale Control
Set timescale so that you can view schedule window by hours, days, weeks, or months.
1. Right click mouse inside the schedule pane and select either Scale Up or Scale Down.
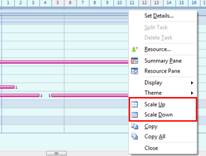
2. Or click up or down arrow button on the top right corner of schedule window.
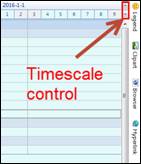
í Use Gantt Chart Menu to Set Timescale
This is another way to change timescale.
1. Click on the Gantt chart.
2. You should see the Gantt chart tab appear.

3. Click Gantt Chart tab to open the ribbon menu.
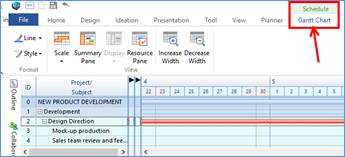
4. Select Time, Day, Week, Month, or Year.

í Gantt Chart Format
n How to change Gantt chart style.
1. Right click on the Gantt chart window.
2. Select Theme and pick a style.
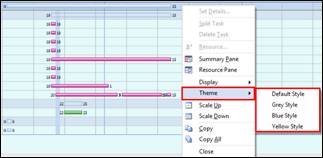
3. Default, gray, blue, and yellow themes are available.
n How to change Gantt chart line
1. Select the schedule bar.
![]()
2. Click Gantt Chart tab and select Line.
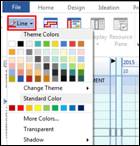
3. Color will change for that entire row even if there are multiple schedule bars.
![]()
í Gantt Chart Panes
n Summary Pane
You can view Gantt chart summary information.
1. View> Gantt Chart> click Gantt chart> click Gantt Chart tab

2. Summary Pane.

3. Or right click on schedule window and select Summary Pane.
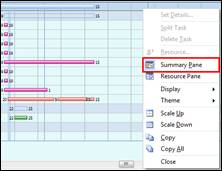
4. Summary pane will appear on the Gantt chart.
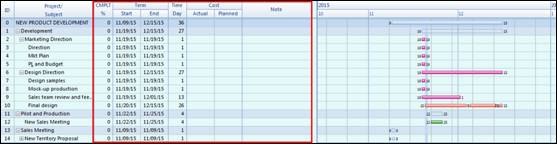
n Resource Pane
You can view Gantt chart resource information.
1. View> Gantt Chart> click Gantt chart> click Gantt Chart tab

2. Resource Pane.
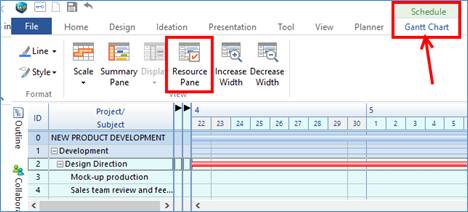
3. Or right click on schedule window and select Summary Pane.
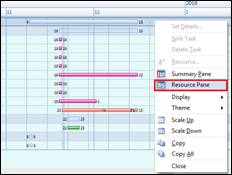
4. You will see resource pane open with resource information.
í Define Resource
Resources are anything that is required to complete a task and they also carry cost. Resources can be people, machinery, transportation, etc. You can define and assign resources for each task.
You must assign schedule to the topic before you can assign resource to it.
n How to define resource.
1. Right-click> Resource> Define
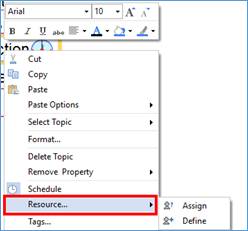
2. Click the [+] button from the Define Resource window to add resource.
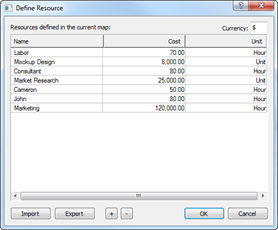
3. When you have finished defining resources, click OK to finish.
í Importing Resource File
You can import resource file you may already have.
1. Select the topic with schedule.
2. Right-click>Resource> Define
3. Click Import button.
4. Browse and select a CSV file.
5. Click Open and import CVS file contents.
6. If need be, use [+] or [-] button to add or delete items.
Note:
⒋ CSV (Comma Separated Value format) or ASCII text files are supported.
⒋ You can export defined resources to other applications. Simply click Export, and it will save the file in CSV format.
í Assigning Resources
Once resources are defined, they can be assigned to each task with a schedule.
1. Select the topic with schedule.
2. Right-click>Resource>Assign
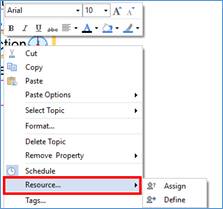
3. Select the resource name, and input Planned (Unit). Planned ($) total amount will show automatically.
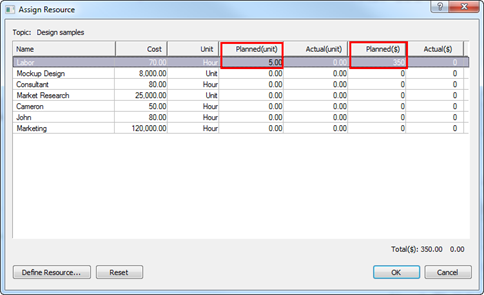
4. Click OK to finish.
5. Selected topic will show resource icon.
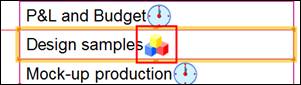
í View Resource Information From the Gantt Chart
1. Click the resource icon from the topic.
2. Or right-click on Gantt chart windows and select Summary Pane and Resource Pane.
3. Or Gantt Chart tab> Summary Pane and Resource Pane.
4. Click Display downward arrow and select options to display completion, term, time, and cost.
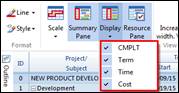
í How to Delete Resource
1. Select the topic with resource.
2. Home tab> Remove> Resource
3. Or right-click> Remove Property > Resource
í Printing Resource
1. File> Print
2. Select Resource.
3. OK to print.
4. You can select Preview before you print.
Brainstorming and Ideation Tool
MindMapper has a number of feature to support creative ideation and brainstorming sessions.
MindMapper facilitates radiant thinking’s most representative creativity technique brainstorming. The goal of brainstorming is to freely come up with a list of ideas spontaneously in a group for a specific problem or an issue. Conducting a brainstorming session with MindMapper is much more efficient and productive against using a whiteboard or giant paper to write down ideas and thoughts simply because with MindMapper, you can jot down keywords as it comes to you and reorganize with ease. As brainstorming session continues, ideas will be organized and categorized. You will be surprised to find that as this process happens, thoughts of each member will efficiently converge into one direction, thereby giving everyone involved positive attitude and confidence about work.
í Start a Brainstorming Session

1. Ideation > Start Session group> Brainstorming
2. Brainstorming window will appear.
3. Right window pane will also appear with brainstorming procedures.
í Brainstorming Mode Menus
n Timer
In most cases, brainstorming session has time limit. You can set time for brainstorming session. By default, timer counts down.
n Sticky Notes Palette
Just like using Post-It notes when brainstorming sessions, you can also use them in MindMapper when brainstorming.
1. Click on the map background.
2. Select a color from the sticky notes palette.
3. Sticky note will be placed on the spot you have clicked your mouse in the background.
4. Or you can hold down Shift key and click on the background to place a sticky note.
n Input fields
1. Input title of the brainstorming session by clicking on the “Subject.”
2. You can fill in categories under subject. You can add or delete categories as well.
n Inputting ideas on the Sticky Notes
You can double click on each of the 4 sticky notes to input ideas and comment. You can also change colors of the note.
n Grouping Sticky Notes
You can group notes together.
1. Select ideas you want to group together.
2. Hold down Shift key and click on the background to group selected notes.
3. Select a group and attached it to brainstorming map.
This approach is used to effectively train radiant association. Radiant association starts with a central topics and radiates out. This method leads users to think logically and creatively through its process of imagination, association, and combination.
í Start Radiant Association Session
1. Ideation > Start Session > Radiant Association
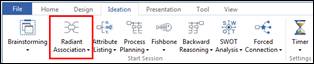
2. Radiant association template map window will appear.
3. Right window pane will also appear with radiation association procedures.
v Attribute Listing
Attribute listing technique was created by Robert Platt Crawford. The technique is based on the framework that it is easier to generate ideas when a problem is broken down into smaller units and that all matters or subjects of analysis have attributes. Typically, this method has been used utilized for product improvements and enhancements. Just like idea generation comes quite easily when following 5Ws and 1H when you are planning to write an essay, likewise attribute listing involves connecting the central subject to all of its attributes and going through each to find a clue for improvements and enhancements.
Start brainstorming by dividing attributes of the problem or subject matter to a noun, adjective, and verb. Noun attribute can include anything that can be seen by the eye or production method. Adjective attributes can include qualities and properties. Verb attribute refers to functional qualities. Let’s give an example of a bicycle. Noun would include wheels, pedals, handle, chain, body, brakes, seat, gear, reflector, and so on. Adjectives might include fast, dangerous, fun, convenient, metallic and so on. Verb or the functional qualities may include the following: carry humans and light load, easily slips in icy roads, can’t ride in the rain or snow, tires deflate easily and so on. After listing all of the attributes for each Bicycle attribute category, you can start creating new ideas. For example, you might think to try developing a new snow tire, just like a car, that won’t slip on the icy road. Attribute listing allows for associating free flowing ideas about a given subject matter. However, it is a divergent thinking technique as much as a forced association technique in that the starting point is making and connecting attributes and generating ideas from an attribute perspective only.
í Start Attribute Listing Session
1. Ideation > Start Session > Attribute Listing
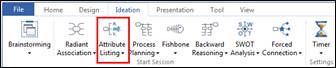
2. Attribute listing template map window will appear.
3. Right window pane will also appear with Attribute Listing procedures.
Process planning is thinking regarding process consisting of detailed items of a certain task in time-series framework. Items that make up the task can be structuralized and analyzed and processed in sequence or time.
You can use MindMapper to structuralize and analyze your tasks and thoughts in process tree format that already accomplishes solving 50% of the program or reaching your goal while others may have no definite plans of action.
í Start Process Planning Session
1. Ideation > Start Session > Process Planning
2. Process Planning template map window will appear.
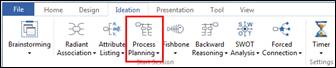
3. Right window pane will also appear with Process Planning procedures.
Fishbone diagram is one of the techniques used to determine the cause of and effect of the certain problem. It displays possible causes of a particular result in fishbone skeleton to find a solution. It is a systematic convergent thinking technique.
í Start Fishbone (Cause & Effect) Session
1. Ideation > Start Session > Fishbone (Cause & Effect)
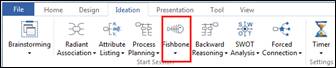
2. Cause & effect template map window will appear.
3. Right window pane will also appear with Cause & Effect procedures.
í Start Backward Thinking Session
1. Ideation > Start Session > Backward Thinking
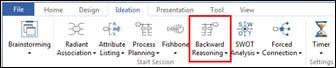
2. Backward thinking backward thinking template map window will appear.
3. Right window pane will also appear with backward thinking procedures.
í Start SWOT Analysis Session
1. Ideation > Start Session > SWOT Analysis
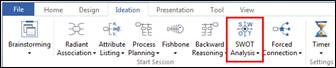
2. SWOT analysis template map window will appear.
3. Right window pane will also appear with SWOT analysis and procedures.
í Start Forced Connection Session
1. Ideation > Start Session > Forced Connection
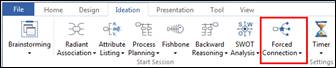
2. Forced connection template map window will appear.
3. Right window pane will also appear with forced connection procedures.
í Setting Timer
1. Ideation > Start Session group> Timer
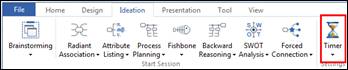
2. Select period of time.
3. Click [User Value] to input your own time period.
Use MindMapper collaboration to communicate with team members. This cloud based service which is only available in the Arena edition or the collaboration server package.
v How to Organize a Collaboration Session
MindMapper online collaboration allows multiple people in remotely or locally to hold a meeting, share and co-edit a map, and brainstorm together for solutions or new ideas. It is a very efficient way of communicating information with others. To use collaboration service, you must have an account from MindMapper.com website. You can either use the website portal or from the program to access collaboration menu. This guide will cover access from the program only.
í Create New Collaboration Session
1. Collaboration sidebar tab> New
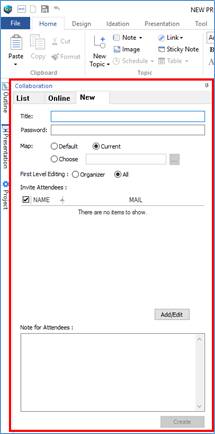
2. Collaboration window will appear.
n Name: Enter the name of the collaboration session.
n Password: Enter password for the meeting if needed.
n Collaboration Map: Upload the map you want to collaborate with others.
⒋ New Map – Create a blank default collaboration map
⒋ Current Map – Upload the currently open map
⒋ Browse – Search for the map from the computer or the cloud
n First Level Edit Permission: Permission right to create 1st level topics.
⒋ Organizer - Only organizer can create 1st level topics.
⒋ All - All participants can create 1st level topics.
n Description: Enter a brief description of the meeting.
n Attendees: Invite attendees by checking the box next to each name.
n Add: Use the Add button to add attendees to the attendee list.
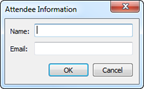
3. After filling out the fields, click Create. Email invites will be sent out as it creates the collaboration meeting map.
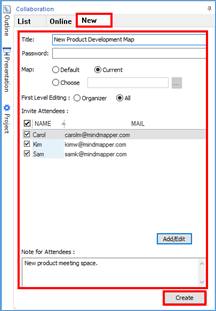
4. Alert message will warn if you want to start collaboration with invited attendees. Click OK to continue.
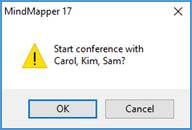
5. Collaboration meeting map will appear in the screen. You must click the start session button in the center of the map to start collaboration. Attendees in blue person icons are online and grey person icons are offline.
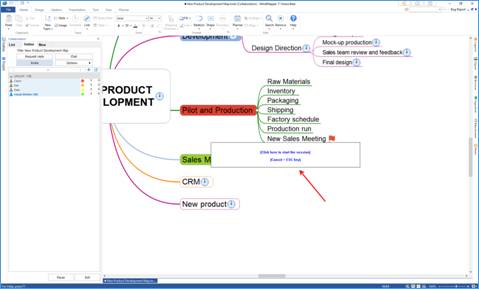
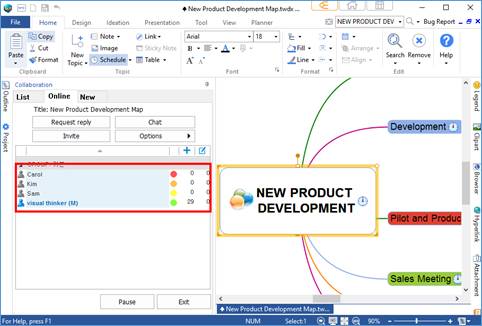
í Joining Collaboration as an Invitee
Invited attendee can join the meeting from email invite, from the program, or from the meeting link.
n How join from email invite
1. Click Join Collaboration from the email invite.
![]()
2. Collaboration map will start.
n How to join from MindMapper program.
1. Click Collaboration sidebar tab and click List. Select either My Collaboration or Invited Collaboration and select a meeting from the list. My Collaboration list shows meetings that you have created. Invited Collaboration list shows meeting that you have been invited to join.
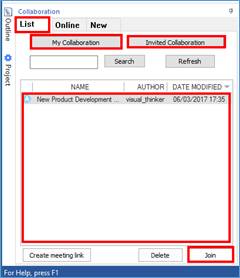
2. Double click the meeting or click Join.
n How to join from a link.
When a meeting link is sent to you, then all you have to do is click the link. Enter user named to be displayed during the session and you will soon be joining the collaboration meeting.
í Chatting
n How to chat (Public)
Chat will all attendees.
1. Click Chat
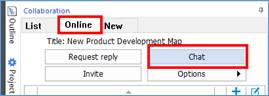
2. Input message and click send for all participants to see.
n How to chat (Private)
Chat with only one attendee.
1. Select a participant that you want to chat with privately.
2. Right click mouse button.
3. Select Chat.
4. Input message and click send.
5. Only the selected person can see your chat.
í Invite Attendee
Invite additional attendees in the middle of collaboration session.
1. Click Invite.
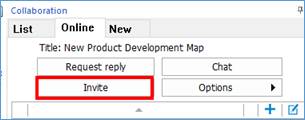
2. Select the person you want to invite and click OK.
í Options Menu
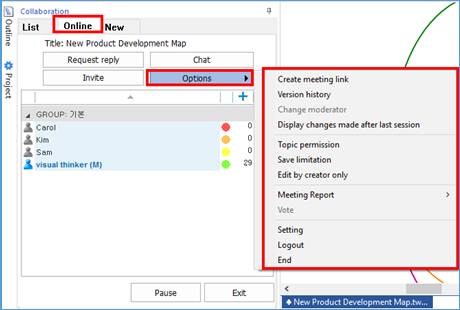
n Create Meeting Link
This creates a link to the collaboration session that you can paste to any communication medium such as email, messenger service, Facebook, Twitter and so on. When a person clicks on the link, they will be able to join the session.
n Version History
Version and Revision manager allows you to keep track of the collaboration map’s changes. You can create a snapshot version of a particular map, and then go back to that snapshot if you feel the meeting map is not progressing in the direction you are thinking.
⒋ View
View details of current version
1. Select a version from Version and Revision Manager list.
2. Snapshot of map version at that particular time will be shown.
3. You can always go back and review editing process.
⒋ Create Version
To create a snapshot of the current map, choose Create Version and enter a descriptive name.
1. Select a version from the Version and Revision Manager list.
2. Click Create Version and enter a descriptive details about the selected version.
3. Click OK to create.
4. If you select this version from the list, you will see that Remove Version button.
⒋ Rollback
Choose Rollback to go back to a previous Created Version. Map will automatically regress back to the saved point, and you can continue your session from that point forward.
1. Select a version from the Version and Revision Manager list
2. Click Rollback
3. “Rollback to the selected point?” message will appear.
4. Click Yes to rollback. Collaboration session will end, you will be reconnected to rolled back point.
n Change Moderator
Change the moderator. You must be the organizer to use this feature.
n Display Changes Made After Last Session
Topics with changes made after you logged out will show.
n Topic Permission
You can assign read/write permission to topic and its children.
n Save Limitation
With Save Limit, you can limit certain attendees from saving the file to their local computer.
n Edit by Creator Only
Topic creator is the only person who can edit the topic.
n Vote
Vote on issues or make quick decisions by online voting feature.
n Settings
Set collaboration settings.
í End Collaboration – Organizer
n How to end collaboration as an Organizer
1. Collaboration > Exit
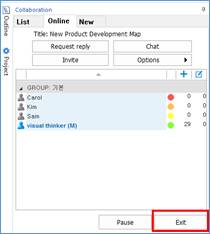
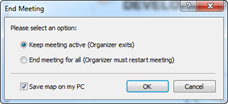
⒋ End meeting for all: Session ends for everyone.
⒋ Keep meeting active: Only the organizer exits the session and meeting is open.
⒋ Save my on my PC: Copy of the collaboration map is saved to local computer.
2. Select options.
3. Click OK.
í End Collaboration - Attendee
n How to end collaboration as an attendee.
1. Collaboration pane >Exit
2. Check if you want to save the collaboration map to your PC.
3. Click OK to end.