5 Appendix
5.1 MindMapper Screens
5.1.1 The MindMapper program screen
5.1.1 Screen Composition
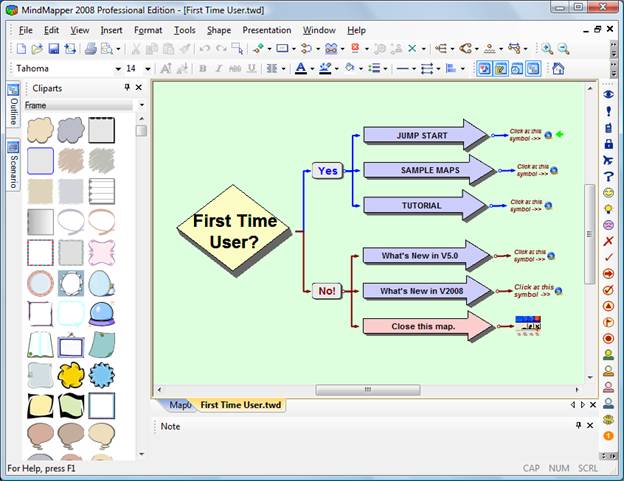
This is the 'drawing canvas’ where you create and view your Mind Maps.
You can display more than one Mind Map at a time. Each Map has its own tab. Click on a tab to view the Map you want.
Title bar
The title bar is at the top of most Windows programs. It tells you the name of the program, and the file name of the current Mind Map.
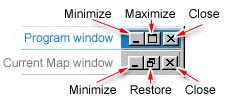
Window Control buttons
There are two main types of windows in MindMapper.
The Program window - This is the main MindMapper window that holds all of the other windows.
The Map windows - Each Map has its own window. Each of these types of windows has its own set of controls:
Minimize - Makes the window as small as possible, and places it at the bottom of the Map window area of the screen.
Maximize - Makes the window as large as possible, filling the Map window.
Restore - Resizes the window to a smaller size, so that it floats in the Map window area.
Close - Closes the window. If you have made changes since your last save, you will be prompted by a message to save the file before closing.
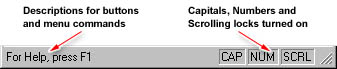
The Status Bar shows brief descriptions of
any button or menu command that you point at (with the mouse arrow pointer). It
also shows the keyboard’s Caps Lock status, number keypad (Num Lock), and
keyboard scrolling (Scroll Lock).
(see View the Status Bar)
5.1.2 Menus
MindMapper follows familiar and recognizable menus found in many popular Microsoft Windows programs. Following is a list of the MindMapper menus, with a brief description of each item:
|
File |
These commands relate to the creation and managing of MindMapper files. |
|
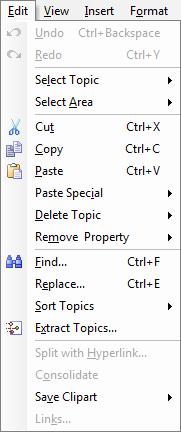
Edit |
A range of commands for making changes to Map topics. |
|
View |
Different ways you can look at your Maps. |
|
Insert |
A variety of items that can be inserted into Maps. |
|
Format |
Commands that assist in getting the look of your Mind Maps just right. |
|
Tools |
Spell checking and Auto numbering features, as well as ways to customize your tool set and set overall preferences for MindMapper. |
|
Shape |
A set of commands for arranging objects in your Maps. |
|
Presentation |
Making a slide show presentation from your map. |
|
Window |
Ways of arranging your Map windows, and a list of currently opened Maps. |
|
Help |
Access to all of the Help information, to assist you in getting the best out of MindMapper. |
5.1.2.1 File

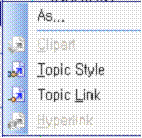
5.1.2.2 Edit
|
|
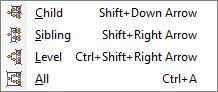
Select Topic
Child Select all child topics of the current topic Sibling Select all siblings of the current topic Level Select all topics of the same level in the entire map All Select all topics in the map Select Area
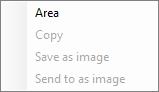
Area Select an area in the map Copy Copy the selected area in the map Save as Image Save the selected area as an image file Send to as Image Send the selected area as an email attachment
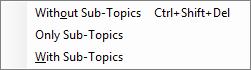
Delete Topic Without Sub-Topics Delete the selected topic only without deleting any of its sub-topics Only Sub-Topics Delete the sub-topics only and do not delete the selected topic With Sub-Topics Delete the selected topic and its subtopics Remove Property
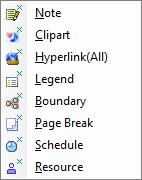
Note Removes associated notes Clipart Removes associated clip arts Hyperlink(All) Removes all associated hyperlinks Legend Remove all legend icons on the topic Boundary Remove the boundary around the topic Page Break Remove the Page Break in the topic Schedule Remove any schedule information Resource Remove any assigned resources Find... Sort Topics
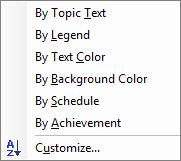
(See Sort Topics)
By Topic Text Sort the topics in alphabetical order By Legend Sort the topics by the order of the Legend icons By Text Color Sort the topics by the color of the text By Background Color Sort the topics by the background color By Schedule Sort the topics by the starting date of the scheduled tasks By Achievement Sort the topics by the achievement rate of the tasks Customize… Customize various sorting options Extract Topics Extract topics based on customized user conditions (see Extract Topics) Split with
Hyperlink… Consolidate Save Clipart
To File… Save the Clipart in the selected topic as an image file To Clipart Pane Save the Clipart in the selected topic to the Clipart pane Links...
|
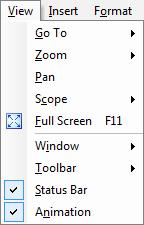
5.1.2.3 View
|
|
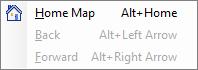
Go
To
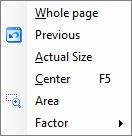
Home Map Load your Home map. (See Home Map) Back Go back to previous map Forward Go to next map Zoom
Pan This feature helps you quickly 'grab'
onto the Map and drag it in different directions, so that you can see where you
are going. Scope
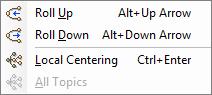
Roll Up Roll up (hide) the sub-topics (see How to Roll-up and Roll-down Levels) Roll Down Roll down (show) the sub topics (see How to Roll-up and Roll-down Levels) Local Centering Hide all other branches and work only on the selected topic. Good for working on a specific area of a complex ma All Topics Go back to showing all topics after applying Local Centering Hide all menus and buttons to use full screen space for mapping and presentation. Press ESC to return to normal mode. (see Using Full Screen Mode) Window
Show or hide various task windows on the MindMapper screen. (see Task Windows) Toolbar
Show or hide various toolbars on the MindMapper screen. (see Toolbars) Status Bar The Status Bar shows brief descriptions
of any button or menu command that you point at. Animation Check
this feature to turn on Clip-Art animation (if available). Not all Clip Arts contain
animation. Uncheck it to turn
this feature off. |
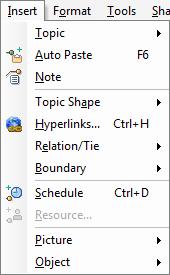
5.1.2.4 Insert
|
|
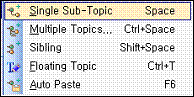
Topic
Inset a new
sibling topic Auto Paste Turns on Auto Paste Mode on, and automatically transfers your selected words and phrases directly from your electronic document into MindMapper. (see Auto Paste Mode) Auto Paste Turns on Auto Paste Mode on, and automatically transfers your selected words and phrases directly from your electronic document into MindMapper. (see Auto Paste Mode)
You can create descriptive text notes for the selected topic. (see Adding
Notes to Topics) Topic Shape
Create an outline shape around your topics to give them a distinguishing look.
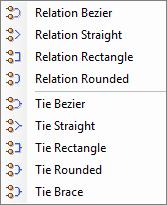
Relation/Tie
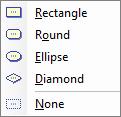
Lets you create a relationship line or tie between two or more selected topics. (see Using Relation/Tie) Boundary
This menu
lets you choose from a variety of topic boundary styles.
Insert scheduling information for selected map topic.
Assign Resources for your scheduled tasks. Picture
Lets you insert clips or image files to a map or a topic.
From
File... Object
As
Child... |
5.1.2.5 Format
|
|
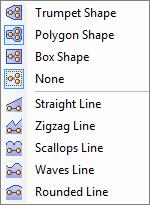
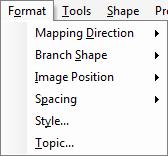
Mapping Direction This fly-out menu includes:
A range of
Map directions Branch Shape This fly-out menu includes:
A range of
Branch Shape styles Image Position This fly-out menu includes:
A range of
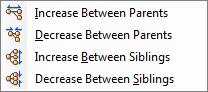
image positions within a topic frame. Spacing This fly-out menu includes:
Selection
of topic spacing choices. Style… Displayes the style options you can set for your
maps. Topic… Displays the
entire topic formatting choices, so you can change the look of topics and
their branches. (see Editing a Topic's Style) |

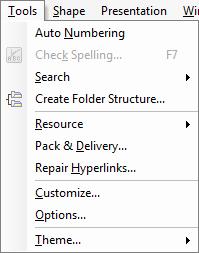
5.1.2.6 Tools
|
|
Auto Numbering (see Auto Numbering) Check
Spelling… Runs the
spell checker, so you can correct any spelling errors in your Map. Search
Internet Search the internet with your favorite search engine based on the selected topic Maps Search your current map or other maps based
on the selected topic Create
Folder Structure… Create a graphical representation of your
folder structure in your hard drive. Resource
Define You can define resources such as manpower, machine, and material within MindMapper, and assign resources to each topic (task). This feature is especially useful when planning a project factoring time and budget simultaneously. (see Setting Resources) Export Summary This allows
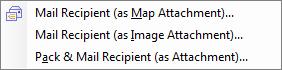
you to save summary of your current resources to a text file. Pack &
Delivery… You can save
your Mind Map with any hyperlinked files as a single file. Packed files have
a *.twds file name extension. This action is like Packing (see
previous entry), but will also open a new E-mail with the Packed file as an
attachment - ready to send to another user. Repair
Hyperlinks… Automatically detect corrupt hyperlinks so
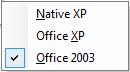
you can repair them quickly Customize Theme
Sets the UI Theme to one of the options |
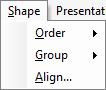
5.1.2.7 Shape
|
|
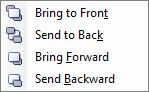
Order
Group
Align… |
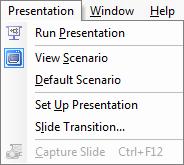
5.1.2.8 Presentation
|
|
Run Presentation View Scenario Set Up Presentation Slide Transition Capture Slide |
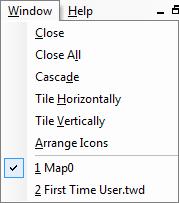
5.1.2.9 Window
|
|
Close Close All Cascade Tile Horizontally (see Tiled windows) Tile Vertically (see Tiled windows) Arrange Icons Currently Opened Files |
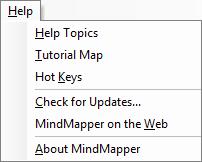
5.1.2.10 Help
|
|
Help
Topics Check Update About MindMapper |
5.1.3 Toolbars
MindMapper has a range of different toolbars. Each has a specific category of buttons, which relate to specific tasks that you can carry out (see Open Specialty Toolbars). You can also create your own User Defined Toolbars.
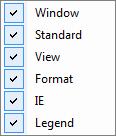
Toolbars
include:
Windows –
Show or hide various task windows
Standard - This toolbar contains general purpose tools and is displayed whenever MindMapper is run. These are the basic tools you need to create, open and save Map files. There are also some frequently used editing, formatting and viewing tools.
View – Contains icons to set various zooming options plus options to rolling up and down.
Format - Contains a group of tools for formatting (changing the look of) text.
PKM – Contains icons for Knowledge Management features of MindMapper.
Legend - This toolbar provides a range of legend icons that can be added to your Maps. These icons are little pictures that help identify different categories of topics in the Map.
5.1.3.1 Windows Toolbar
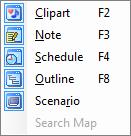
![]()
![]() Clipart
Clipart
Show the Clipart window
![]() Notes
Notes
Show the Notes window
![]() Schedule
Schedule
Show the Schedule window
![]() Outline
Outline
Show the Outline window
5.1.3.2 Standard Toolbar
![]()
![]() New
New
Creates a new Mind Map in the Mind Map window, ready for building. (see Starting
a New Mind Map)
![]() Open
Open
Opens an existing Mind Map. (see Opening Mind Maps)
![]() Save
Save
Click on this button to save the current Map file. (see Saving Your Mind Map)
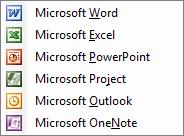
![]() Import/Export
Import/Export
Import your Microsoft Office documents into a map, or export your map to a
Microsoft Office document
![]() Print
Print
Print hard-copies of your Maps. (see Printing Your Mind Map)
![]() Preview
Preview
Print Preview is a handy way to check the look and layout of your printed Map.
(see Preview before Printing)
![]() Cut
Cut
Removes the selected object from your Map and holds it in the temporary memory
of the computer - ready to be pasted somewhere else. (see Cut, Copy and Paste)
![]() Copy
Copy
Copies the selected object from your Map into the temporary memory of your
computer - ready for pasting into another Map, or into another program. (see Cut,
Copy and Paste)
![]() Paste
Paste
Takes the contents of the computer's temporary memory and places it into the
current Map. (see Cut, Copy and Paste)
![]() Copy/Paste
Style
Copy/Paste
Style
Click on a topic with the style you want and select this button to copy - then
click on the topic that you're changing and click this button to apply the
copied style. (see Copy and Paste Style)
![]() Undo
Undo
Use Undo to go back to the last action you did. (see Undo and Redo)
![]() Redo
Redo
If you Undo an action, then realize you shouldn't have, use Redo to redo that
action. (see Undo and Redo)
![]() Selection
Tool
Selection
Tool
The standard arrow pointer, that you can use to select objects on the Map page.
(see Selecting Topics)
![]() Insert
Floating Topic
Insert
Floating Topic
Floating text (labels and annotations) can be added using this command. (see Floating
Text)
![]() Insert Topic
Insert Topic
Click on a topic, then use this command to insert a new (Child) topic under the
selected topic. (see Adding Topics)
![]() Insert Topic Shape
Insert Topic Shape
Select a border around your topic to add enhancd look
![]() Insert Relation/Tie
Insert Relation/Tie
Lets you create a relationship line or tie between two selected topics. (see Using
Relation Lines)
![]() Boundary
Boundary
Each topic topic is contained in a frame. You can fill the frame with color,
and place a border around the frame. (see Change Topic Boundaries and the Gallery
of Topic Boundaries)
![]() Image Position
Image Position
Select the position of the topic clipart
![]() Insert Schedule
Insert Schedule
Lets you insert schedule information for the topic
![]() Assign Resource
Assign Resource
Assign a resource for the selected topic.
Resources must be defined first.
![]() Remove Property
Remove Property
Remove one or more attributes associated with a topic
![]() Assign Resource
Assign Resource
Assign a resource for the selected topic.
Resources must be defined first.
![]() Remove Property
Remove Property
Remove one or more attributes associated with a topic
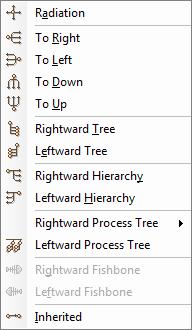
![]() Mapping Direction
Mapping Direction
This is the direction that topic topics branch out from the main topic. (see Change
Branch Direction and the Gallery of Branch Directions)
![]() Branch Shape
Branch Shape
Branches come in a variety of different shapes and colors. You can select the
shape and color that suits you. (see Change Branch Shape and Color and the Gallery
of Branch Shapes)
5.1.3.3 View Toolbar
![]() Zoom In
Zoom In
Zoom in to the map
![]() Zoom Out
Zoom Out
Zoom out of the map
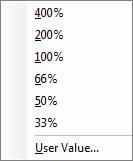
![]() Zoom Factor
Zoom Factor
Set your zoom level
![]() Zoom Area
Zoom Area
Select the zoom area
![]() View Whole Page
View Whole Page
View the maps without Menus and toolbars
![]() Zoom Previous
Zoom Previous
Go back to the previous zoom level
![]() Roll Down
Roll Down
(See Roll Up, above) When you want to see them again, you simply roll them down.
![]() Roll Up
Roll Up
To simplify your Mind Map, you can hide certain levels by 'rolling them up'. (see Roll-up and Roll-down Levels)
![]() Local Centering
Local Centering
Select a topic and hide all other topics except the selected topic and its Child topics. (see Centering and Local Centering)
![]() View All Topics
View All Topics
Displays the entire Map.
5.1.3.4 Format Toolbar
![]()
![]() Font Face
Font Face
There are many different fonts, each with its own name. Some are 'serif' fonts
(like Times New Roman); some are heading or 'sans serif' fonts (like Arial);
others are called 'script' or 'casual' fonts. Choose the font type you want from the
list.
![]() Font Size
Font Size
Font sizes are measured in 'points' (70 points = 1 inch/2.54 cm). The bigger the number, the larger the
text.
![]() Increase
Font Size
Increase
Font Size
Makes the font bigger in size with each click.
![]() Decrease Font Size
Decrease Font Size
Makes the font smaller in size with each click.
![]() Bold
Bold
Makes the selected text look Bold.
![]() Italics
Italics
Makes the selected text look Italics.
![]() Strikethrough
Strikethrough
Makes the selected text look ![]() .
.
![]() Underline
Underline
Makes the selected text look Underlined.
![]() Text Align
Text Align
Choose one of 4 text align options.
![]() Font
Color
Font
Color
Allows you to set the color for the selected text.
![]() Line
Color
Line
Color
Lets you to set the line color for the selected topic branch.
![]() Fill
Color
Fill
Color
Set the fill color for the selected text frame.
![]() Line Weight
Line Weight
Set the thickness of the selected
branch. See Change Branch Shape, Line Shape, and Color
![]() Change Line Pattern
Change Line Pattern
Set the line type of branches, boundaries, and topic shapes.
![]() Arrows
Arrows
Set arrows on relation lines and ties.
![]() Alignment
Alignment
Sets various alignment options on the selected topics
5.1.3.5 PKM Toolbar
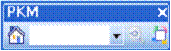
![]() View Home Map
View Home Map
Load your designated home map.
![]() Search Map
Search Map
Search the current map for entered string
![]() Knowledge Management
Knowledge Management
Perform various Knowledge Management features, such as Extract, Sort, etc.
5.1.3.6 Legend Toolbar
The
Legend icons are small pictures that can be inserted into topic topics. They provide a way of identifying topic
categories. (see Using Legends)

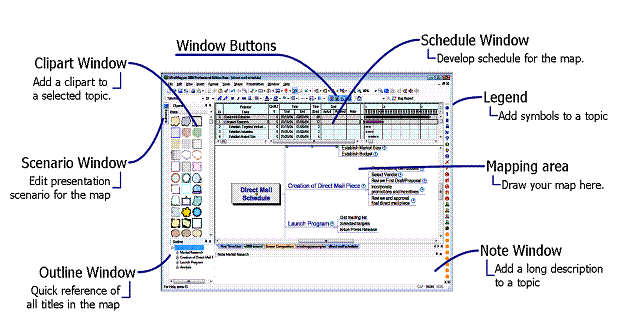
5.1.4 Task Windows
MindMapper also has a number of special
windows. Each helps you carry out specific tasks when building maps. (see Open
Task Windows)
They include:
![]() Clip Art - A collection of pictures that you can drag
and drop onto your Map.
Clip Art - A collection of pictures that you can drag
and drop onto your Map.
![]() Note - Handy notes can be added to any topic in your
Map to provide useful information later.
Note - Handy notes can be added to any topic in your
Map to provide useful information later.
![]() Schedule - Time frames with resource allocation can be
created for sections of your Map, to assist you in planning projects.
Schedule - Time frames with resource allocation can be
created for sections of your Map, to assist you in planning projects.
![]() Outline - This window provides a 'table of
contents'-style outline of the hierarchy and flow for topics in your Map.
Outline - This window provides a 'table of
contents'-style outline of the hierarchy and flow for topics in your Map.
Scenario - This window provides scenarios based on our presentation slides.
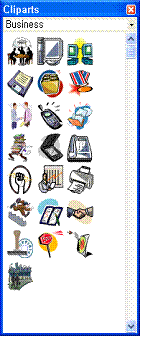
5.1.4.1 Clip Art Window
|
|
|||||||
|
This window has a number of categories of clip art. Clips are added to the Map by simply dragging them off the Clip Art window, and dropping them in the Map window. You can also add new clips to the User Defined categories. (see Using Clip Art)
|
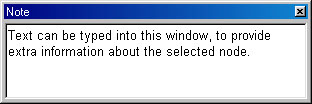
5.1.4.2 Note Window
|
|
|||||||||
|
You can add a descriptive text Note to any selected topic. Text notes are a great way to attach extra information to topics on a Map. You can add quick thoughts to lay the foundations for further development, or prompts as reminders at a later date. Notes can be created and viewed in this Notes window. When printing, text notes are included if you print the Outline text of the Map. (see Adding Notes)
|
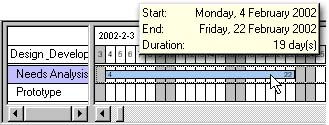
5.1.4.3 Schedule Window
|
|
|||||||||
|
Some of your Maps may be project-based, where there is a sequential flow across a time-frame. Schedules are made up of a number of activities. Each activity has a Start date and an End date. The time span between these two dates is called the 'Duration' for that activity. The Schedule window uses a Gantt chart to show each of the tasks, with its related date and % achieved details. (see Setting Schedules and Setting Resources)
|
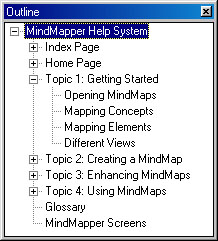
5.1.4.4 Outline Window
|
|
|||||||
|
The Outline window provides a 'table of contents' view of the hierarchy and flow of topics in your map. You can click on any topic in the 'tree' to focus on that topic (and its children). Click on the
|